15 Halloween Wall Decor Ideas to Wow Your Guests
Walls are the perfect canvas to bring Halloween spirit into your home. With the right decorations, you can turn blank spaces into spooky statement pieces that set the tone for the whole room.
From DIY wall art to hanging bats, eerie portraits, and festive garlands, the options are endless and budget-friendly. The trick is choosing pieces that create impact without overwhelming your space.
As a DIY décor expert, I’ve pulled together 15 Halloween wall décor ideas that are creative, stylish, and easy to try.
Stay with me—you’ll discover simple ways to transform your walls into haunting highlights that will impress guests and make your home feel truly festive.
Table of Contents
- Why Halloween Wall Decor Matters
- 15 Halloween Wall Decor Ideas
- Tips for Choosing the Right Decor
- Where to Source Materials
- Installation and Maintenance Tips
- Conclusion
Why Halloween Wall Decor Matters
Decorating your walls for Halloween is a game-changer. It sets the mood for the season, making your home feel festive and immersive.
A creepy spider web or a cheerful pumpkin collage can instantly transport you to a haunted forest or a cozy fall scene. Wall decor is versatile, too. It works in tiny apartments, sprawling houses, or even your office cubicle.
Plus, it’s a chance to show off your personality. Love all things gothic? Go for it. Prefer playful and whimsical? That’s perfect, too. Your walls are a blank slate to make Halloween your own.
15 Halloween Wall Decor Ideas
I’ve rounded up 15 ideas, grouped into four themes: Spooky & Creepy, Whimsical & Fun, Elegant & Gothic, and Kid-Friendly. Each idea comes with a description, materials, cost estimate, difficulty level, and tips to make it shine. Whether you’re a DIY newbie or a crafting pro, there’s something here for you. Let’s get started!
Spooky & Creepy
1. Glowing Ghost Silhouettes
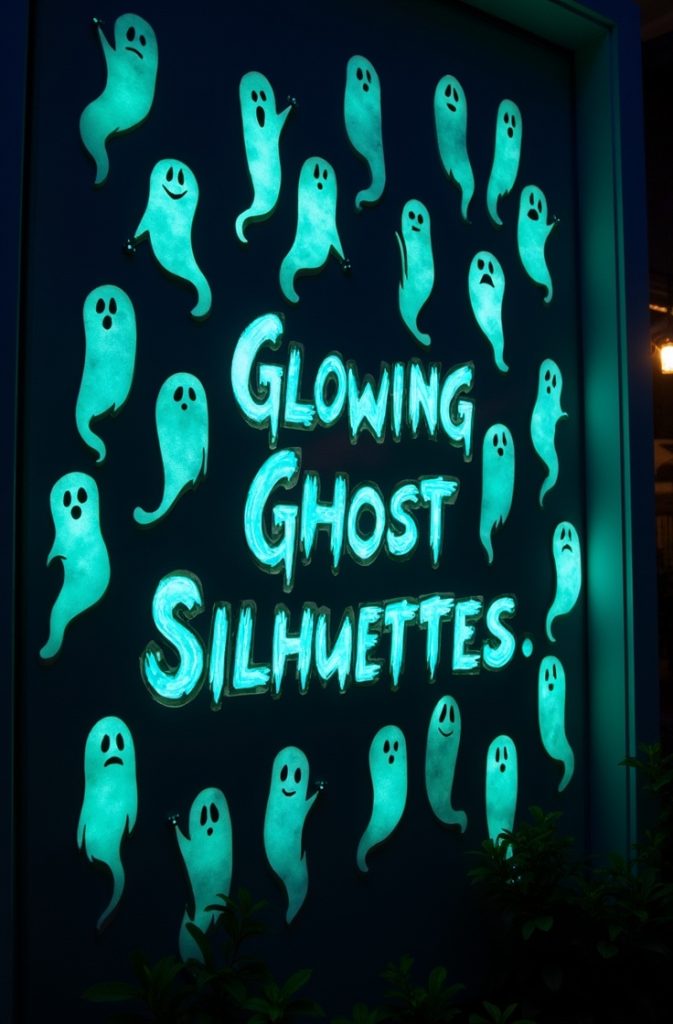
Want to give your guests a chill? Create glowing ghost silhouettes for your walls. These eerie shapes look amazing at night, thanks to glow-in-the-dark paint. They’re simple to make and perfect for setting a spooky vibe.
- Materials: Black poster board, glow-in-the-dark paint, ghost stencils, adhesive strips.
- Cost: About $10–15.
- Difficulty: Beginner.
- How to Do It: Grab some black poster board from a dollar store. Use ghost stencils (or freehand if you’re artsy) to draw ghostly shapes. Paint them with glow-in-the-dark paint. Once dry, cut them out and stick them to your wall with adhesive strips. For extra spookiness, place battery-powered LED lights behind the silhouettes.
- Tips: These work indoors or in covered outdoor areas like porches. Charge the paint with a flashlight before your party for a brighter glow. Your guests will love the haunting effect!
2. Bloody Handprint Wall Art
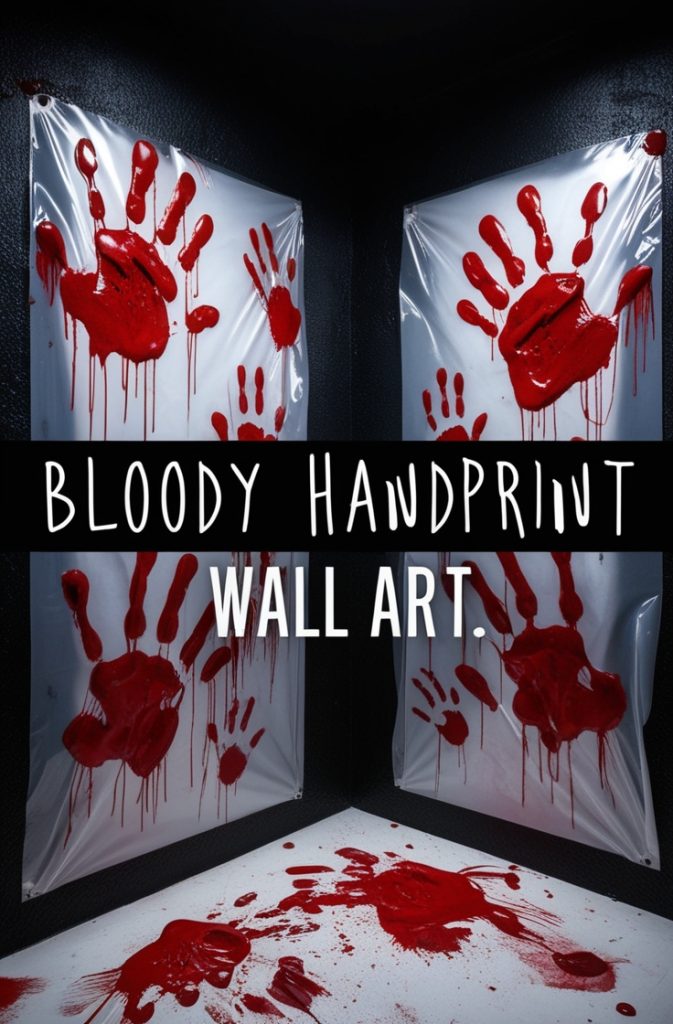
Nothing screams Halloween like a creepy crime scene. Bloody handprint wall art is a renter-friendly way to add a touch of horror. It’s quick, cheap, and oh-so-effective.
- Materials: Clear plastic sheets, red washable paint, double-sided tape.
- Cost: Around $5–10.
- Difficulty: Beginner.
- How to Do It: Buy clear plastic sheets from a craft store. Dip your hands in red washable paint and press them onto the sheets to make handprints. Smudge some prints for a dragged, eerie look. Let them dry, then hang the sheets with double-sided tape. Arrange them in a pattern, like someone tried to escape!
- Tips: Use washable paint to avoid stains. This decor is easy to remove, making it great for apartments. Pair it with dim lighting to dial up the scare factor.
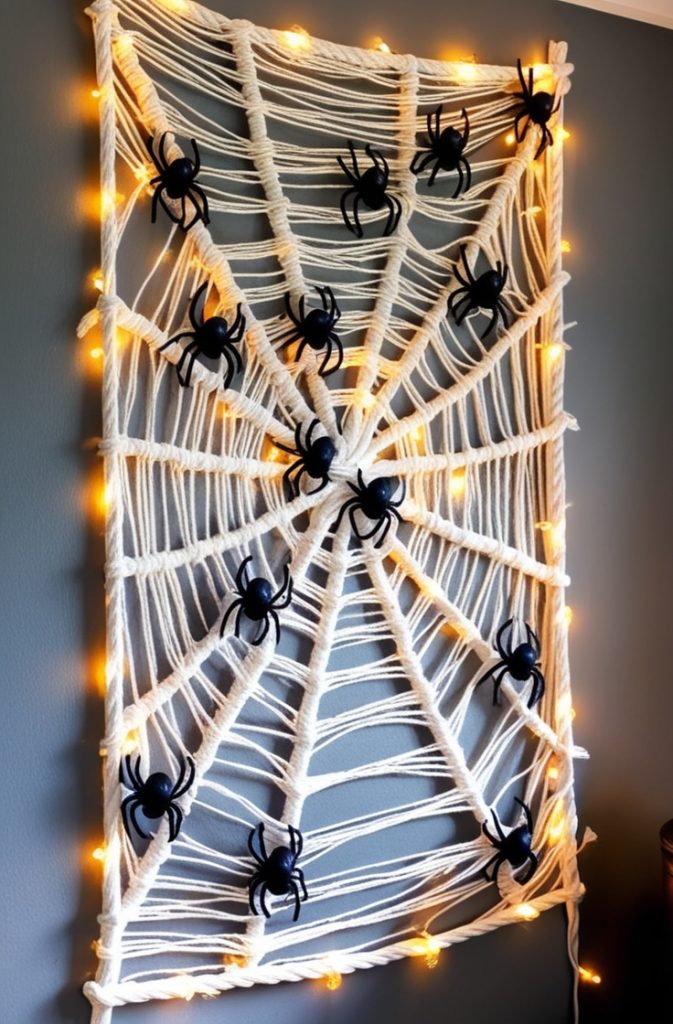
3. Spider Web Wall Installation

A giant spider web with creepy crawlers is a Halloween classic. This 3D wall installation adds depth and drama to any room. It’s a bit more involved but worth the effort.
- Materials: White yarn or cotton string, plastic spiders, pushpins or adhesive hooks.
- Cost: About $8–12.
- Difficulty: Intermediate.
- How to Do It: Start by pinning or hooking yarn to your wall in a star shape to form the web’s base. Weave more yarn in a spiral pattern to create the web. Glue or tie plastic spiders onto the yarn. Vary the web sizes for a dynamic look. For a glowing effect, weave in LED fairy lights.
- Tips: Use lightweight yarn to avoid wall damage. Add extra spiders for a creepier vibe. This works great in corners or over doorways.
4. Haunted Mirror Decals
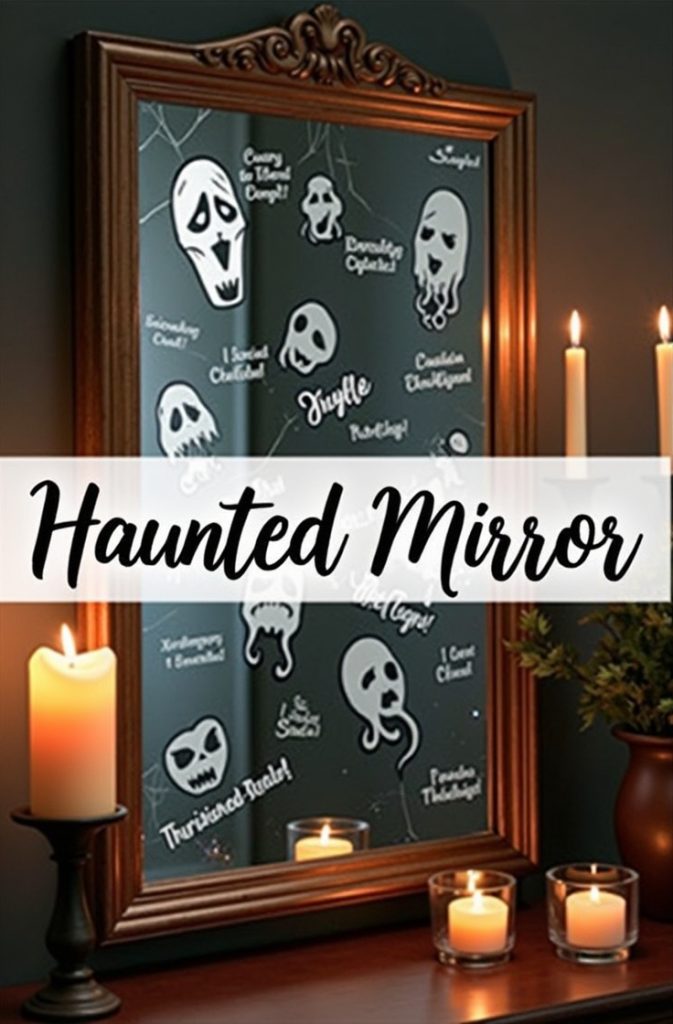
Turn a plain mirror into a haunted masterpiece. Vinyl decals of ghostly faces or cracked glass effects make your wall look like something out of a horror movie. It’s super easy and looks amazing.
- Materials: Vinyl decals (store-bought or custom-cut), a wall-mounted mirror (optional).
- Cost: Around $15–20.
- Difficulty: Beginner.
- How to Do It: Buy Halloween-themed vinyl decals online or from a craft store. Look for ghostly faces, cracked glass, or eerie phrases. Clean your mirror, then apply the decals following the instructions. If you don’t have a mirror, stick them directly on the wall for a similar effect.
- Tips: Use removable decals to keep your mirror safe. Dim the lights or add a flickering candle nearby to enhance the spooky mood. This is perfect for entryways or bathrooms.
Whimsical & Fun
5. Pumpkin Patch Wall Collage
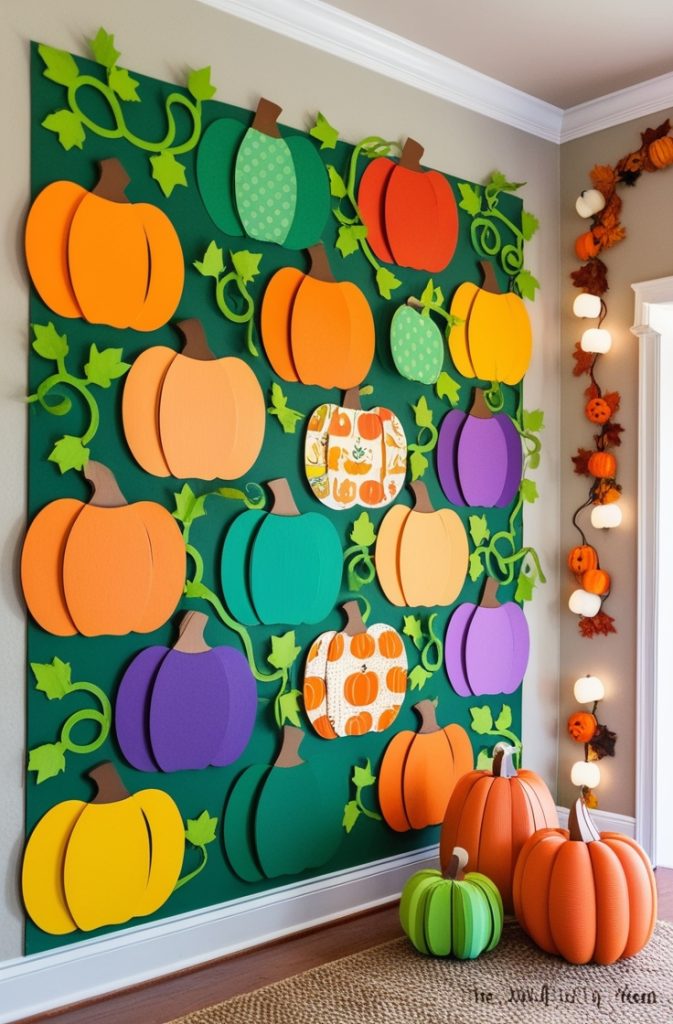
Bring the charm of a pumpkin patch to your walls. This colorful collage of paper pumpkins is cheerful and budget-friendly. It’s a great way to add a festive, fall vibe to any room.
- Materials: Colored cardstock (orange, white, green), scissors, adhesive dots.
- Cost: About $5–10.
- Difficulty: Beginner.
- How to Do It: Cut pumpkin shapes from cardstock in different sizes. Mix solid colors with patterns like polka dots or stripes. Use adhesive dots to arrange them on your wall in a patchwork style. Add green stems or vines for extra flair.
- Tips: Try metallic or glitter cardstock for a fun sparkle. This is perfect for kids’ rooms or living areas. You can reuse the pumpkins for fall decor after Halloween.
6. Witch Hat Wall Hangings
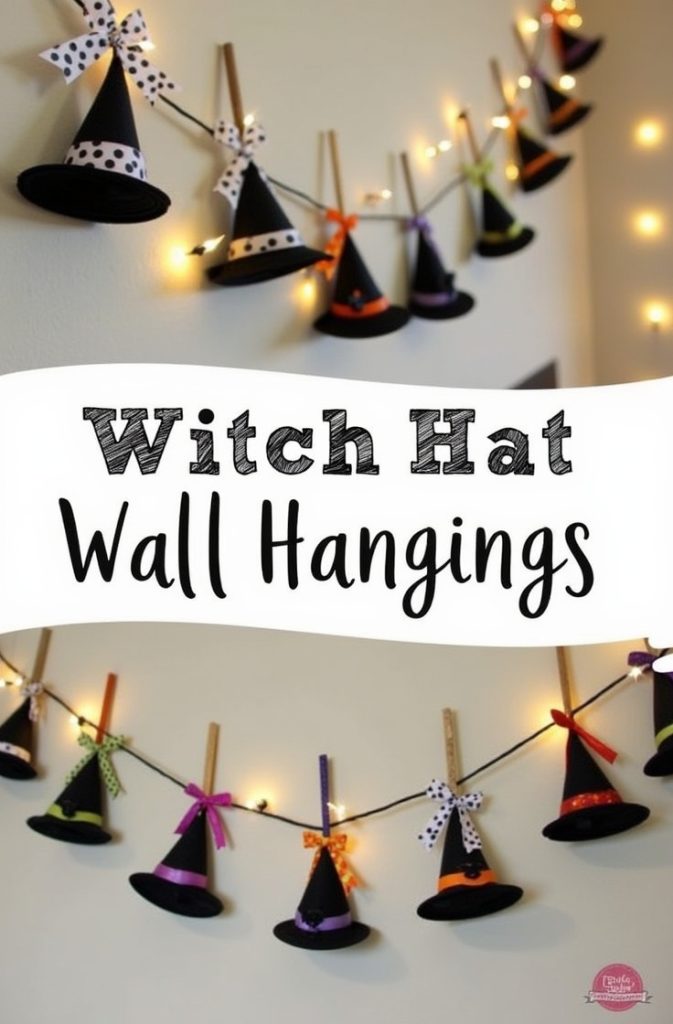
Witch hats aren’t just for wearing! Hang mini witch hats on your wall for a playful, magical display. This idea is quick, cute, and reusable year after year.
- Materials: Mini witch hats (store-bought or DIY with felt), ribbons, command hooks.
- Cost: Around $10–15.
- Difficulty: Beginner.
- How to Do It: Buy mini witch hats or make them from black felt. Tie colorful ribbons (orange, purple, or black) to the hats. Hang them with command hooks in a staggered pattern. Add paper stars or bats for extra charm.
- Tips: Alternate hat sizes and ribbon colors for a lively look. This works great above a fireplace or in a hallway. Store the hats flat to reuse next year.
7. Candy Corn Banner
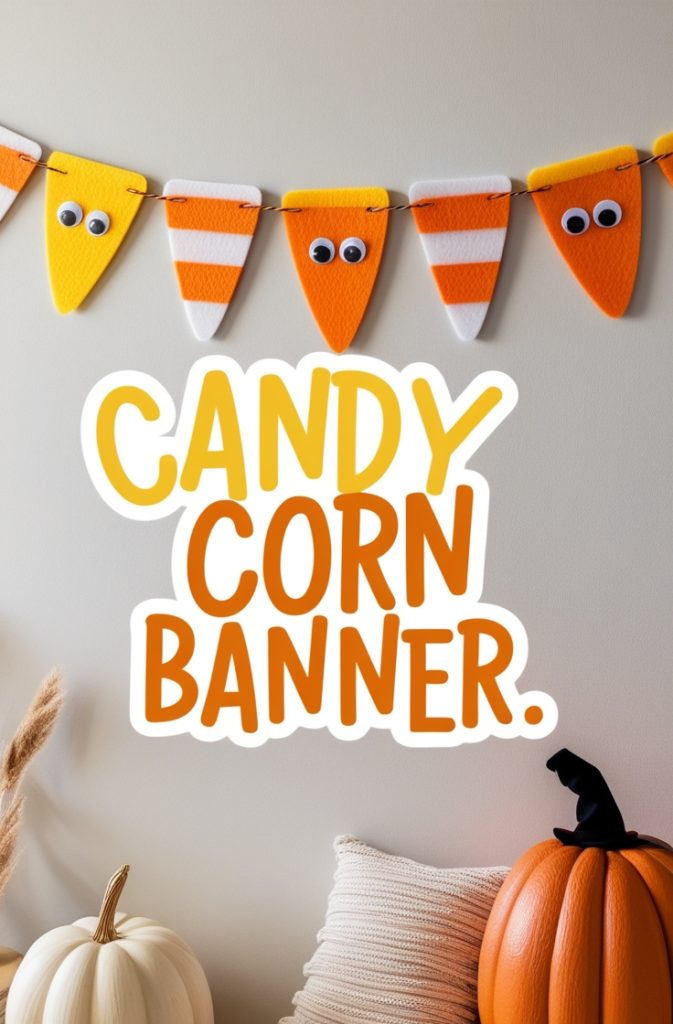
Who doesn’t love candy corn? This sweet banner made of felt or foam brings a pop of Halloween cheer to your walls. It’s simple and perfect for a cozy vibe.
- Materials: Felt or foam sheets (yellow, orange, white), string, glue.
- Cost: About $7–12.
- Difficulty: Beginner.
- How to Do It: Cut candy corn shapes from felt or foam: yellow at the bottom, orange in the middle, white at the top. Glue them together to form each piece. String them together with twine or ribbon. Hang the banner with command hooks or pushpins.
- Tips: Add googly eyes to some pieces for a silly twist. This looks great in kitchens or dining areas. It’s durable, so you can pack it away for next Halloween.
8. Boo-tiful Balloon Wall

Balloons aren’t just for parties! This “BOO” balloon wall is a fun, eye-catching way to celebrate Halloween. It’s quick to set up and perfect for a festive gathering.
- Materials: Black, orange, and white balloons, helium tank (optional), markers, adhesive strips.
- Cost: Around $15–20.
- Difficulty: Beginner.
- How to Do It: Inflate balloons with helium for a floating effect or stick them flat to the wall. Use a marker to draw “BOO” or spooky faces on the balloons. Arrange them in a cluster or spell out the word on your wall. Secure with adhesive strips if not using helium.
- Tips: Mix balloon sizes for variety. This is ideal for party backdrops or photo booths. Pop the balloons after Halloween to save space.
Elegant & Gothic
9. Vintage Halloween Portraits
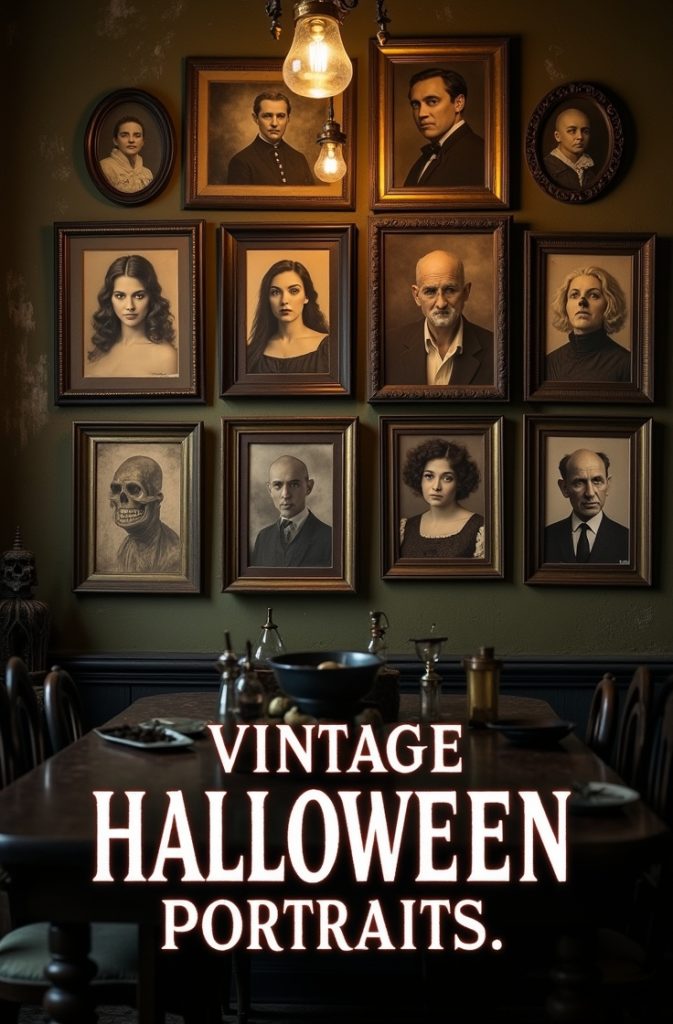
Turn thrift-store finds into creepy masterpieces. Vintage portraits with spooky tweaks add a gothic, mysterious vibe to your Halloween decor. They’re unique and full of character.
- Materials: Old frames, printed images or thrift-store portraits, paint or markers.
- Cost: Around $10–20.
- Difficulty: Intermediate.
- How to Do It: Find old portraits at thrift stores or print vintage-style images online. Use paint or markers to add fangs, eerie eyes, or ghostly glows. Frame them and hang in a gallery-style arrangement on your wall.
- Tips: Stick to sepia-toned images for an authentic look. This works great in dining rooms or entryways. Check frames for sturdiness before hanging.
10. Black Lace Wall Panels

For a touch of elegance, black lace wall panels are a gothic dream. They’re sophisticated yet spooky, perfect for a classy Halloween setup.
- Materials: Black lace fabric, canvas frames, staple gun or glue.
- Cost: Around $15–25.
- Difficulty: Intermediate.
- How to Do It: Buy small canvas frames from a craft store. Stretch black lace fabric over each frame and secure it with a staple gun or glue. Hang the panels in a grid or staggered pattern. For extra drama, place LED lights behind the lace.
- Tips: Choose lace with bold patterns for impact. This looks stunning in dining rooms or living areas. Store the panels flat to keep the lace intact.
11. Bat Silhouette Mural
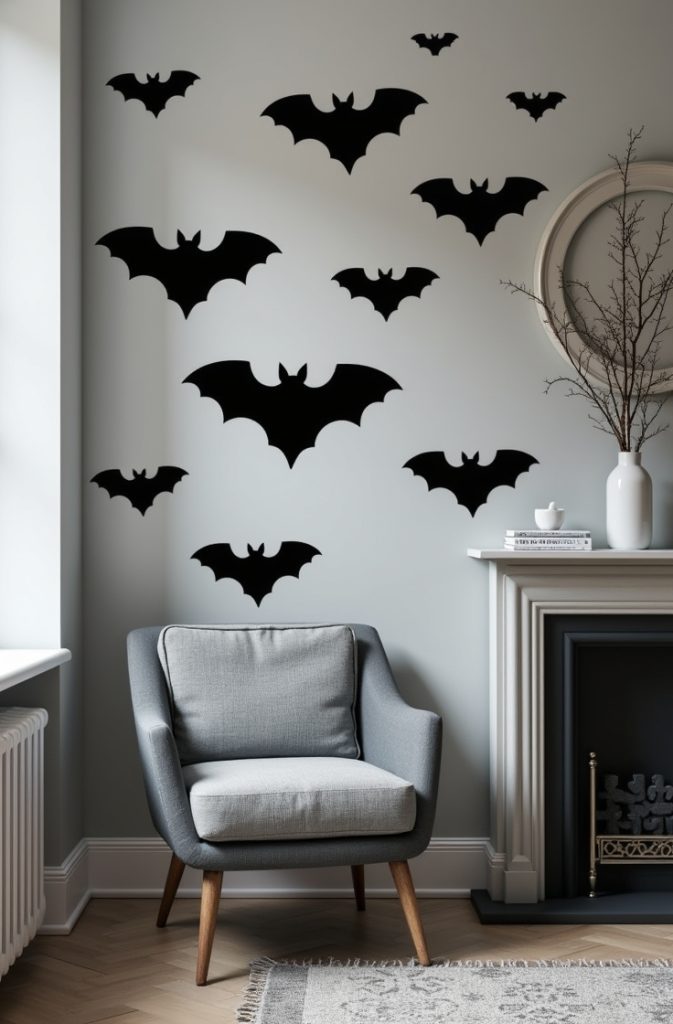
A flock of bats flying across your wall is sleek and stylish. This mural is simple to create and adds a modern, gothic touch to your Halloween decor.
- Materials: Black vinyl or paint, bat stencils, painter’s tape.
- Cost: Around $10–15.
- Difficulty: Beginner.
- How to Do It: Use bat stencils to cut shapes from black vinyl or paint them directly on the wall. Arrange the bats in a flying pattern, starting from one corner. Secure vinyl with adhesive or use painter’s tape for painted designs.
- Tips: Matte black keeps it subtle and chic. This works well on accent walls or hallways. Remove vinyl carefully to avoid wall damage.
12. Skull String Art
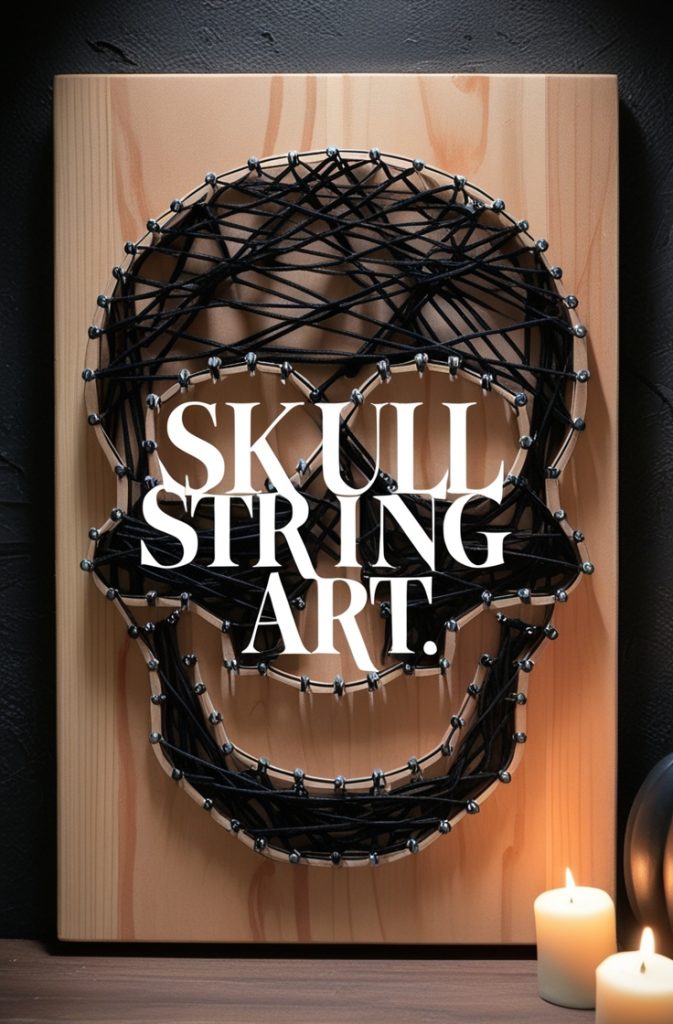
Skull string art is a handmade masterpiece that screams gothic charm. It’s a bit more advanced but makes a bold statement on your wall.
- Materials: Wood board, nails, black or white string, skull template.
- Cost: Around $15–20.
- Difficulty: Advanced.
- How to Do It: Find a skull template online and trace it onto a wood board. Hammer nails along the outline, about 1/4 inch apart. Tie string to one nail and weave it across the design to fill the skull shape. Hang the board with a sturdy hook.
- Tips: Paint the board black for contrast. This looks amazing in living rooms or entryways. Take your time with the string for a clean finish.
Kid-Friendly
13. Monster Face Wall Stickers

Kids love monsters, and these removable wall stickers let them get creative. They’re colorful, safe, and perfect for a fun Halloween project.
- Materials: Removable wall stickers, optional craft paper for custom shapes.
- Cost: Around $5–10.
- Difficulty: Beginner.
- How to Do It: Buy monster-themed wall stickers online or from a craft store. Let kids arrange them on the wall to create silly or spooky faces. If you want custom shapes, cut them from craft paper and stick with adhesive dots.
- Tips: This is a great activity for kids to design their own monsters. The stickers are reusable, so save them for next year. Perfect for bedrooms or playrooms.
14. Glow-in-the-Dark Stars and Bats
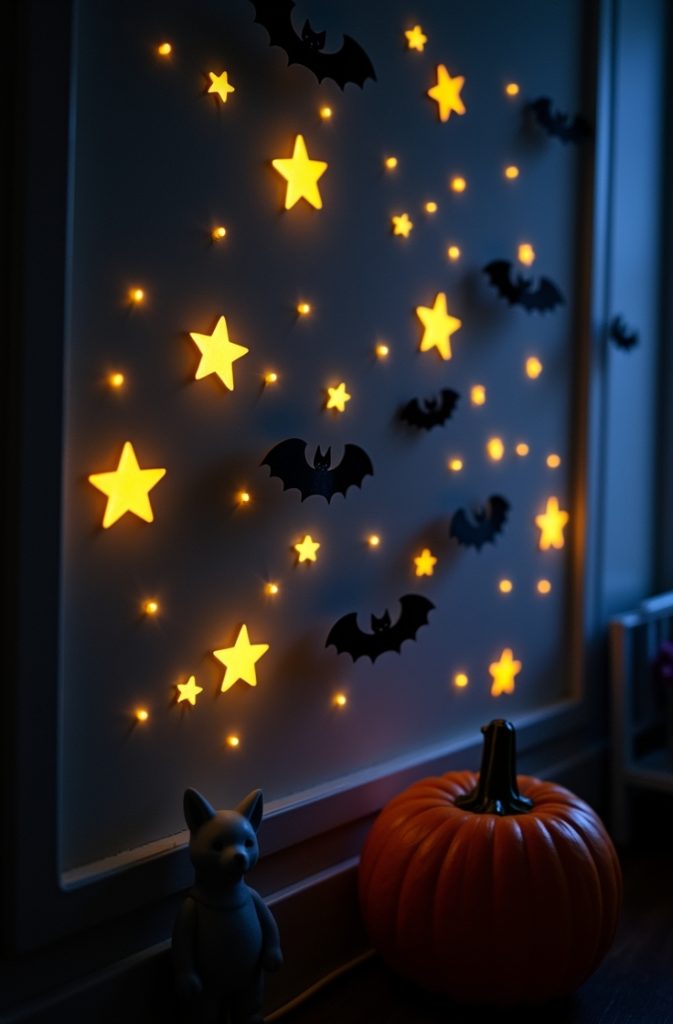
Create a magical Halloween night scene with glow-in-the-dark stars and bats. Kids will love watching their walls light up after dark.
- Materials: Glow-in-the-dark stickers, optional UV light for charging.
- Cost: Around $5–10.
- Difficulty: Beginner.
- How to Do It: Buy glow-in-the-dark star and bat stickers. Arrange them on the wall in patterns, like constellations or a bat swarm. Charge them with a flashlight or UV light before bedtime for a glowing effect.
- Tips: Mix sizes for a dynamic look. This is perfect for kids’ bedrooms or nurseries. Peel off carefully to reuse next Halloween.
15. Paper Bat Mobile
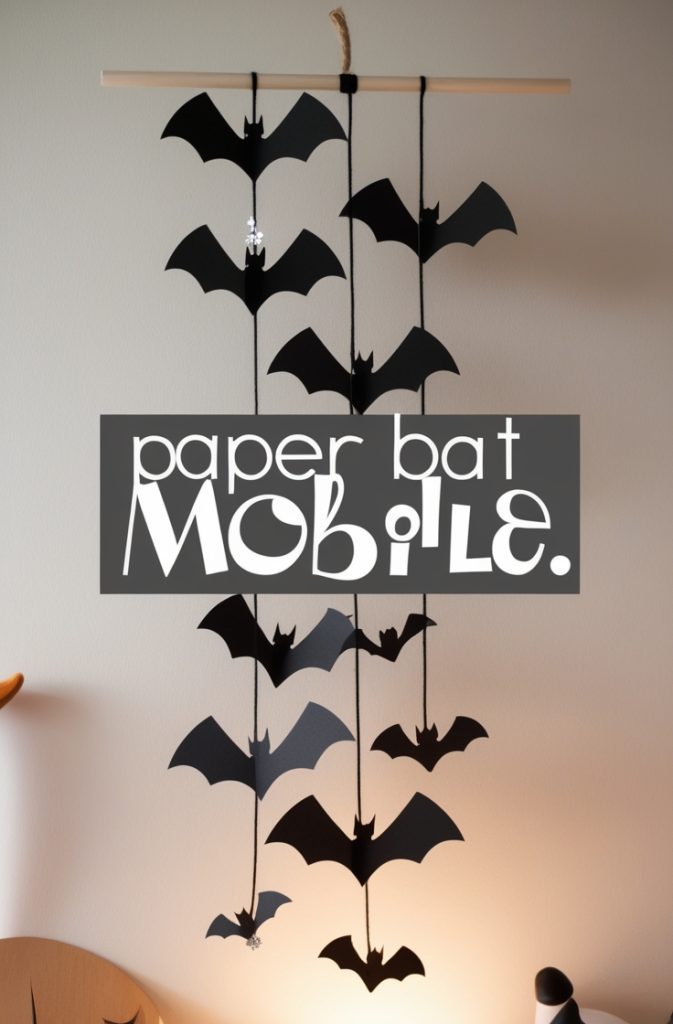
A paper bat mobile adds playful movement to your Halloween decor. It’s easy for kids to help make and looks adorable hanging on the wall.
- Materials: Black cardstock, string, small dowel or hanger.
- Cost: Around $5–10.
- Difficulty: Beginner.
- How to Do It: Cut bat shapes from black cardstock. Tie them to a dowel or hanger with string at varying lengths. Hang the mobile from a command hook on the wall or ceiling. Add glitter for a sparkly touch.
- Tips: Let kids decorate the bats with glitter or stickers. This is great for nurseries or playrooms. Store flat to keep the bats in shape.
Tips for Choosing the Right Decor
Picking the perfect Halloween wall decor is all about balance.
Start by measuring your wall space. A small apartment might need compact ideas like decals or banners, while a large living room can handle bigger projects like spider webs or portraits.
Set a budget and mix DIY projects with store-bought items to save money. Match the decor to your home’s style—pumpkin collages for cozy vibes, lace panels for elegant spaces.
If you have kids or pets, stick to non-toxic materials and renter-friendly adhesives like command strips. Safety first!
Where to Source Materials
You don’t need to break the bank for these projects. Check out Dollar Tree or Walmart for affordable supplies like cardstock, paint, and adhesive strips.
Thrift stores are goldmines for frames or vintage portraits. For unique items like vinyl decals or mini witch hats, browse Amazon, Etsy, or craft sites like Michaels.
Need stencils or templates? Search online for free printables—Pinterest is full of them. Always compare prices to get the best deal.
Installation and Maintenance Tips
Hanging your decor is easy with the right tools. Use command strips or adhesive hooks for renter-friendly setups.
Painter’s tape works great for painted designs or temporary displays. Pushpins are good for lightweight items like yarn or paper.
To keep your decor in top shape, store reusable items like decals or banners flat in a dry place. Wrap delicate pieces like lace or string art in tissue paper.
After Halloween, repurpose pumpkins or bats for fall decor—think Thanksgiving table displays or autumn wreaths.
Conclusion
There you have it—15 Halloween wall decor ideas to make your home festive and fun!
From creepy ghost silhouettes to playful pumpkin collages, there’s something for every style and skill level. I hope you’re inspired to try at least one of these projects.
Grab some supplies, get creative, and share your spooky creations with friends or on social media. Halloween is all about making memories, so let your walls tell a story this October. Happy decorating!

Emily Harper is a kitchen decor expert and interior designer with a passion for creating stylish, functional spaces. As a busy mom, she understands the importance of a kitchen that works for both family life and design. With 6 years of experience, Emily specializes in transforming kitchens into inviting, practical spaces. She’s known for her ability to blend trends with everyday needs, helping families create kitchens that feel like the heart of the home.