11 Creative Halloween Pumpkin Ideas
Halloween is my favorite time of year. The crisp air, spooky vibes, and glowing pumpkins make it magical.
I love carving and decorating pumpkins—it’s a fun way to get creative. Whether you’re a beginner or a seasoned crafter, I’ve got 11 Halloween pumpkin ideas that will inspire you.

These ideas suit all skill levels, budgets, and themes. From classic jack-o’-lanterns to glittery masterpieces, there’s something for everyone.
Let’s dive in and make your Halloween unforgettable!
Table of Contents
- Traditional Carved Pumpkins
- No-Carve Pumpkin Decorating
- Themed Pumpkin Designs
- Creative and Unique Pumpkins
- Kid-Friendly Pumpkin Ideas
- Practical Tips for Pumpkin Crafting
- Inspiration and Customization
- Conclusion
Traditional Carved Pumpkins
Carving pumpkins is a Halloween tradition I adore. It’s hands-on, a bit messy, and so rewarding.
These two ideas will get you started with classic carving fun.
Idea 1: Classic Jack-o’-lantern
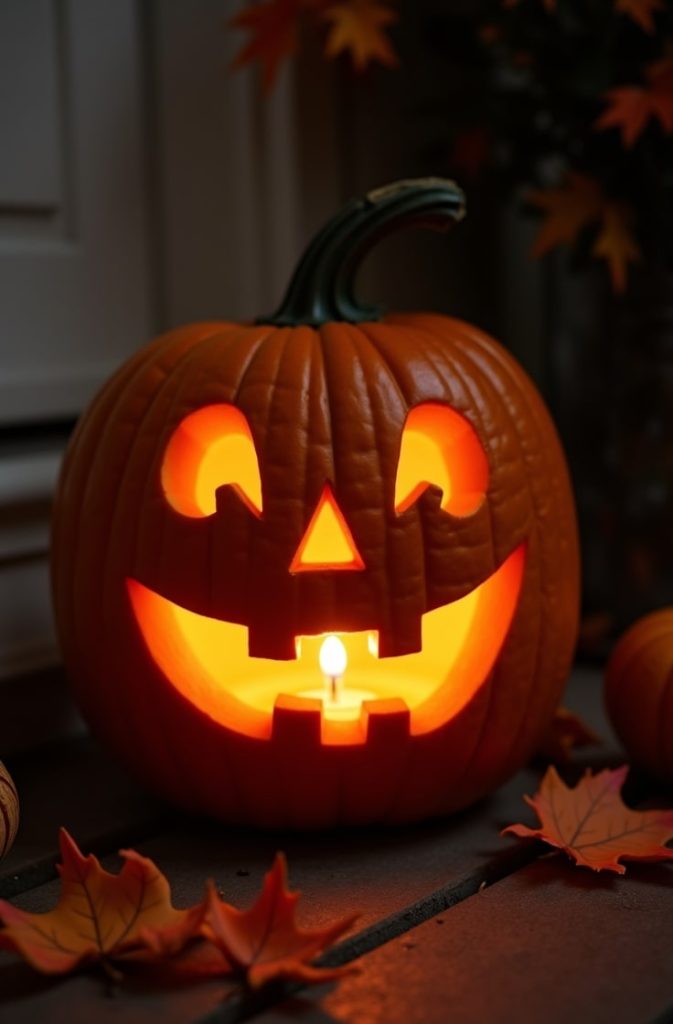
I can’t imagine Halloween without a grinning jack-o’-lantern. It’s simple, nostalgic, and perfect for families.
You’ll need a medium-sized pumpkin, a carving kit, and a candle or LED light. First, pick a smooth, firm pumpkin.
Cut off the top to create a lid. Scoop out the seeds and pulp.
I like to save the seeds for roasting—they’re a tasty snack! Sketch a face on the pumpkin with a marker.
Go for a spooky grin or a silly expression. Use a carving knife to cut out the eyes, nose, and mouth.
Smooth any rough edges with a small tool. Place a candle or LED light inside.
Light it up, and watch your jack-o’-lantern glow! This idea is great for beginners.
It’s easy, quick, and brings back childhood memories. Everyone loves a classic jack-o’-lantern on the porch.
Idea 2: Scary Monster Face
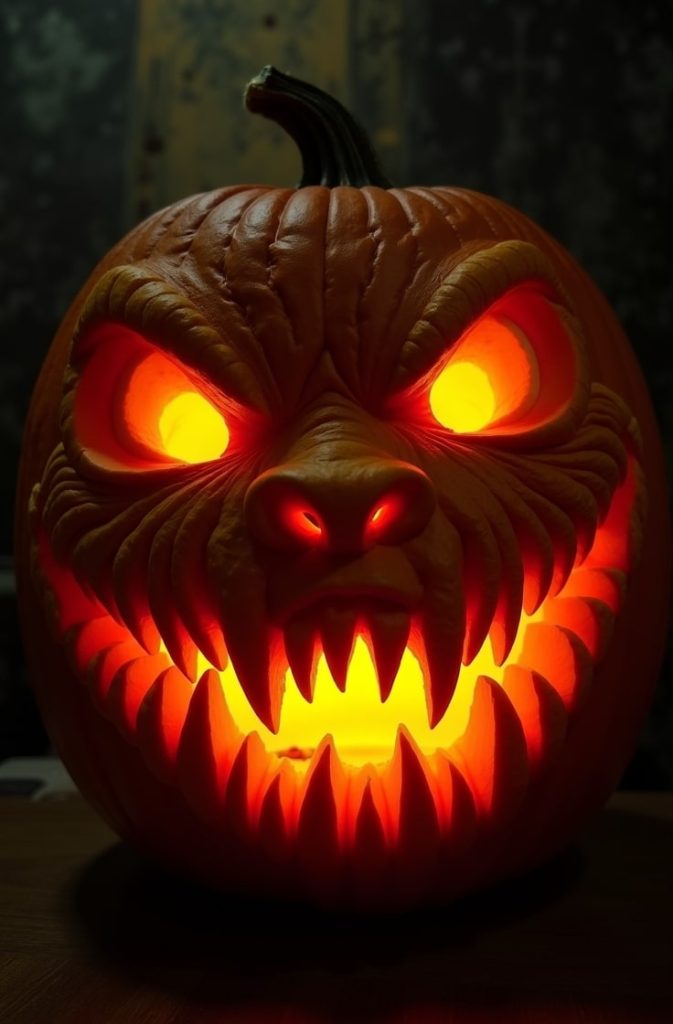
If you want something creepier, try a scary monster face. Think werewolves, zombies, or ghouls.
This one’s a bit trickier but worth it for horror fans. You’ll need a large pumpkin, precision carving tools, and a reference image.
I find monster sketches online for inspiration. Start by cleaning out the pumpkin.
Draw your monster face with a marker—sharp teeth and glowing eyes work great. Use small carving tools for details like scars or fur.
Take your time to get the expression right. I like to add depth by carving some areas deeper than others.
Pop an LED light inside to make the face pop. This design suits intermediate carvers who love a spooky challenge.
Your monster pumpkin will be the talk of the neighborhood!
No-Carve Pumpkin Decorating
Not everyone loves carving, and that’s okay! No-carve pumpkins are safe, fun, and just as festive.
These three ideas are perfect for kids or anyone who wants a mess-free project.
Idea 3: Painted Galaxy Pumpkin
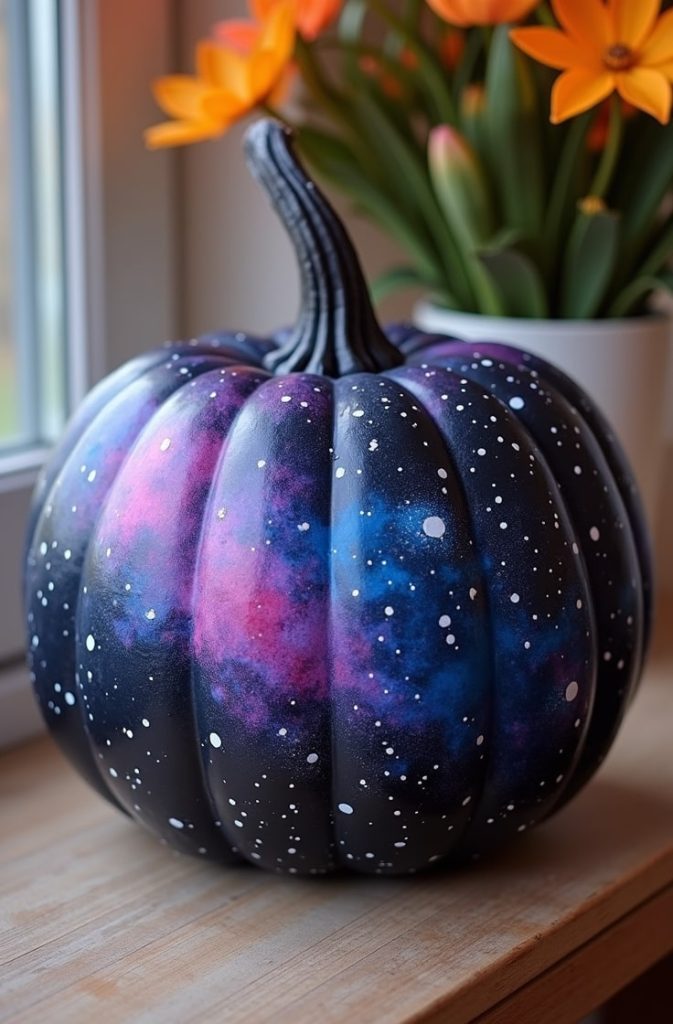
I’m obsessed with galaxy-themed crafts. A painted galaxy pumpkin is out-of-this-world fun.
You’ll need acrylic paints, brushes, and a sealant spray. Choose a smooth pumpkin.
Paint it with a dark base color like black or navy. Let it dry completely.
Then, swirl on purples, blues, and pinks to mimic a galaxy. I use a sponge brush for a soft, cloudy effect.
Add white dots for stars with a small brush. You can even splatter white paint for a starry look.
Seal it with a clear spray to protect your design. This idea is beginner-friendly and safe for kids.
It’s a vibrant, cosmic addition to your Halloween decor. Place it on a table for a stunning centerpiece.
Idea 4: Glitter Glam Pumpkin
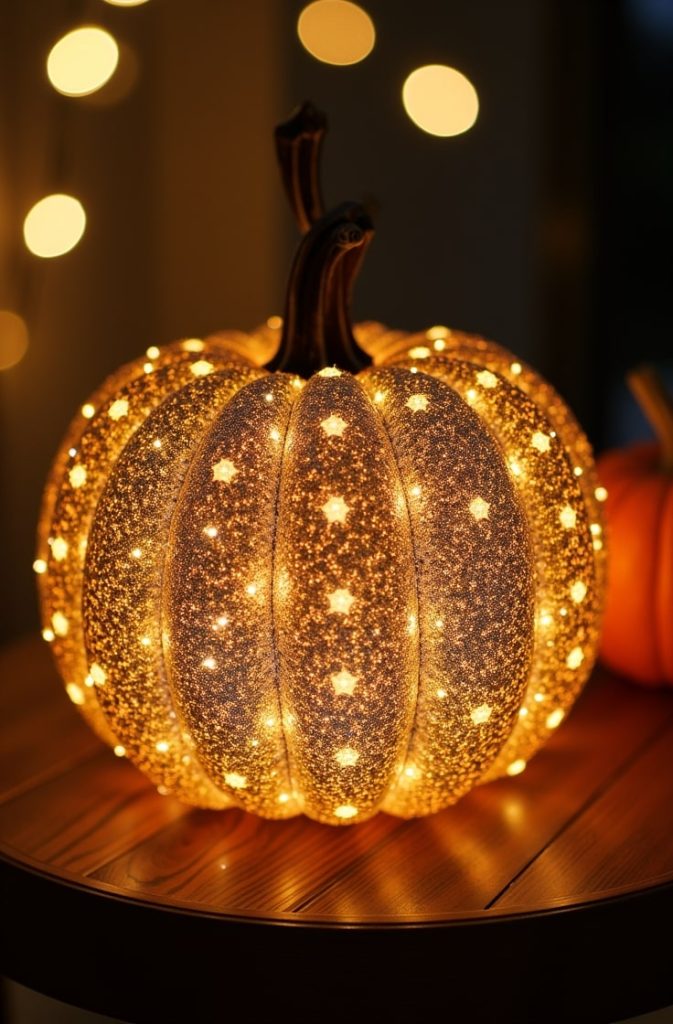
Who doesn’t love a little sparkle? A glitter glam pumpkin is eye-catching and super easy.
You’ll need glue, glitter, rhinestones, and optional stencils. Pick a pumpkin in any size.
Brush glue over the surface in sections. Sprinkle glitter generously—I love gold or silver for Halloween.
For extra flair, glue on rhinestones in patterns like stars or swirls. If you want clean lines, use stencils for shapes like bats or moons.
Shake off excess glitter and let it dry. Seal with a clear spray to keep the sparkle in place.
This project is quick and perfect for parties. It’s a dazzling, no-carve option that anyone can do.
Your glitter pumpkin will shine bright all season.
Idea 5: Chalkboard Pumpkin
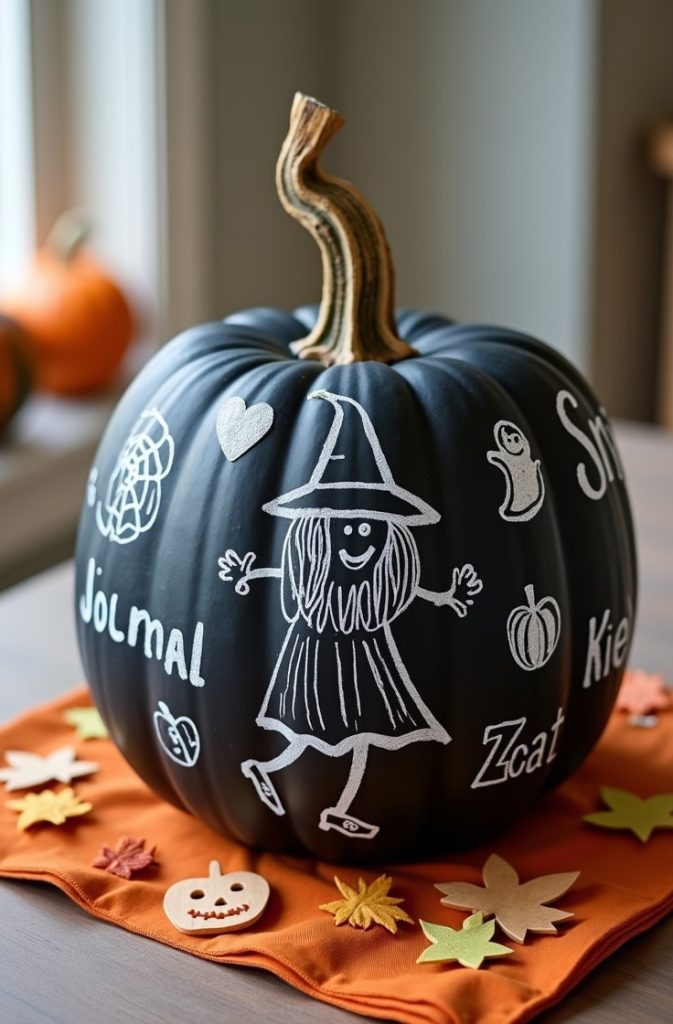
A chalkboard pumpkin is one of my favorite no-carve ideas. It’s reusable and lets you change designs whenever you want.
You’ll need chalkboard paint, chalk, and a primer. Start with a clean, dry pumpkin.
Apply a thin layer of primer to help the paint stick. Once it’s dry, brush on two coats of chalkboard paint.
Let it cure for 24 hours. Then, grab some chalk and draw!
I love sketching ghosts, witches, or funny phrases. You can erase and redraw as often as you like.
This idea is great for families—kids can doodle without making a mess. Place it on your porch or kitchen table for a fun, interactive decoration.
Themed Pumpkin Designs
Themed pumpkins add a special touch to Halloween. These two ideas let you tap into pop culture or spooky vibes for a unique look.
Idea 6: Pop Culture Character Pumpkin
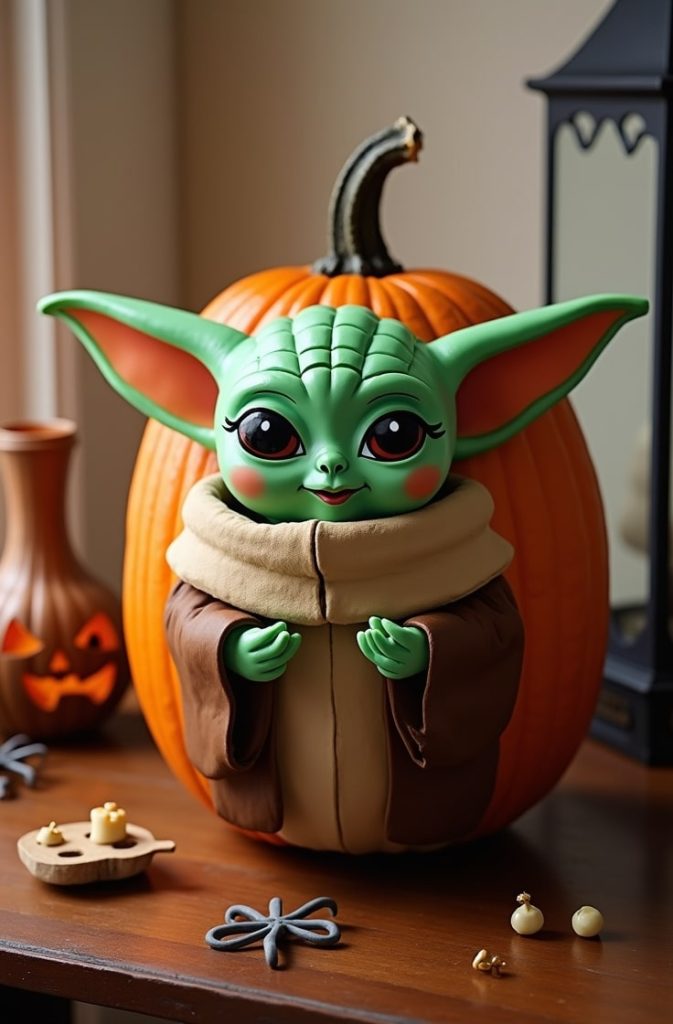
I love bringing my favorite characters to life with pumpkins. Think Baby Yoda, Harry Potter, or a superhero.
You can carve or paint this one. You’ll need a pumpkin, carving tools or paints, and a reference image.
For carving, trace the character’s face onto the pumpkin. Cut carefully to capture details like glasses or a helmet.
For painting, use acrylics to recreate the character’s colors. I painted a Baby Yoda pumpkin last year, and it was a hit!
Add props like a tiny scarf or hat for extra charm. This idea appeals to fans of all ages.
It’s a bit more involved, so it’s best for intermediate crafters. Your character pumpkin will steal the show at any Halloween gathering.
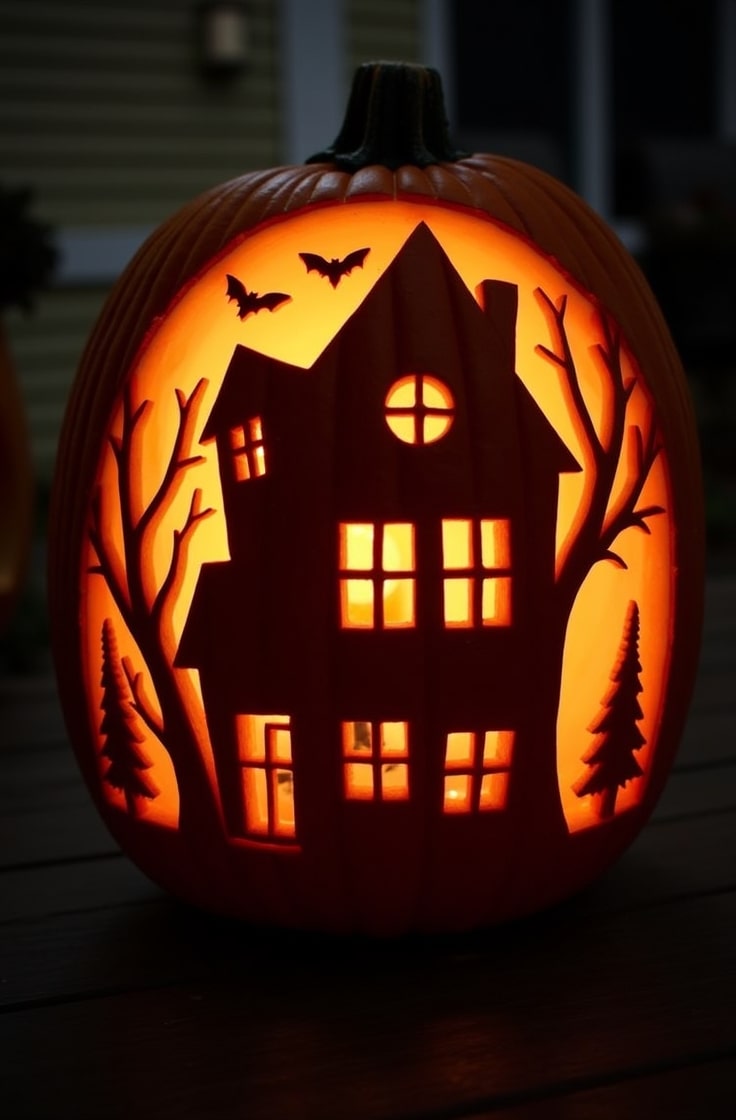
Idea 7: Haunted House Scene
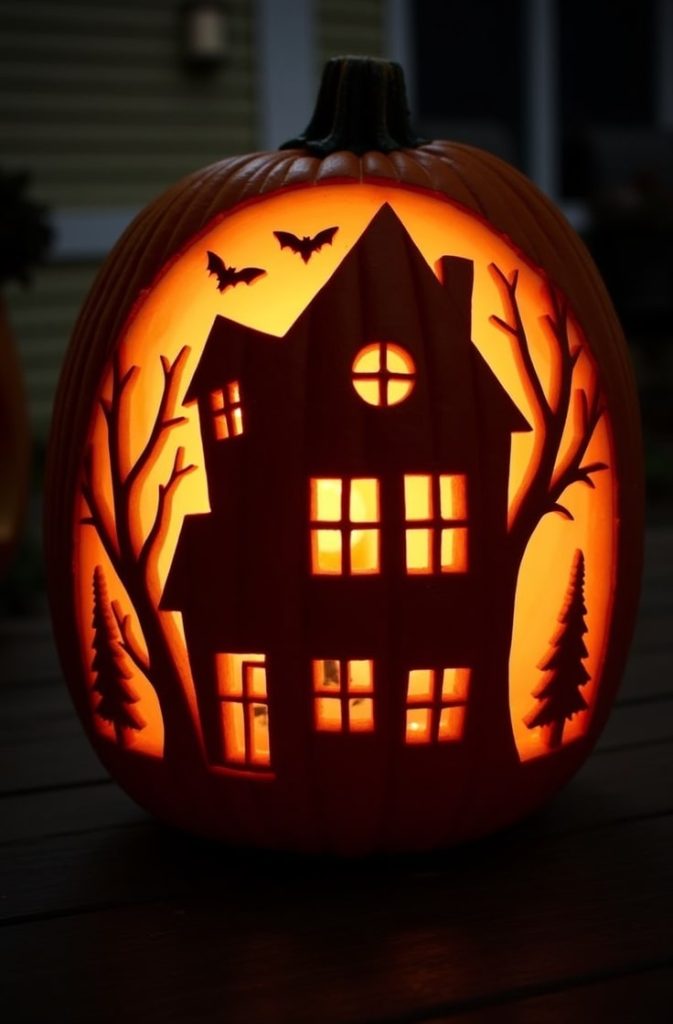
A haunted house pumpkin creates a spooky, atmospheric vibe. It’s like carving a story into your pumpkin.
You’ll need a large pumpkin, carving tools, and an LED light. Sketch a haunted house silhouette with crooked windows and bats flying nearby.
Add details like a full moon or bare trees. Carve carefully, using different depths for a layered effect.
I like to carve the windows thinner so they glow brighter. Place an LED light inside to backlight the scene.
This design is perfect for advanced carvers who want a challenge. It’s a stunning addition to your Halloween decor.
Set it on your porch to create a creepy, inviting glow.
Creative and Unique Pumpkins
Want something totally different? These two ideas push the boundaries of pumpkin decorating with fresh, creative twists.
Idea 8: Pumpkin Planter
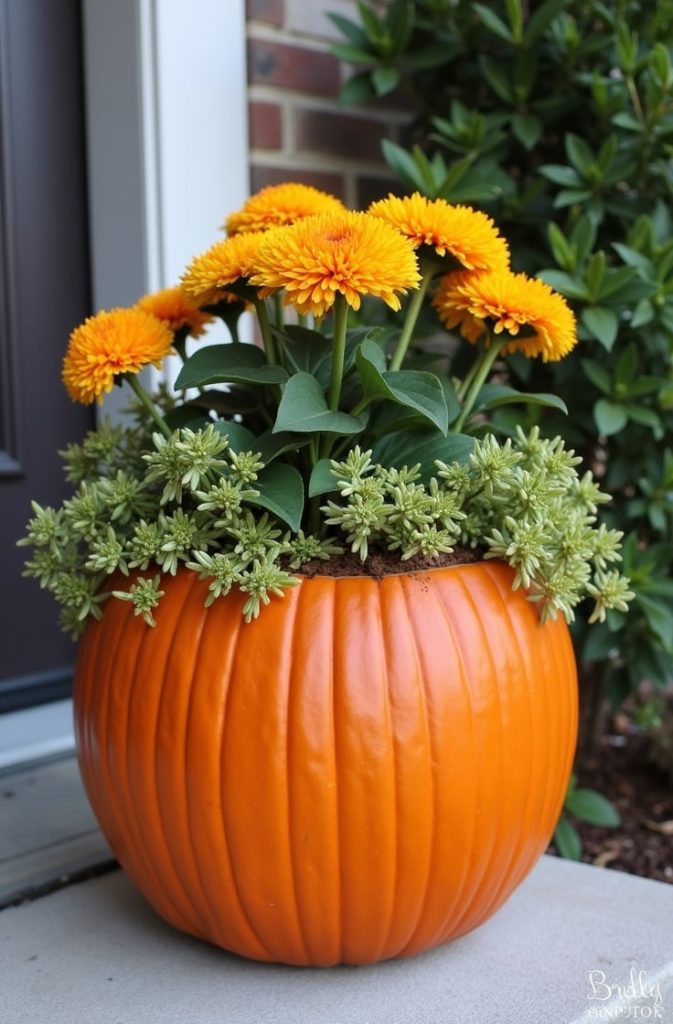
A pumpkin planter is both festive and eco-friendly. It’s a fun way to blend Halloween with fall vibes.
You’ll need a medium pumpkin, soil, plants, and an optional liner. Cut off the top and scoop out the insides.
If you want it to last longer, add a plastic liner inside. Fill the pumpkin with soil.
Plant fall flowers like mums or succulents for a modern look. I love using colorful pansies for a pop of color.
Place it on your porch or patio. This idea is easy and great for beginners.
It’s a beautiful, natural decoration that works all season. Plus, it’s a great way to reuse your pumpkin!
Idea 9: Mosaic Tile Pumpkin
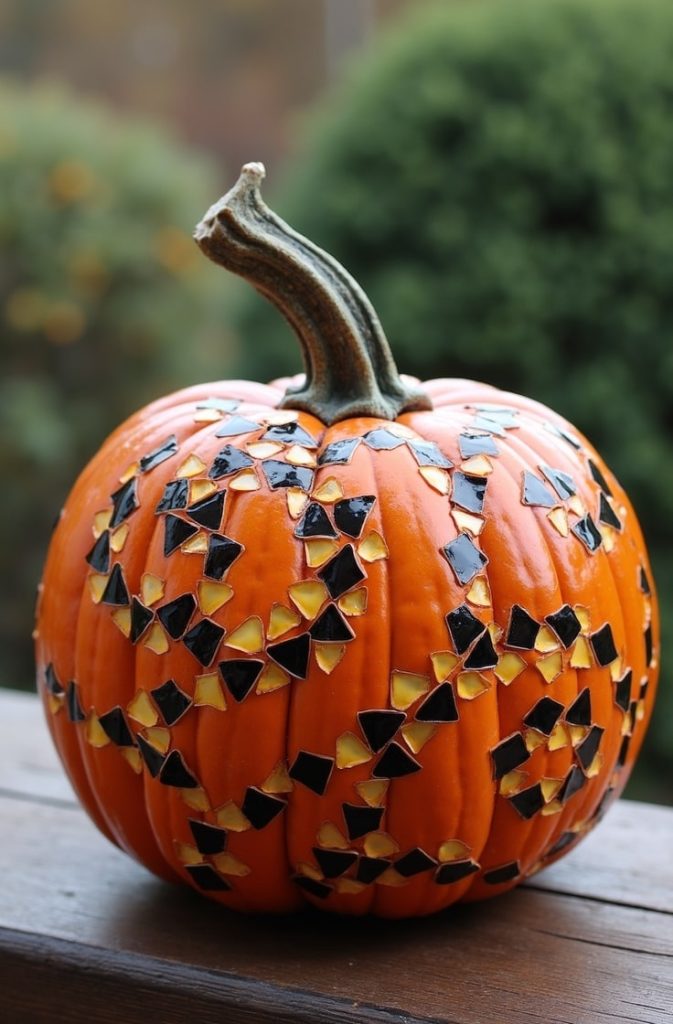
A mosaic tile pumpkin looks like a work of art. It’s perfect for a stained-glass effect.
You’ll need ceramic or glass tiles, adhesive, and grout. Clean your pumpkin thoroughly.
Arrange tiles in a pattern—I like swirls or geometric shapes. Glue each tile in place and let it dry overnight.
Apply grout between the tiles, wiping away excess with a damp cloth. Seal the design with a clear spray.
This project takes some patience, so it’s best for intermediate crafters. The result is a durable, stunning pumpkin that stands out.
Display it indoors or on a covered porch for a classy Halloween touch.
Kid-Friendly Pumpkin Ideas
Kids love Halloween. These two ideas are safe, simple, and so much fun.
They’re perfect for little hands and big imaginations.
Idea 10: Emoji Pumpkin
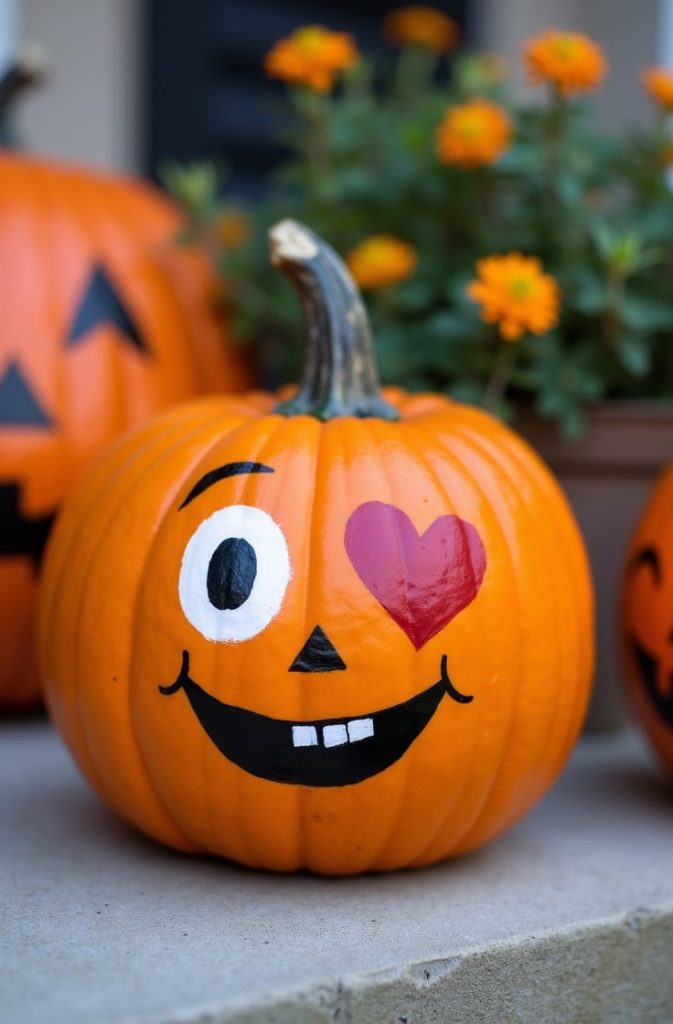
Emoji pumpkins are playful and quick to make. Kids can’t get enough of them!
You’ll need a small pumpkin, acrylic paints, and brushes. Optional stencils make it easier.
Paint the pumpkin with a base color like yellow. Once dry, add emoji features—think winking eyes, a ghost face, or a heart-eyes smile.
I use black and white paint for bold details. Seal the design with a clear spray.
This project is fast and kid-safe. It’s great for a Halloween party or classroom activity.
Your emoji pumpkin will bring smiles to everyone who sees it.
Idea 11: Pumpkin Candy Holder
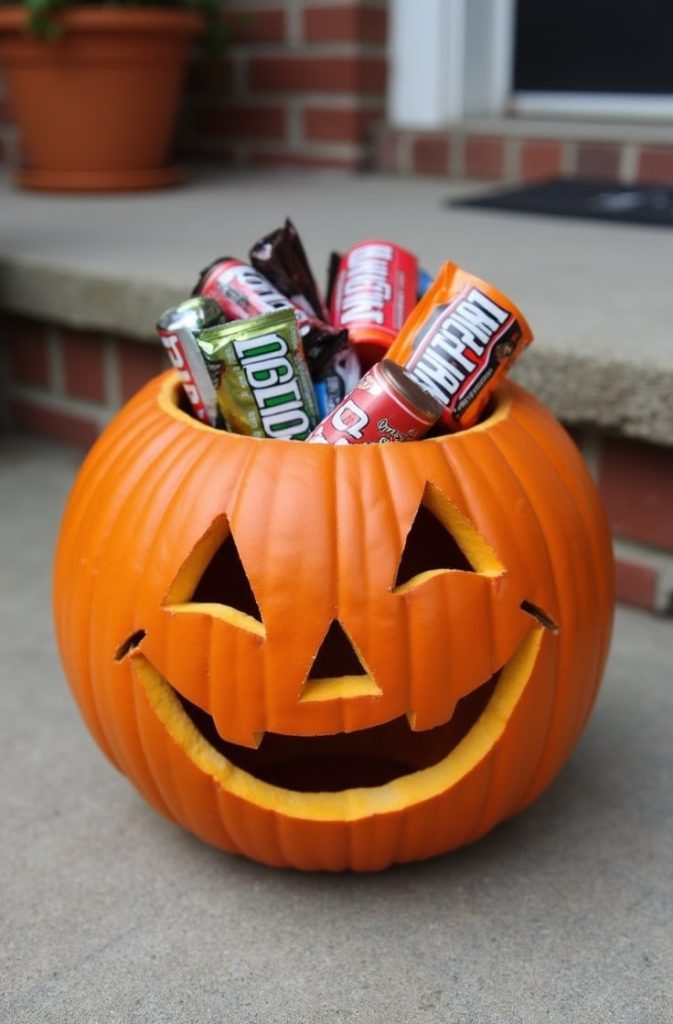
A pumpkin candy holder is both cute and functional. It’s perfect for trick-or-treaters.
You’ll need a small pumpkin, a carving knife, and candy. Cut off the top and hollow out the pumpkin.
Clean it well to remove any pulp. Fill it with wrapped candies—I like using mini chocolates or lollipops.
Decorate the outside with paint or stickers for extra flair. This idea is simple and great for kids to help with.
Place it near your door for trick-or-treaters to grab a sweet treat. It’s a festive, practical way to share the Halloween spirit.
Practical Tips for Pumpkin Crafting
Before you start, here are some tips to make your pumpkin projects a success. These will save you time and keep your creations looking great.
Choosing the Right Pumpkin
Pick a pumpkin that’s firm and free of soft spots. For carving, choose a medium or large pumpkin with a flat bottom.
For painting, a smooth surface works best. Smaller pumpkins are great for kids’ projects or candy holders.
I always check for a sturdy stem—it’s a sign of freshness. Buy your pumpkin a week or two before Halloween to ensure it lasts.
Safety Guidelines
Safety comes first, especially with kids. Use carving tools designed for pumpkins—they’re safer than kitchen knives.
Kids should stick to painting or decorating with stickers. Always supervise young crafters.
I keep a first-aid kit nearby, just in case. For no-carve projects, use non-toxic paints and glues.
Work in a well-lit area to avoid slips or cuts.
Preservation Techniques
Pumpkins don’t last forever, but you can extend their life. After carving, soak the pumpkin in a bleach-water solution (1 tablespoon bleach per gallon of water) for a minute.
This kills bacteria. For no-carve pumpkins, apply a clear sealant spray to protect paint or glitter.
Keep pumpkins in a cool, dry place when not on display. I store mine in the fridge overnight to keep them fresh longer.
Lighting Options
Lighting makes your pumpkin glow. Candles create a warm, traditional look but need watching to avoid fires.
LED lights are safer and last longer—I use them for most projects. Glow sticks are fun for kids and add a colorful effect.
Choose a light that matches your design. For example, bright LEDs work great for haunted house scenes.
Inspiration and Customization
Your pumpkins can be as unique as you are. Here’s how to take these ideas to the next level.
Mix and Match Ideas
Combine techniques for a one-of-a-kind pumpkin. Try carving a face and painting stars around it.
Or glue rhinestones onto a painted galaxy pumpkin. I once carved a ghost and added glitter for a sparkling effect.
Experiment with colors, textures, and props to make your pumpkin stand out. The possibilities are endless!
Thematic Grouping
Create a cohesive Halloween display with multiple pumpkins. Group a classic jack-o’-lantern, a glitter glam pumpkin, and an emoji pumpkin for a fun mix.
Or go all-spooky with a monster face, haunted house, and painted ghost. I like to arrange pumpkins on my porch with hay bales and string lights.
It creates a welcoming, festive vibe.
Sourcing Materials
You don’t need to spend a lot. Check dollar stores for paints, glitter, and rhinestones.
Craft stores have carving kits and chalkboard paint. For natural elements, use leaves or twigs from your yard.
I’ve found great deals on pumpkins at local farms or grocery stores. Shop early for the best selection.
Conclusion
These 11 Halloween pumpkin ideas offer something for everyone. From classic jack-o’-lanterns to mosaic tile masterpieces, you can find a project that fits your style and skill level.
I love how pumpkins bring out creativity and make Halloween special. Try one or two ideas this year.
Or go big and create a whole pumpkin display! Share your creations with friends or on social media—I’d love to see what you make.
For more inspiration, check out online tutorials or visit a local pumpkin patch. Halloween is all about fun, so grab a pumpkin and get crafting!

Emily Harper is a kitchen decor expert and interior designer with a passion for creating stylish, functional spaces. As a busy mom, she understands the importance of a kitchen that works for both family life and design. With 6 years of experience, Emily specializes in transforming kitchens into inviting, practical spaces. She’s known for her ability to blend trends with everyday needs, helping families create kitchens that feel like the heart of the home.