Open Kitchen Shelving: What I Wish I Knew Before Removing My Cabinets
I pulled my first upper cabinet off the wall on a Sunday morning. Coffee in hand. Screwdriver in the other. I thought it would feel like a magazine cover moment. It didn’t.
Dust rained down. The wall behind it looked awful. My “dreamy open shelf kitchen” idea suddenly felt like a mistake.
Three years later, I don’t regret it. But I wish someone had told me the truth first.
This isn’t another glossy roundup of pretty shelves. It’s the honest version. You’ll get real projects, real trade-offs, and a way to get the look without the regret.
Top 5 Open Shelving Products on Amazon
- Sheppard-style Blind Floating Shelf Brackets (6-Pack, Steel) – hidden brackets that let you build a solid wood shelf with no visible hardware.
- All Chic Wood Corbels (Set of 2) – decorative supports that give open shelves a finished, farmhouse look instead of a raw DIY feel.
- YCCO Industrial Pipe Shelf Brackets (4-Pack) – a sturdy, exposed-hardware option if you want an industrial style instead of a floating look.
- VASAGLE 4-Tier Ladder Shelf – a freestanding backup for storage you lose when cabinets come down.
- StorageWorks Woven Baskets (2-Pack) – hides small, messy items so your open shelves don’t look cluttered day to day.
Remove One Upper Cabinet Before You Commit To The Whole Wall
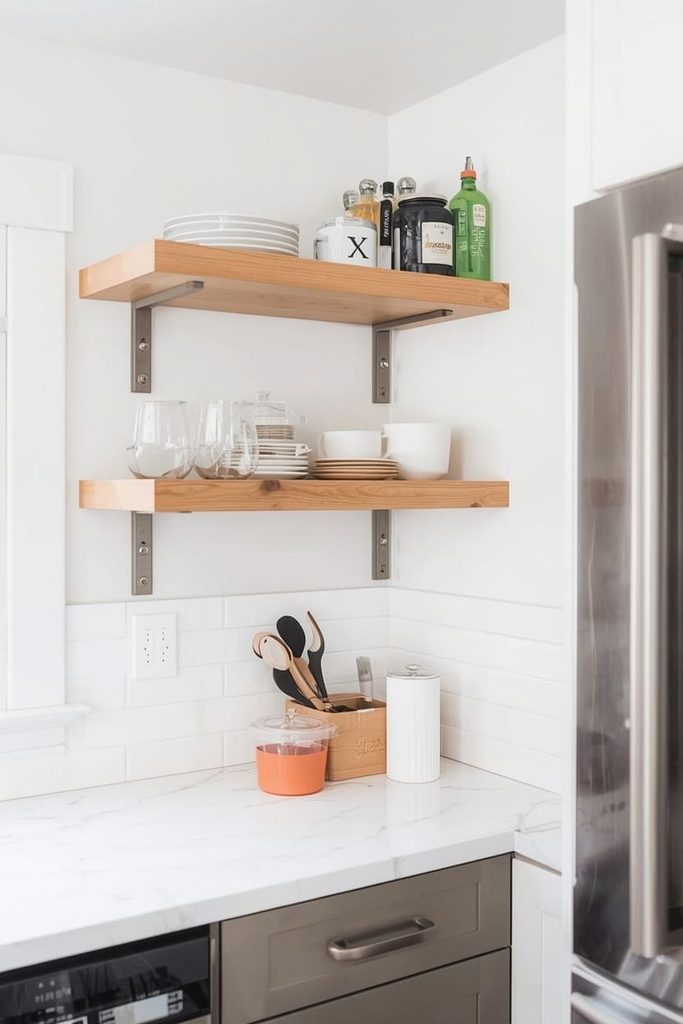
Take down a single cabinet first. Live with it for two weeks before deciding on the rest of your kitchen.
This is the step most people skip. They see a full open-shelf kitchen online and rip everything out at once. That’s how regret happens.
Pick the cabinet you use least. Remove it carefully, patch the wall, and install one shelf in its place. Use it daily for two weeks. Notice how it feels to see everything on display. Notice how much dust builds up. This small test tells you more than a hundred Pinterest photos ever will.
If you love it, move on to the next cabinet. If you don’t, you’ve only patched one wall, not gutted your whole kitchen.
Take photos of the test cabinet before and after. Compare how the space feels at different times of day. Morning light hits shelves differently than evening light, and that changes how “styled” or “cluttered” the same items look. This small habit helps you make a decision based on real living, not just a first impression.
Shop The Look:
- Blind Floating Shelf Brackets (6-Pack, Steel) – strong enough to test a single shelf without committing to a full system yet.
- DAP Wall Patch Kit – covers the marks left behind once you remove that first cabinet.
- Behr Touch-Up Paint (Sample Size) – matches your existing wall color so the patched spot blends in.
Build A Floating Shelf System That Replaces Your Uppers
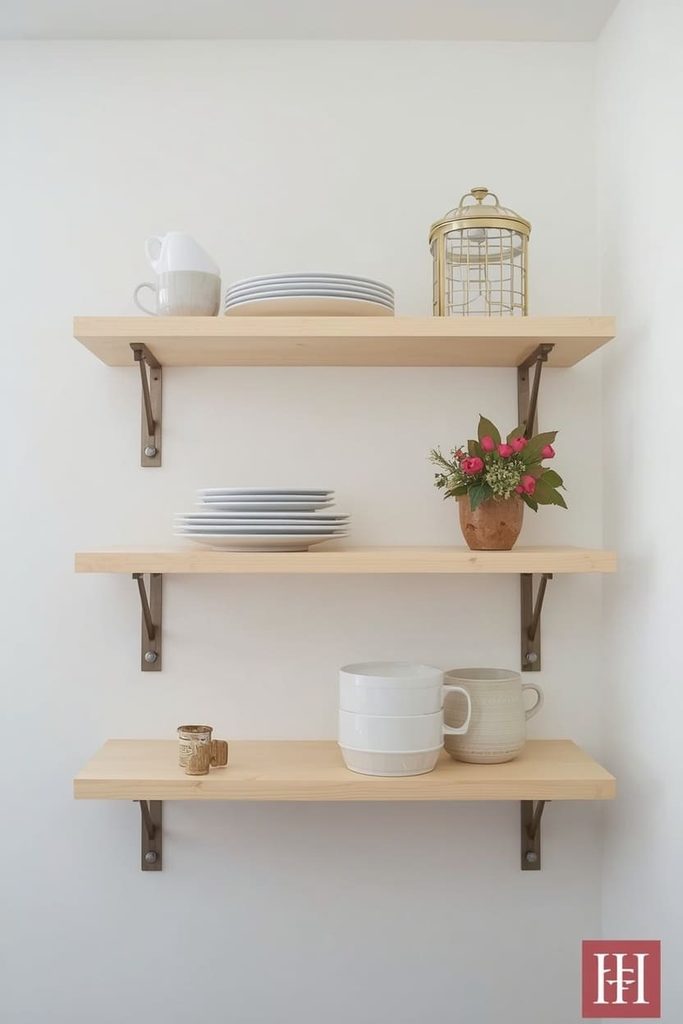
Use solid wood boards and hidden brackets to build shelves that mimic the exact spacing of your old cabinets. This keeps your kitchen’s storage capacity close to what it was.
Cabinets are removed. Now you need real storage back, not just decoration. Measure the width of your old cabinet run. Cut wood boards to match. Space three shelves the same way your cabinet shelves were spaced, so your muscle memory for reaching things doesn’t have to change much.
Sand and seal the wood before mounting it. This step gets skipped a lot, and it’s the reason some shelves look tired within a year. A sealed shelf resists spills and stains far better than raw wood.
Mount into studs wherever possible. Open shelves hold real dishes, so they need real support, not just wall anchors.
Think about weight distribution before you load anything up. Heavy stoneware and cast iron belong on the lowest shelf, closest to the bracket’s strongest support point. Lighter glassware and everyday mugs can sit higher, where a smaller margin of error is less risky. This one habit prevents the sagging shelf look you sometimes see in older open-shelf kitchens.
Give yourself a full 24 hours after mounting before loading the shelf completely. This lets any wall anchors or adhesive fully set, especially if part of your wall didn’t line up with a stud.
Shop The Look:
- Blind Floating Shelf Brackets (150 lb capacity per pair) – strong enough to carry a full shelf of stacked plates.
- Pre-Sanded Pine Project Board – a ready-to-finish wood board sized for standard shelf builds.
- Minwax Wood Finish Stain – seals and protects the wood so spills wipe off instead of soaking in.
Add Corbels For A Finished, Non-DIY Look
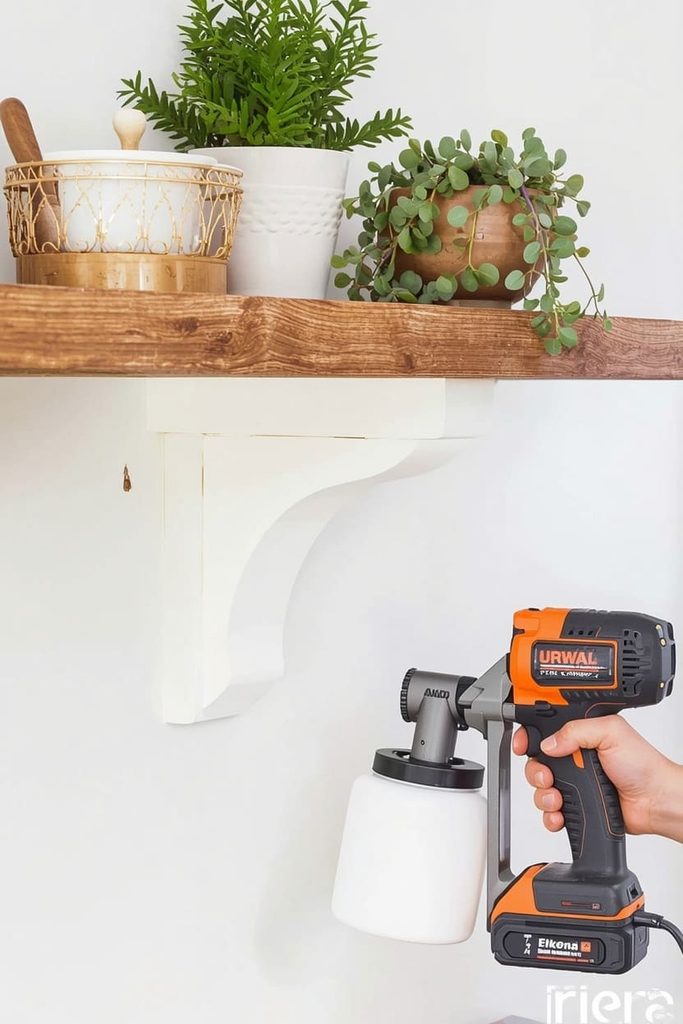
Decorative corbels under your shelves make them look intentional and built-in, not like a leftover home project.
Floating shelves look sleek, but they’re not for everyone. Some kitchens, especially farmhouse or traditional styles, look better with visible support. That’s where corbels come in.
Corbels mount directly to the wall, then your shelf board rests on top. This distributes weight differently than a floating bracket, which means corbels can often hold heavier loads with less strain on the wall. They also add a design detail that ties into cabinetry, trim, or an island you already have.
Paint or stain your corbels to match your cabinet color for a look that feels planned instead of tacked on.
Measure twice before drilling corbel placement. Unlike floating brackets, corbels sit visibly under the board, so uneven spacing is much more noticeable. Use a level and a pencil mark at both mounting points before you commit to any holes.
Corbels also work well in kitchens where you’re not ready to remove every cabinet. You can mix a run of corbel-supported shelves with your remaining cabinetry, and the shared trim style ties the whole wall together instead of looking like two separate projects.
Shop The Look:
- All Chic Wood Corbels (Set of 2) – classic farmhouse-style supports that pair naturally with painted cabinetry.
- Ekena Millwork Corbel – a heavier-duty option if you’re supporting a longer or deeper shelf board.
- Wagner Paint Sprayer (Handheld) – makes it fast to paint corbels to match your existing trim color.
Keep A Few Closed Cabinets For The Stuff You Don’t Want On Display
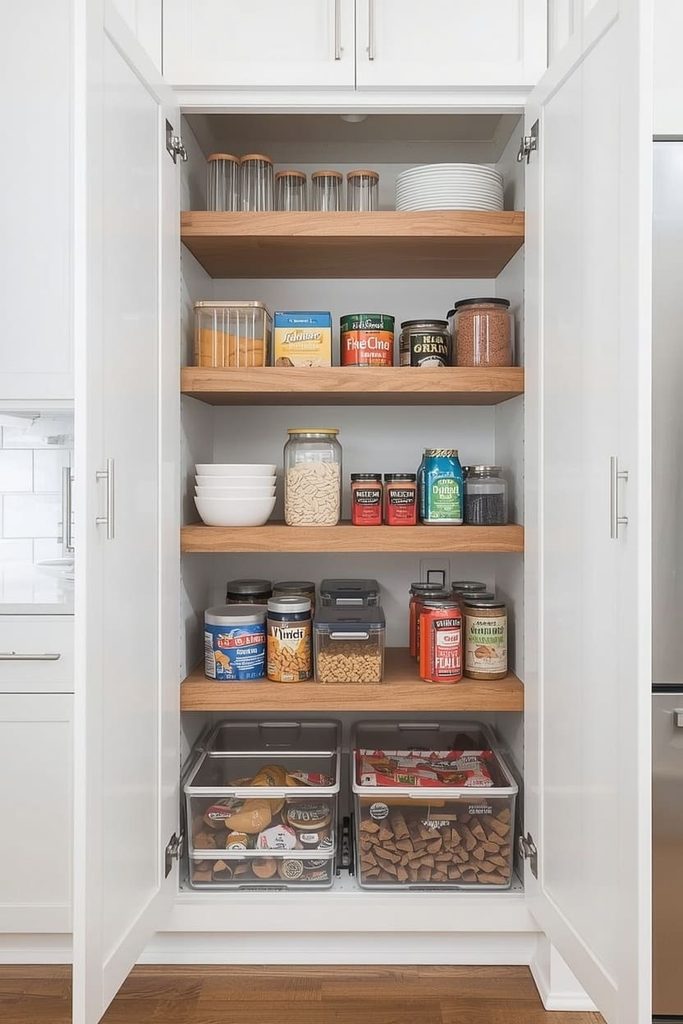
Don’t remove every cabinet. Keep at least one closed cabinet or drawer for appliances, food storage, and anything you don’t want guests to see.
This is the part that gets left out of the pretty photos. Open shelves show everything. Your mismatched Tupperware. Your protein powder. Your kid’s sippy cups. Not everything in a kitchen is meant to be on display, and that’s fine.
Choose one lower cabinet to keep closed. Use it for bulk pantry items, small appliances, or anything with an ugly label. This gives your open shelves room to breathe with only the items you actually want people to see.
This single decision solves most of the “open shelving looks messy” complaints people run into.
Think of this cabinet as your kitchen’s junk drawer, but organized. Add drawer dividers or small bins inside so even hidden storage stays functional instead of becoming a dumping ground. A closed cabinet only helps your open shelves look better if it doesn’t turn into chaos every time you open the door.
If you’re tight on lower cabinets to spare, consider a small rolling cart tucked beside your fridge or counter instead. It gives you the same “hide it away” function without needing to keep an entire built-in cabinet.
Shop The Look:
- VASAGLE 4-Tier Ladder Shelf – if you’re short on lower cabinets, this adds hidden storage tiers without new cabinetry.
- Simple Houseware Stackable Cabinet Organizer – makes the most of your one remaining closed cabinet.
- Clear Pantry Storage Bins with Lids – keeps loose food items sealed and stacked out of sight.
Style Your Shelves With A Simple Rule, Not Random Placement
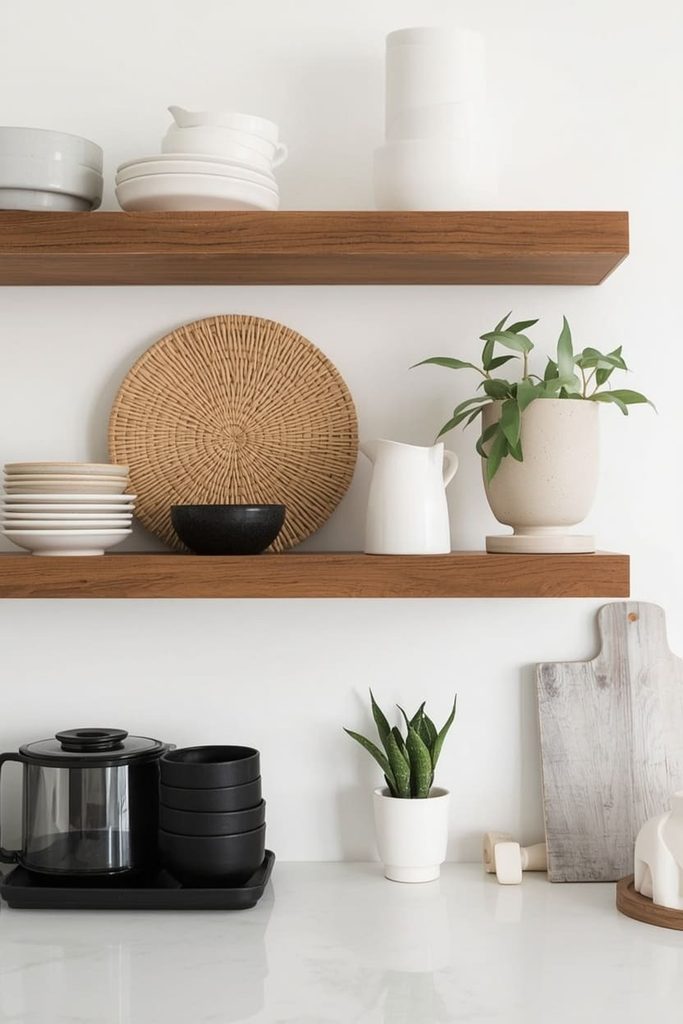
Follow the rule of three: group items in odd numbers, and vary the height of what you place next to each other.
Once your shelves are up, styling them is where most people freeze. Here’s the shortcut. Group items in sets of three. A stack of bowls, a small plant, and one tall pitcher looks more intentional than a single row of matching mugs.
Vary height across each grouping. Short next to medium next to tall creates visual interest without looking cluttered. Leave a little empty space on each shelf too. A shelf packed edge to edge feels chaotic, even if everything is neatly stacked.
Step back and look at your shelves from across the room every time you rearrange. What looks fine up close often looks crowded from a distance.
Repeat one material or color across your shelves to tie the whole wall together. This could be a consistent wood tone, a single accent color in your dishware, or matching baskets on each shelf. Without this thread, open shelving can start to feel like a random collection instead of an intentional design choice.
Rotate a few items seasonally. Swap a few pieces every couple of months, the way you’d refresh a coffee table. This keeps your shelves from feeling stale and gives you a reason to actually use the pretty dishes you own instead of saving them for guests.
Shop The Look:
- Sorbus Floating Shelves with Invisible Brackets – a clean base for testing different styling arrangements.
- Small Ceramic Planter (Set of 2) – an easy way to add height variation to a shelf grouping.
- Neutral Stoneware Bowl Set – simple, stackable pieces that photograph well and function daily.
Solve The Dust Problem Before It Becomes A Daily Chore
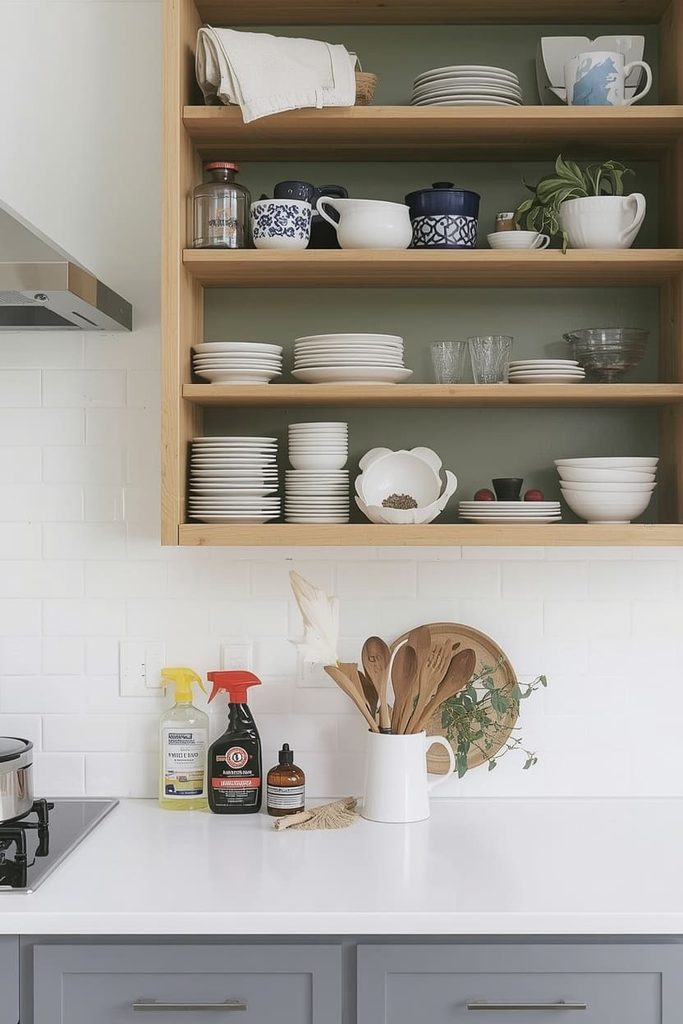
Store daily-use items on open shelves and move rarely-used items behind glass-front cabinets or into closed storage.
Nobody warns you about dust the way they should. Open shelves collect it fast, especially near a stove. If everything you own sits in the open, wiping shelves becomes a weekly chore you’ll eventually skip.
The fix is simple. Only keep things you touch often on open shelves. Daily plates, everyday mugs, and the pan you use constantly stay out. Items you use once a month move into a cabinet, even if that means keeping one or two upper cabinets after all.
If you want some closed storage without losing the open look, swap a solid cabinet door for a glass one. You still get visibility, but with less direct dust exposure.
Wipe shelves down once a week, even if nothing looks dirty yet. Grease from cooking travels further than most people expect, and it settles as an invisible film before it ever looks visibly dirty. A quick wipe with a degreasing spray keeps this from building into a deep-clean project later.
Consider your stove’s distance from your shelves before finalizing your layout. If you’re building new shelves as part of your project, keep them a bit further from direct grease splatter than your old cabinets were. Even a few extra inches makes a noticeable difference over time.
Shop The Look:
- Glass Cabinet Door Insert Kit – swaps a solid door for glass so you get a similar look with less dust exposure.
- Microfiber Duster with Extendable Handle – makes weekly shelf dusting faster, especially for higher shelves.
- Bar Keepers Friend Multi-Surface Cleaner – cuts through grease film that settles near stove-side shelves.
Add Under-Shelf Lighting To Make Everything Look Intentional
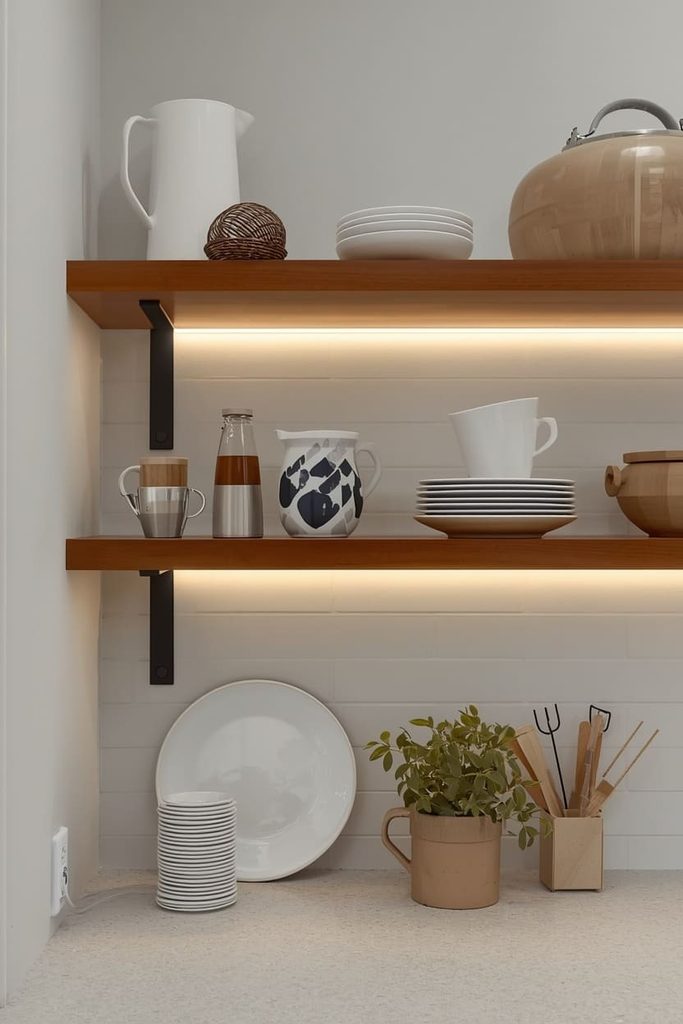
A thin LED strip light under each shelf makes your open shelving look styled and expensive, even with budget shelves.
This is the detail that separates a Pinterest-worthy shelf from a plain one. Lighting draws the eye to what’s displayed and hides the fact that your shelf might just be an affordable wood board and a bracket.
Stick-on LED strips work well here. Run one along the underside of each shelf, tucked toward the back edge so the light source stays hidden. Choose a warm white tone if your kitchen leans traditional, or a cooler white if your space is more modern.
This project takes under an hour per shelf and instantly makes your styling look more finished, even before you touch a single mug or plate.
Test the light placement before sticking anything down permanently. Turn the lights on at night and check how the glow looks from your main sitting or standing spots in the kitchen. A light placed too far forward can shine directly into your eyes instead of softly lighting the shelf below.
If your kitchen doesn’t have an outlet nearby, battery-powered LED strips solve this without any rewiring. They usually last several months per charge or battery set, which is more than enough for daily use before a quick swap.
Shop The Look:
- LED Under-Cabinet Strip Lights (Battery or Plug-In) – adds a soft glow under each shelf without any wiring work.
- 3M Cable Clips – keeps light strip wires tucked and hidden along the back of the shelf.
- Remote-Controlled Dimmer Switch – lets you adjust brightness depending on the time of day.
FAQs About Open Kitchen Shelving
Is open kitchen shelving hard to maintain?
Yes, more than closed cabinets. Dust and grease build up faster since everything is exposed. Wiping shelves weekly keeps it manageable, especially near the stove.
Do open shelves make a kitchen feel bigger?
Yes, in most cases. Removing upper cabinets opens up visual space and makes the room feel less boxed in. This effect is strongest in small or narrow kitchens.
How much weight can a floating shelf hold?
This depends on your brackets and wall type. Most steel blind brackets support 50 to 150 pounds per pair when mounted into studs. Always check the product’s rated capacity before loading heavy dishes.
Should I remove all my cabinets or just some?
Just some, in most cases. Keeping one or two closed cabinets gives you a place for less attractive items. Full removal works better in larger kitchens with plenty of wall space to spare.
What’s the biggest regret people have with open shelving?
Visible clutter is the top complaint. Once cabinets are gone, mismatched dishes and small appliances have nowhere to hide. Planning your storage before removing cabinets prevents most of this regret.
Can I add open shelving without a full renovation?
Yes, you can start with one cabinet or one wall section. This lets you test the look and the upkeep before committing to a larger remodel.

Emily Harper is a kitchen decor expert and interior designer with a passion for creating stylish, functional spaces. As a busy mom, she understands the importance of a kitchen that works for both family life and design. With 6 years of experience, Emily specializes in transforming kitchens into inviting, practical spaces. She’s known for her ability to blend trends with everyday needs, helping families create kitchens that feel like the heart of the home.