15 Halloween Room Decor Ideas to Transform Your Space
There’s just something magical about Halloween that gets me every year.
The chill in the air, the spooky charm all around, and the perfect excuse to go all-out with creative decor—it’s hands-down my favorite season.

I absolutely love transforming my home into a cozy little haunted haven, full of eerie surprises and festive touches.
If you’re anything like me—whether you’re planning a full-blown haunted bash or just want to soak in the spirit of the season—decorating your space for Halloween is half the fun. That’s why I’ve rounded up 15 of my favorite Halloween room decor ideas to help get those spooky vibes flowing.
No matter the size of your space—tiny apartment, cozy living room, or even your front porch—these ideas will help you add that perfect haunted touch.
From easy DIY projects to bold, boo-tiful statement pieces, there’s a little something here for everyone. Ready to get inspired? Let’s make your home the spookiest (and most stylish) on the block!
Table of Contents
- Setting the Halloween Mood
- 15 Halloween Room Decor Ideas
- 1. Spooky Wall Silhouettes
- 2. Glowing Jack-o’-Lanterns
- 3. Cobweb Corner Drapes
- 4. Haunted Mirror
- 5. Witch’s Cauldron Centerpiece
- 6. Floating Candles
- 7. Creepy Portrait Gallery
- 8. Pumpkin Garland
- 9. Ghostly Drapery
- 10. Spiderweb Table Runner
- 11. Skull and Candle Display
- 12. Potion Bottle Collection
- 13. Bat Chandelier
- 14. Bloody Handprint Window Clings
- 15. Fog Machine Ambiance
- Practical Tips for Implementation
- Customizing for Different Spaces
- Conclusion
Setting the Halloween Mood
Before we get to the decor ideas, let’s talk about setting the vibe. A cohesive Halloween theme ties everything together. Think about what kind of spooky atmosphere you want. Do you love the classic haunted house look with cobwebs and ghosts?
Or maybe a witch’s lair with potions and cauldrons? You could go for a cozy pumpkin patch feel or a gothic manor with dark, elegant touches. Whatever you choose, a clear theme keeps your decor looking intentional.
Color schemes are key. Stick to Halloween classics like orange, black, purple, green, and white. These colors scream spooky season.
For example, orange pumpkins paired with black candles create instant Halloween vibes. Purple and green add a mystical touch, perfect for witchy themes. White works great for ghostly or ethereal looks. Mix and match these colors to suit your style.
Lighting is your secret weapon. Dim lighting sets a creepy mood. Swap out bright bulbs for softer ones. Candles (real or LED) add a warm, flickering glow. String lights in orange or purple can drape across mantels or windows for a magical effect.
I love using fairy lights to mimic stars in a haunted night sky. Play with shadows, too—silhouettes and dim corners make everything feel spookier.
If you’re new to decorating, don’t worry. Start with a simple theme and build from there. These ideas will guide you, whether you’re a beginner or a seasoned DIYer.
Let’s get to the fun part: the 15 decor ideas!
15 Halloween Room Decor Ideas
Here are 15 ideas to transform your space. Each one comes with a description, materials, cost estimate, difficulty level, and tips to make it shine. Whether you’re on a budget or ready to go all out, you’ll find inspiration here.
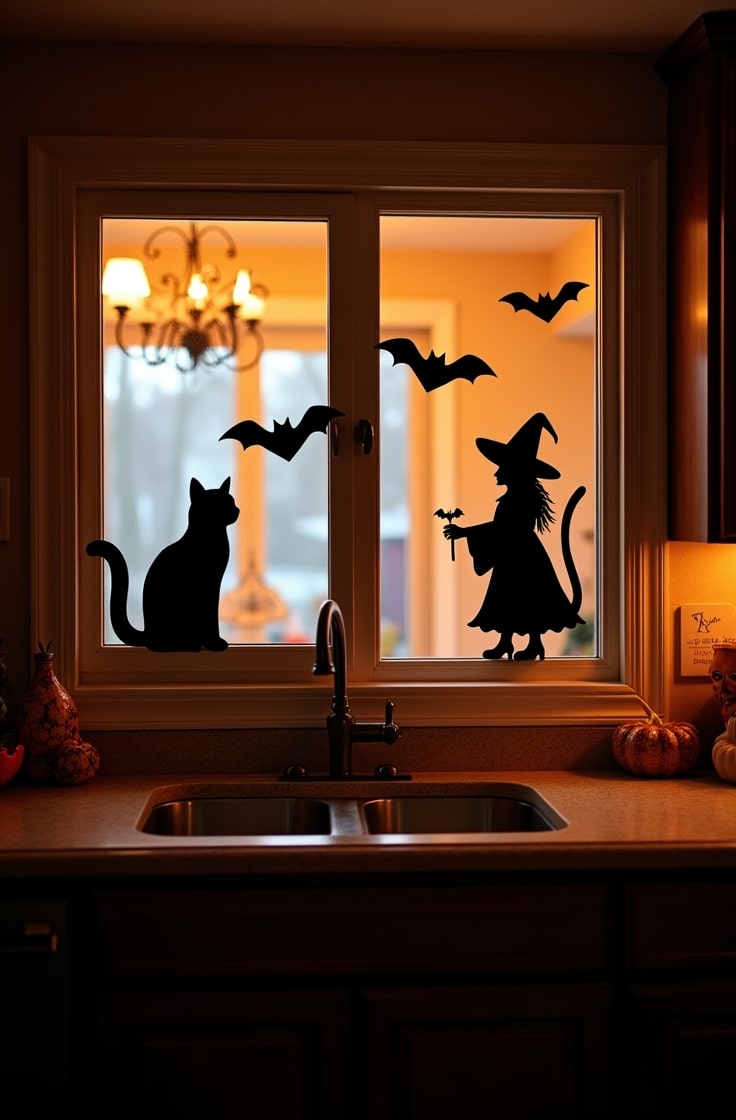
1. Spooky Wall Silhouettes

I love how simple yet creepy wall silhouettes can be. Cut out shapes like bats, spiders, or ghosts from black cardstock and stick them on your walls. When the lights hit them, they cast eerie shadows that make your room feel alive with spooks.
- Materials: Black cardstock, scissors, double-sided tape.
- Cost: Low ($5–10).
- Difficulty: Easy.
- Tips: Find free silhouette templates online for perfect shapes. Layer multiple cutouts for a 3D effect. For example, stack two bats slightly offset to create depth. Use removable tape to avoid damaging your walls. Place them near a light source to maximize the shadow effect.
You can scatter these across a living room wall or create a “swarm” of bats flying up a staircase. It’s a quick project that packs a punch. I made a spider web with spiders crawling across my dining room wall last year, and it was a hit with guests!
2. Glowing Jack-o’-Lanterns

Nothing says Halloween like a glowing jack-o’-lantern. Carve real pumpkins or use faux ones for a reusable option. Pop an LED candle inside, and you’ve got a warm, festive glow that lights up any room.
- Materials: Pumpkins (real or faux), carving tools, LED candles.
- Cost: Moderate ($10–20).
- Difficulty: Moderate.
- Tips: If carving, use a sharp knife and scoop out the insides completely for easier cutting. For safety, stick with battery-operated LED candles—they’re just as effective without the fire risk. Try carving unique designs like cats or skulls for variety.
Place these on your coffee table, windowsill, or even in a corner of your bedroom. I love grouping three different-sized pumpkins for a balanced look. Faux pumpkins are great if you want to reuse them next year.
3. Cobweb Corner Drapes

Cobwebs are a Halloween staple. Stretchy cotton or synthetic cobwebs draped in corners or over furniture instantly make your space feel abandoned and eerie. Add plastic spiders for extra creepiness.
- Materials: Store-bought cobwebs, plastic spiders.
- Cost: Low ($5–15).
- Difficulty: Easy.
- Tips: Pull the cobwebs thin to look more realistic—less is more. Tuck them into corners, over lamps, or across bookshelves. Scatter a few plastic spiders for a spooky surprise. Avoid overdoing it; a few well-placed webs go a long way.
I draped cobwebs over my living room curtains last Halloween, and it looked like a haunted mansion. This is perfect for beginners because it’s so easy to set up and take down.
4. Haunted Mirror

A haunted mirror is such a cool touch. Add spooky decals or use washable paint to create eerie designs on a mirror. When you look in, it feels like a ghost is staring back.
- Materials: Mirror, removable decals, washable paint.
- Cost: Moderate ($15–25).
- Difficulty: Easy.
- Tips: Vinyl decals are best for easy removal after Halloween. Look for designs like cracked glass, ghostly faces, or bloody handprints. If painting, use washable tempera paint to avoid permanent damage. Test a small area first.
I put a cracked-glass decal on my hallway mirror, and it spooked everyone who walked by. This works great in entryways or bathrooms where mirrors are focal points.
5. Witch’s Cauldron Centerpiece

A bubbling cauldron is perfect for a witchy vibe. Fill a cauldron prop with dry ice for a misty effect or fairy lights for a glowing, magical look. It’s a stunning centerpiece for your dining table or coffee table.
- Materials: Cauldron prop, dry ice, fairy lights.
- Cost: Moderate ($20–30).
- Difficulty: Moderate.
- Tips: If using dry ice, handle it with gloves and ensure good ventilation—safety first! For a simpler option, wrap fairy lights inside the cauldron for a glowing effect. Add plastic bones or eyeballs for extra flair.
I used a cauldron with fairy lights on my dining table last year, and it was the talk of my Halloween party. It’s versatile and works for both spooky and whimsical themes.
6. Floating Candles

Channel your inner Hogwarts with floating candles. Hang battery-operated taper candles from the ceiling with fishing line. They sway gently, creating a magical, eerie atmosphere.
- Materials: LED taper candles, fishing line, command hooks.
- Cost: Moderate ($15–25).
- Difficulty: Moderate.
- Tips: Use clear command hooks to avoid wall damage. Tie fishing line securely to prevent candles from falling. Space them unevenly for a natural look. Test the setup before your event to ensure stability.
I hung these over my dining room table, and it felt like we were dining in a haunted castle. This is perfect for a gothic or magical theme.
7. Creepy Portrait Gallery

Turn your walls into a haunted gallery. Find thrifted frames and fill them with printed “haunted” portraits. Think eerie faces or eyes that seem to follow you.
- Materials: Old frames, printed images, paint.
- Cost: Low ($10–20).
- Difficulty: Easy.
- Tips: Search for free printable portraits online—vintage faces work great. Paint frames black or gold for a gothic touch. Arrange them in a cluster for maximum impact. Add LED candles nearby to light them up.
I created a creepy gallery in my living room, and guests loved the “watching eyes” effect. It’s budget-friendly and super easy to pull off.
8. Pumpkin Garland

A pumpkin garland adds a cozy, festive touch. String mini pumpkins or paper pumpkins across mantels, doorways, or windows. It’s simple but screams Halloween.
- Materials: Mini pumpkins, twine, hot glue.
- Cost: Low ($10–15).
- Difficulty: Easy.
- Tips: Paint mini pumpkins to match your color scheme—gold or white looks chic. Use hot glue to secure them to twine. For paper pumpkins, cut out shapes and fold them for a 3D effect. Hang with command strips for easy removal.
I draped a garland over my fireplace, and it tied the whole room together. This works in any space, from living rooms to bedrooms.
9. Ghostly Drapery

Sheer white fabric draped over furniture or windows looks like floating ghosts. It’s ethereal and spooky without being too scary.
- Materials: Cheesecloth, white fabric, safety pins.
- Cost: Low ($10–20).
- Difficulty: Easy.
- Tips: Cut cheesecloth into irregular shapes for a tattered look. Pin it loosely to curtains or chairs. Add googly eyes for a playful, kid-friendly version. Keep it away from heat sources.
I used this in my bedroom, and it felt like a ghost was hovering by the window. It’s a quick way to add a haunting touch to any room.
10. Spiderweb Table Runner

A spiderweb table runner is a DIY showstopper. Use lace or string to create a web pattern for your dining table. It’s elegant yet creepy.
- Materials: Black lace, white string, fabric glue.
- Cost: Low ($5–15).
- Difficulty: Moderate.
- Tips: Lay out the string in a web shape before gluing. Use glow-in-the-dark string for a nighttime glow. Add a plastic spider in the center for effect. Practice on paper first to perfect the design.
I made one for my kitchen table, and it looked amazing under candlelight. This is great for dinner parties or spooky brunches.
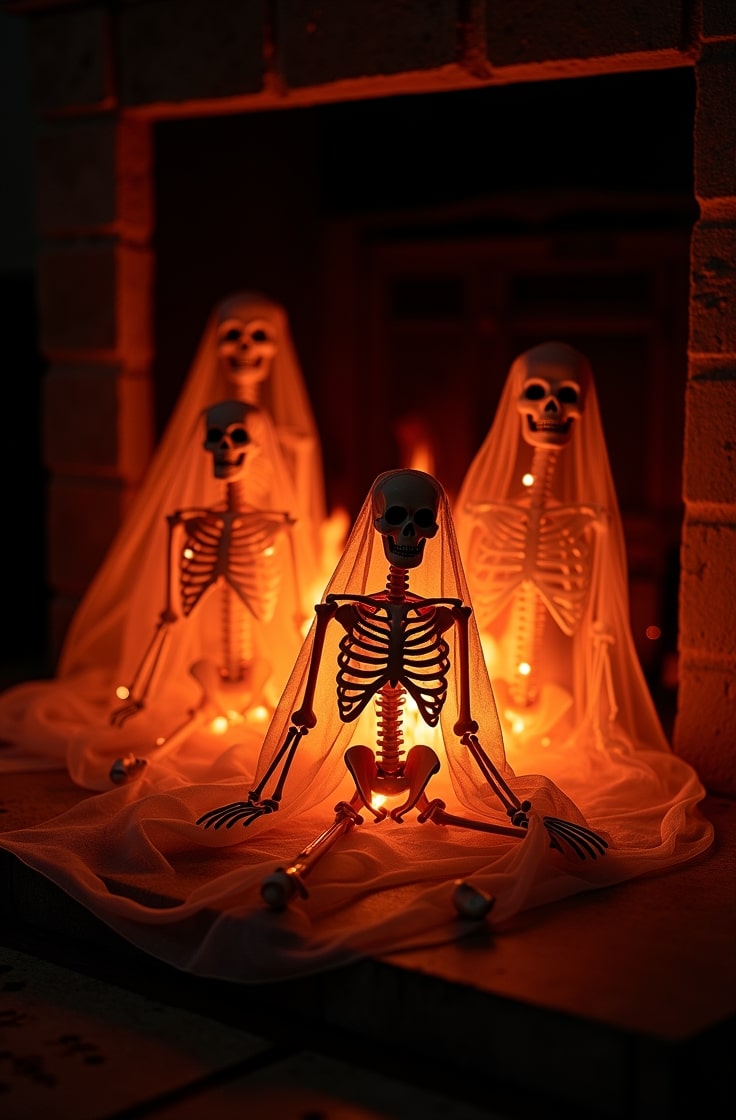
11. Skull and Candle Display

Faux skulls paired with candles create a gothic vibe. Arrange them on a tray for a chic, creepy centerpiece.
- Materials: Plastic skulls, candles, tray.
- Cost: Moderate ($15–25).
- Difficulty: Easy.
- Tips: Spray-paint skulls silver or gold for a modern twist. Use LED candles for safety. Group them tightly for a dramatic effect. Add moss or cobwebs for texture.
I set this up on my coffee table, and it felt like a scene from a gothic novel. It’s perfect for living rooms or dining areas.
12. Potion Bottle Collection

Repurpose glass bottles into spooky potions. Add colored liquids and creepy labels for a witchy display.
- Materials: Glass bottles, food coloring, printable labels.
- Cost: Low ($5–15).
- Difficulty: Easy.
- Tips: Use water with food coloring for safe “potions.” Find free printable labels online—think “Witch’s Brew” or “Dragon’s Blood.” Display on a shelf or table. Add glitter for a magical touch.
I lined these up on my bookshelf, and they added such a fun, mystical vibe. This is great for kids and adults alike.
13. Bat Chandelier

Turn your chandelier into a bat haven. Hang paper or foam bats from the fixture for a spooky, fluttering effect.
- Materials: Black foam, fishing line, hot glue.
- Cost: Low ($10–15).
- Difficulty: Moderate.
- Tips: Cut bats from foam for durability. Tie them with fishing line to make them “fly.” Add LED string lights for a glowing effect. Ensure the chandelier can support the weight.
I did this in my dining room, and it was a showstopper. It’s perfect for a haunted house or gothic theme.
14. Bloody Handprint Window Clings

Red handprints on your windows look like a crime scene. Use vinyl clings or washable paint for a chilling effect.
- Materials: Red vinyl, washable paint.
- Cost: Low ($5–10).
- Difficulty: Easy.
- Tips: Buy pre-made vinyl clings for convenience. If painting, use washable tempera to clean up easily. Place on windows facing the street for trick-or-treaters to see. Space them randomly for realism.
I put these on my front windows, and neighbors thought it was so creepy! It’s a quick way to spook up your exterior.
15. Fog Machine Ambiance

A fog machine takes your decor to the next level. It creates a misty, eerie atmosphere that transforms any room.
- Materials: Fog machine, fog juice.
- Cost: High ($30–50).
- Difficulty: Moderate.
- Tips: Use in a well-ventilated area to avoid stuffiness. Follow the machine’s instructions carefully. Pair with dim lighting for maximum effect. Test it before your event to get the timing right.
I used a fog machine in my living room last Halloween, and it felt like a haunted forest. It’s a splurge, but so worth it for the vibe.
Practical Tips for Implementation
Now that you’ve got these ideas, let’s talk about making them happen. Sourcing materials is easy if you know where to look. Check thrift stores for frames, bottles, or trays—perfect for the portrait gallery or potion bottles.
Dollar stores have cheap cobwebs, plastic spiders, and LED candles. Online retailers like Amazon or Etsy offer decals, fog machines, and printable templates. I always browse Etsy for unique touches like custom potion labels.
Storage is key for reusable decor. Store faux pumpkins, skulls, and garlands in labeled bins to keep them safe until next year.
Wrap delicate items like fairy lights in bubble wrap. Keep decals flat to avoid creasing. I have a dedicated Halloween bin in my garage, and it makes setup so much easier each year.
Safety comes first. Use LED candles instead of real ones, especially around kids or pets. If using dry ice or a fog machine, ensure proper ventilation and follow instructions. Avoid placing decor near heat sources.
For example, keep cheesecloth away from space heaters. If you have young kids, skip small items like plastic spiders that could be a choking hazard.
Time management is crucial. Quick projects like silhouettes or garlands can be done in an hour. More involved ones, like the cauldron or bat chandelier, might take an afternoon.
Plan ahead if you’re hosting a party. I like to start decorating in early October so I’m not rushed.
Customizing for Different Spaces
Not every idea works in every room, so let’s tailor them. For your living room, go bold with centerpieces like the cauldron or skull display. These draw attention and set the tone for gatherings. I love placing glowing jack-o’-lanterns on my coffee table for a cozy focal point.
In bedrooms, keep it subtle and cozy. Ghostly drapery over a headboard or pumpkin garland along a shelf adds a Halloween touch without overwhelming the space. For kids’ rooms, stick to playful decor like glowing pumpkins or googly-eyed ghosts. Avoid anything too scary—my nephew loves the garland but gets spooked by skulls.
For small spaces like apartments, focus on wall-based or hanging decor. Silhouettes, garlands, or floating candles save floor space while still making an impact. I live in a small apartment, and wall decals have been a game-changer for me.
Don’t forget your entryway or outdoor space. Bloody handprint clings on windows or jack-o’-lanterns by the door welcome trick-or-treaters. A fog machine near the entrance creates a spooky first impression. I set up a small cauldron with lights by my front door, and kids loved it last year.
Conclusion
There you have it—15 Halloween room decor ideas to make your home spook-tacular!
From creepy silhouettes to glowing cauldrons, these projects suit every budget, skill level, and space. I’ve had so much fun experimenting with these over the years, and I hope you feel inspired to try them too.
Mix and match to create your perfect Halloween vibe. Share your creations on social media—I’d love to see how you bring these ideas to life! Halloween is all about creativity and fun, so don’t be afraid to add your own spooky twist.

Emily Harper is a kitchen decor expert and interior designer with a passion for creating stylish, functional spaces. As a busy mom, she understands the importance of a kitchen that works for both family life and design. With 6 years of experience, Emily specializes in transforming kitchens into inviting, practical spaces. She’s known for her ability to blend trends with everyday needs, helping families create kitchens that feel like the heart of the home.