13 Spooky & Creative Halloween Table Centerpiece Ideas
Are you ready to make your table the star of your spooky gathering? I’ve got you covered with 13 creative Halloween table centerpiece ideas that will wow your guests.
Whether you’re throwing a creepy dinner party, a fun family get-together, or a full-on haunted bash, these ideas will bring the perfect mix of eerie, festive, and fun.
I’ve organized them into three categories—Nature-Inspired, Supernatural Themes, and Edible/Fun Creations—to make it easy for you to find the vibe that fits your event.
Each idea comes with a clear description, materials list, step-by-step instructions, estimated time and cost, variations for personalization, and safety tips where needed.
Let’s dive in and create something unforgettable!
Nature-Inspired Centerpieces
These ideas pull from the beauty of fall and the outdoors, blending natural elements with a Halloween twist. They’re perfect for a warm, rustic look with just the right amount of spookiness.
Table of Contents
- Nature-Inspired Centerpieces
- Supernatural Themes
- Edible and Fun Creations
- Wrapping It Up
1. Mini Pumpkin Patch Arrangement
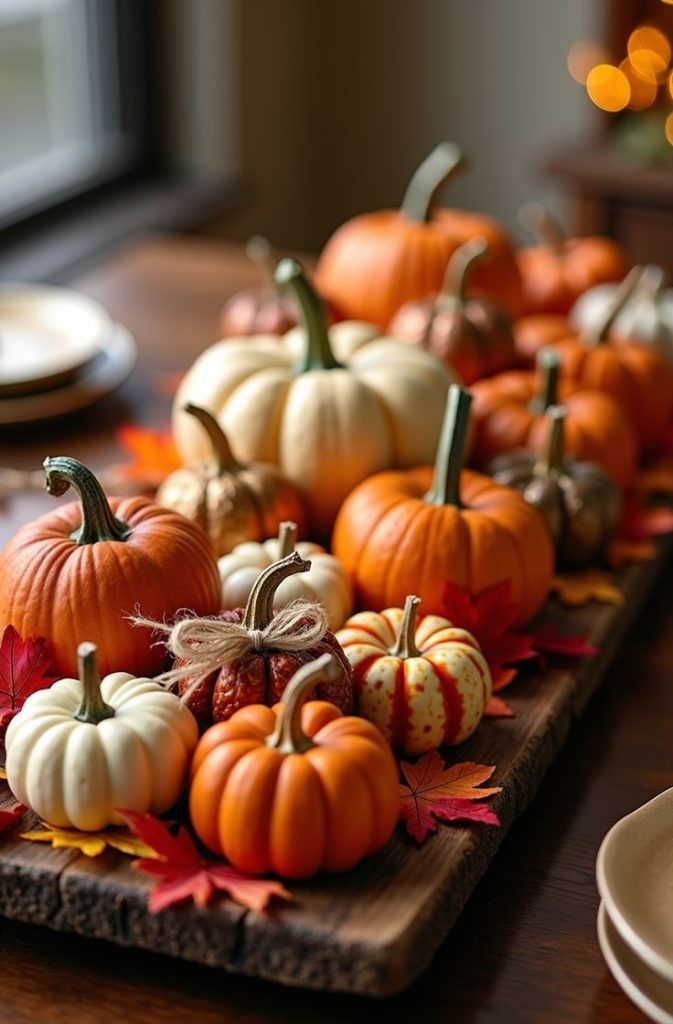
Picture this: a cozy little pumpkin patch right on your table. This centerpiece uses mini pumpkins and gourds to create a harvest-inspired display that’s charming and not too scary. It’s great for all ages and adds a warm, autumnal feel to your setup.
Materials You’ll Need
- 10-15 mini pumpkins or gourds (real or faux)
- Faux autumn leaves (red, orange, yellow)
- Twine or ribbon
- A wooden tray or platter (about 12-18 inches long)
How to Make It
- Place your wooden tray in the center of your table. It’s your base, so make sure it’s sturdy.
- Arrange the mini pumpkins and gourds on the tray. Mix sizes and shapes for a natural look. Stack some for height.
- Scatter faux leaves around the base of the pumpkins. Tuck them in to fill gaps.
- Tie twine or ribbon around a few pumpkins in simple bows. This adds texture and charm.
Time and Cost
- Time: 15 minutes
- Cost: Under $20 (check dollar stores or local markets for pumpkins and leaves)
Variations
Want to add a little glow? Carve out a few mini pumpkins and pop in LED tea lights. For a fancier look, paint some pumpkins in metallic colors like gold or silver. You can also swap the tray for a woven basket for a different vibe.
Tips
If you use real pumpkins, they’ll last a few weeks. Spray them with a clear varnish to keep them fresh longer. If kids are around, make sure the tray is stable so nothing topples over. This setup is super low-maintenance and reusable for Thanksgiving too!
2. Spider Web Branches
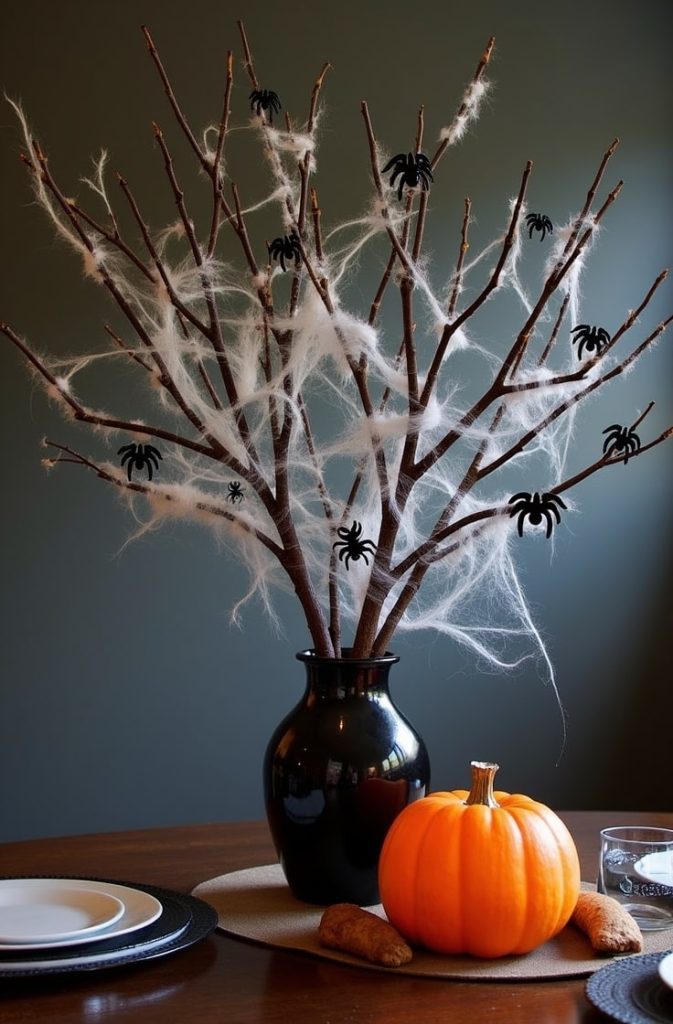
This centerpiece brings the haunted forest to your table. Bare branches draped with spooky spider webs and creepy-crawly plastic spiders create an eerie but approachable vibe. It’s simple to make and looks amazing under dim lighting.
Materials You’ll Need
- Dry branches (grab them from your yard or a craft store)
- White cotton webbing (the stretchy kind works best)
- Plastic spiders (small and medium sizes)
- A vase or weighted base (to hold the branches)
How to Make It
- Stick your branches in the vase. Add rocks or sand to the base to keep it steady.
- Stretch the cotton webbing over the branches. Pull it thin to look like real spider webs. Don’t overdo it—less is more.
- Attach plastic spiders to the webs with hot glue or string. Scatter them unevenly for a natural effect.
- Place the vase in the center of your table. Adjust branches for balance.
Time and Cost
- Time: 20 minutes
- Cost: $10-15 (branches are free if you forage; webbing and spiders are cheap at craft stores)
Variations
For extra flair, mix in black feathers or tiny bat figurines. Want a nighttime glow? Use glow-in-the-dark webbing or paint the spiders with glow paint. You can also spray-paint the branches black for a darker look.
Tips
Make sure the vase is heavy enough so the branches don’t tip over. If kids are joining the party, skip tiny spiders that could be a choking hazard. This centerpiece is lightweight and easy to store for next year.
3. Fall Foliage Cauldron
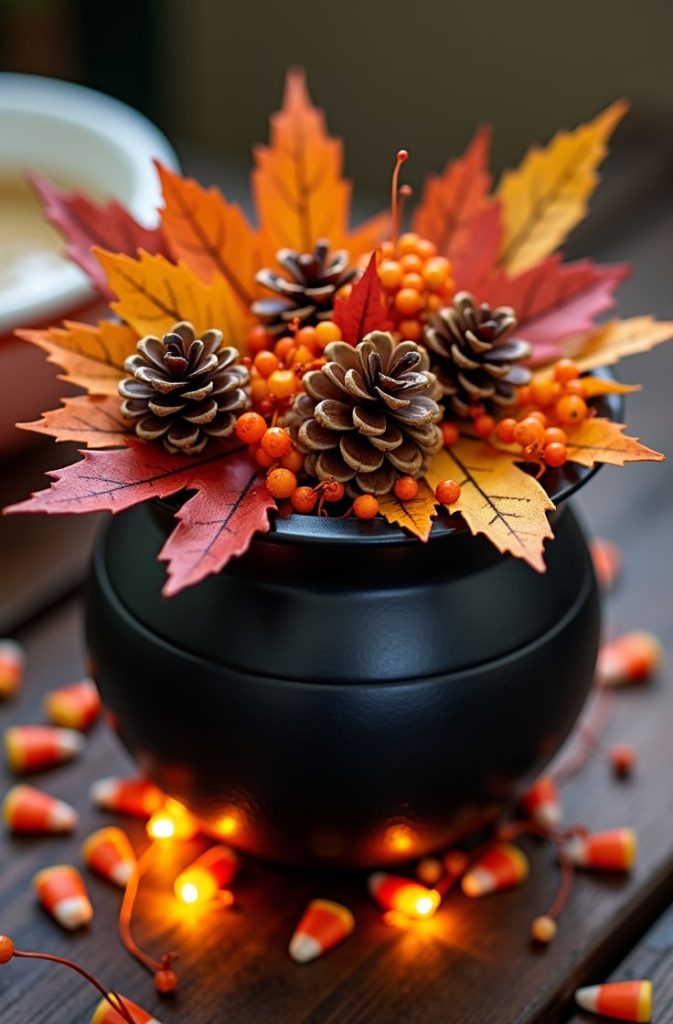
Imagine a witch stirring a brew of autumn leaves! This centerpiece uses a small cauldron filled with colorful foliage, pinecones, and faux berries. It’s a fun nod to Halloween magic with a natural twist.
Materials You’ll Need
- Mini cauldron (plastic or metal, about 6-8 inches wide)
- Assorted faux foliage (leaves, ferns, berries)
- Pinecones (small to medium)
- Hot glue gun
- Optional: A small sign that says “Witch’s Harvest”
How to Make It
- Fill the cauldron halfway with faux foliage. Mix colors for a vibrant look.
- Glue pinecones and berries on top of the leaves. Arrange them so they spill over the edges slightly.
- If you’re using a sign, write “Witch’s Harvest” on a small piece of cardstock. Glue it to a stick and insert it into the cauldron.
Time and Cost
- Time: 10 minutes
- Cost: $15 (cauldrons are affordable at party stores; foliage is reusable)
Variations
For a playful touch, toss in some candy corn or gummy worms as “ingredients.” If you want a bold look, paint the cauldron neon green or purple. Add battery-operated string lights around the base for a glowing, magical effect.
Tips
If you’re using a real cauldron, make sure it’s clean and food-safe if you add edibles. Keep the centerpiece away from open flames. This one’s quick to assemble and perfect for a last-minute setup.
4. Mossy Skull Terrarium
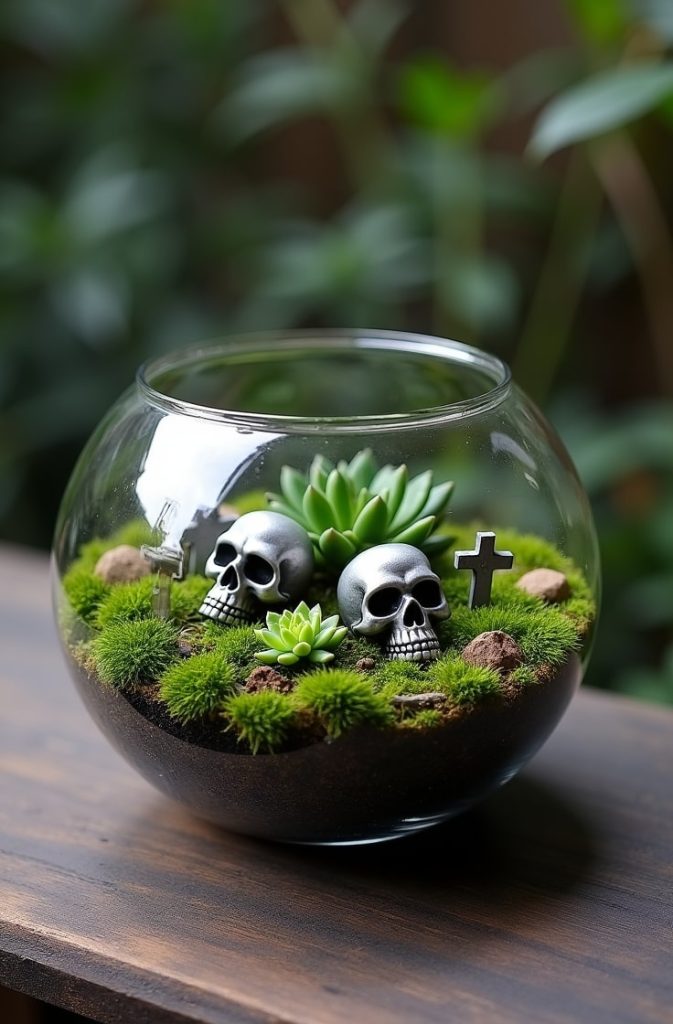
This centerpiece is like a tiny haunted graveyard in a glass bowl. Layers of moss, small skulls, and faux succulents create a spooky yet earthy scene that’s sure to spark conversation.
Materials You’ll Need
- Glass bowl or jar (8-10 inches wide)
- Craft moss (green or gray)
- Plastic skulls (small, about 1-2 inches)
- Faux succulents
How to Make It
- Spread a layer of moss at the bottom of the glass bowl. Make it uneven for a natural look.
- Place plastic skulls and succulents on the moss. Arrange them like a miniature landscape.
- Add a thin layer of moss on top to tie it together. Leave some skulls partially visible for effect.
Time and Cost
- Time: 25 minutes
- Cost: $20-25 (glass bowls and moss are pricier, but reusable)
Variations
For a magical touch, weave in fairy lights or sprinkle colored sand for contrast. If you want it to last longer, use real succulents (but water sparingly). You can also add tiny tombstones for a graveyard vibe.
Tips
Keep this away from heat sources if you use real plants, as they can wilt. Dust the moss regularly to keep it looking fresh. This centerpiece is a bit more delicate, so place it where it won’t get bumped.
Supernatural Themes
These centerpieces lean into ghosts, witches, and monsters. They’re perfect for adding a thrilling, spooky vibe with lights, fabrics, and fun props.
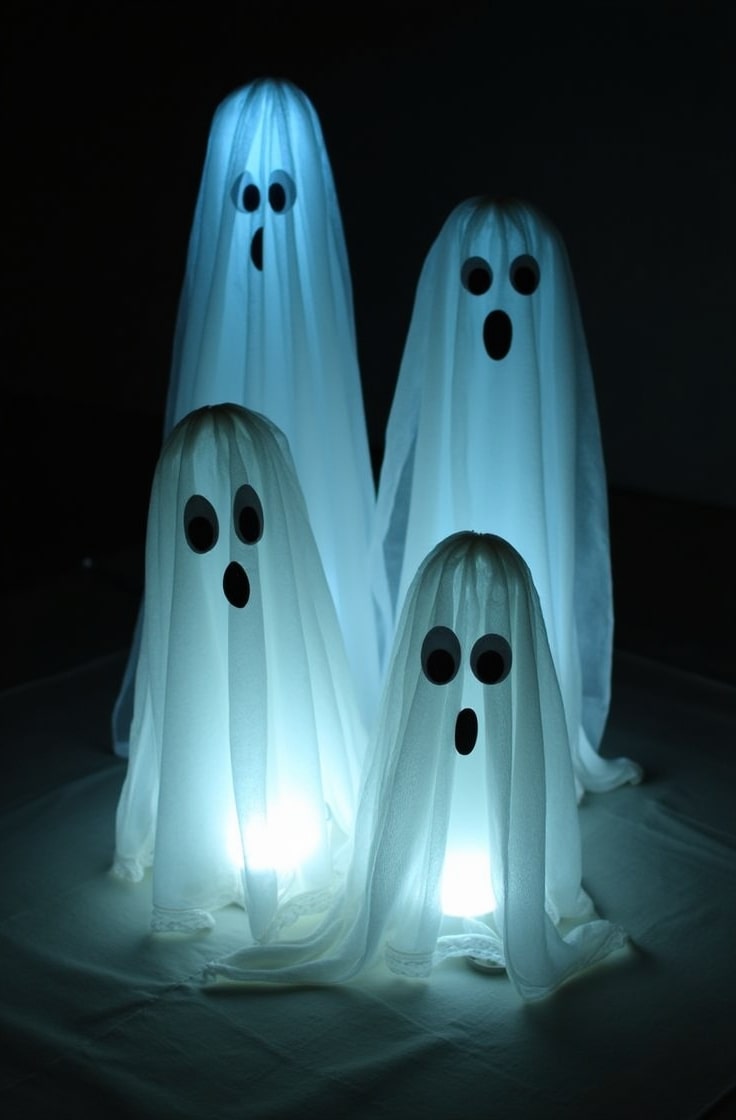
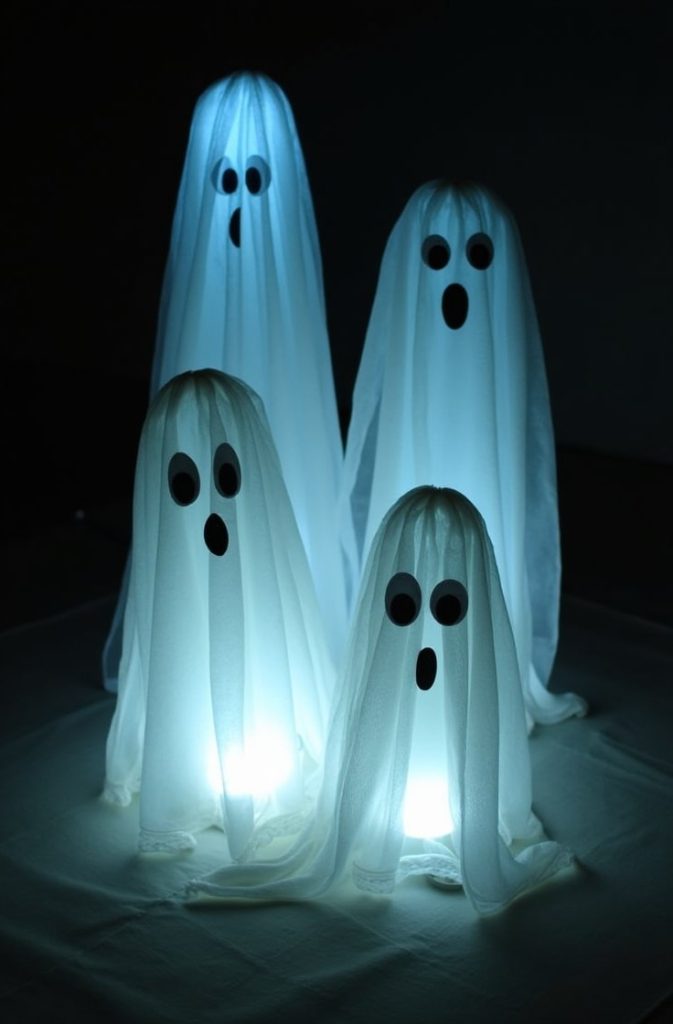
5. Floating Ghost Candles

Want to make your guests gasp? These cheesecloth ghosts seem to float above LED candles, creating a ghostly glow. They’re eerie but easy to make, and they look amazing in a dark room.
Materials You’ll Need
- Cheesecloth (2-3 yards)
- Starch spray (to stiffen the fabric)
- LED pillar candles (3-5, depending on table size)
- Wire or dowels (to shape the ghosts)
How to Make It
- Cut cheesecloth into squares (about 12×12 inches). You’ll need one per ghost.
- Bend wire or dowels into a loose ball shape to form the ghost’s head. Leave a long end to stick into the candle base.
- Spray cheesecloth with starch. Drape it over the wire form to create a ghost shape. Let it dry completely (about 1 hour).
- Remove the wire and place the stiffened ghost over an LED candle. Arrange several on your table.
Time and Cost
- Time: 30 minutes (plus drying time)
- Cost: $15 (cheesecloth and LEDs are budget-friendly)
Variations
For a kid-friendly version, glue googly eyes on the ghosts. Use colored LED candles (purple or green) for a different mood. You can also make larger ghosts for a bigger impact.
Tips
Always use flameless LED candles to avoid fire risks. If you’re short on time, skip the starch and let the cheesecloth drape loosely—it still looks spooky. Store the ghosts carefully to reuse next year.
6. Witch’s Hat Stack
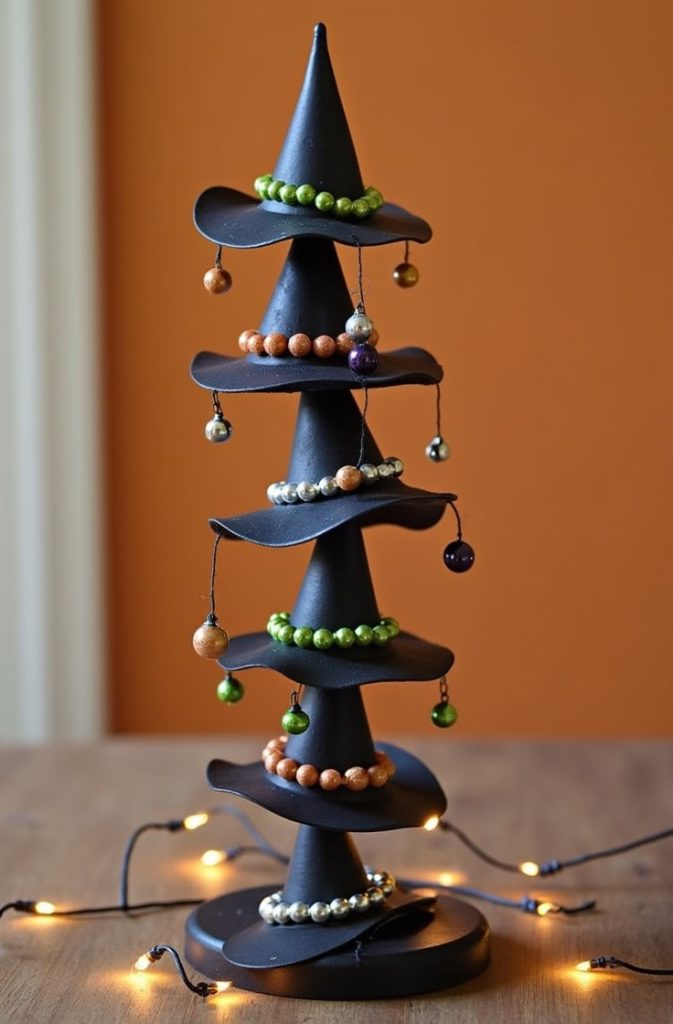
This whimsical centerpiece stacks mini witch hats into a playful tower. It’s quirky, eye-catching, and a great way to channel Halloween magic.
Materials You’ll Need
- 3-5 mini witch hats (craft or party store)
- Wooden dowel (about 12 inches long)
- Beads or charms (for decoration)
- Black paint
How to Make It
- Paint the wooden dowel black. Let it dry completely.
- Thread the dowel through the center of each witch hat. Stack them unevenly for a fun look.
- Glue the hats in place to secure them.
- Hang beads or charms from the hat brims with string or hot glue.
Time and Cost
- Time: 20 minutes
- Cost: $10 (mini hats are cheap; dowels are reusable)
Variations
Fill the hats with small candies for a treat-filled centerpiece. Add black feathers to mimic a raven’s look. For a modern twist, use metallic or glittery hats.
Tips
Make sure the dowel is anchored in a heavy base to prevent tipping. This one’s sturdy and great for small tables. Keep it away from kids who might pull it down.
7. Bat Silhouette Vase
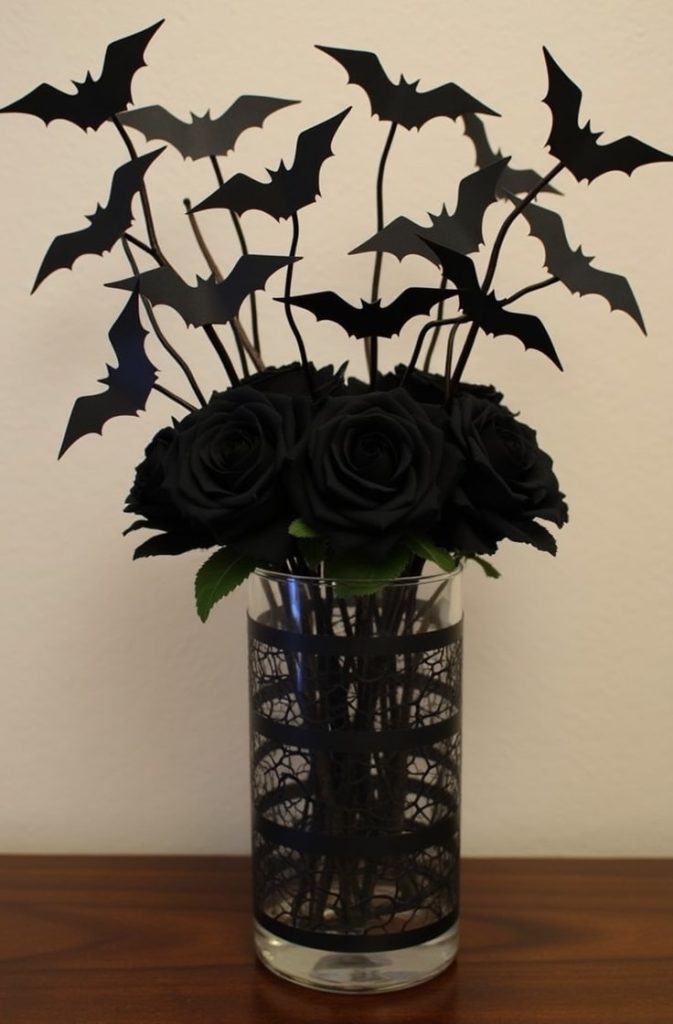
Bats are a Halloween classic, and this centerpiece makes them shine. A clear vase wrapped with bat cutouts and filled with dark flowers or branches creates a spooky yet elegant look.
Materials You’ll Need
- Clear vase (8-10 inches tall)
- Black construction paper
- Scissors
- Double-sided tape
- Faux black roses or branches
How to Make It
- Cut bat shapes from black construction paper. Aim for 5-10 bats in different sizes.
- Stick the bats to the outside of the vase with double-sided tape. Space them randomly.
- Fill the vase with black roses or branches. Arrange them for a dramatic effect.
Time and Cost
- Time: 15 minutes
- Cost: $12 (construction paper and tape are super affordable)
Variations
Use glow-in-the-dark paper for the bats to make them pop at night. Add plastic spiders or cobwebs for extra creepiness. Swap roses for orange flowers for a bolder color scheme.
Tips
Choose a shatterproof vase if kids or pets are around. This centerpiece is quick to make and easy to store. It’s also versatile enough for other fall events.
8. Skeleton Hand Server
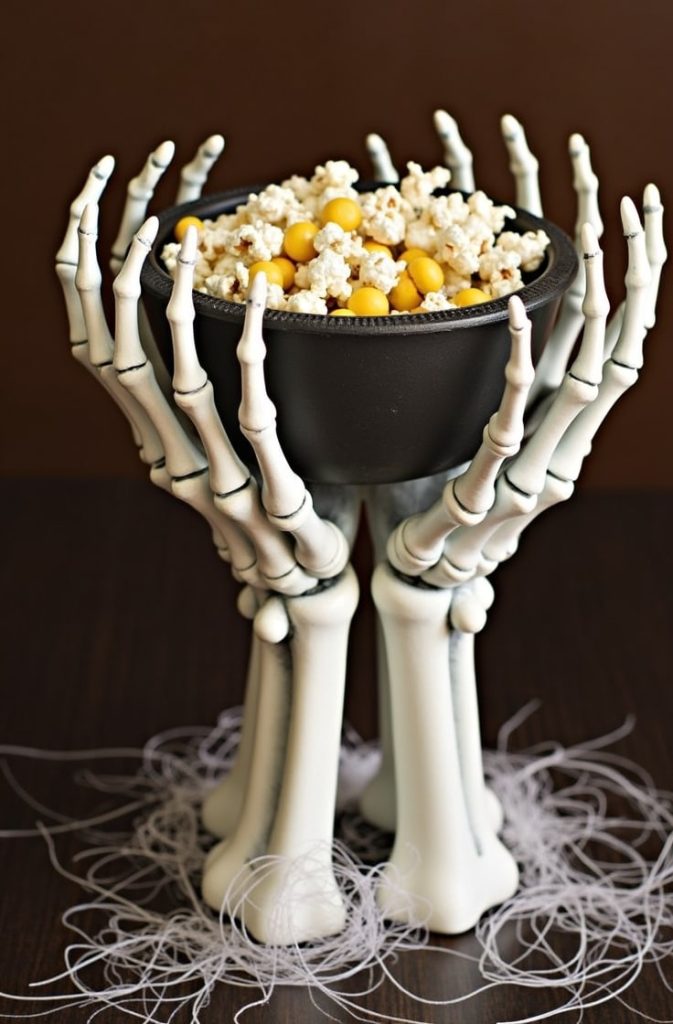
This creepy centerpiece doubles as a functional serving dish. Plastic skeleton hands hold a bowl or platter, making it both spooky and practical.
Materials You’ll Need
- Faux skeleton hands (2-4, depending on bowl size)
- Small bowl or platter (6-8 inches wide)
- Hot glue gun
- Halloween-themed fillers (like plastic eyeballs or candy)
How to Make It
- Glue skeleton hands to the edges of the bowl. Position them like they’re grabbing it.
- Fill the bowl with Halloween fillers, like plastic eyeballs or wrapped candies.
- Place the bowl in the center of your table. Angle the hands to look like they’re rising from the tablecloth.
Time and Cost
- Time: 10 minutes
- Cost: $18 (skeleton hands can be found at party stores)
Variations
Use the bowl to hold snacks like popcorn or chips. Paint the hands silver or gold for a chic twist. Add cobwebs around the base for extra spookiness.
Tips
If you’re serving food, use food-safe glue or ensure the hands don’t touch the edibles. This centerpiece is sturdy but keep it away from table edges to avoid spills.
9. Haunted Mirror Frame

This centerpiece adds a touch of mystery. A small mirror with dripping “blood” paint and spooky stickers reflects your table’s lights in an eerie way.
Materials You’ll Need
- Small mirror (8-10 inches, framed)
- Red paint (acrylic works well)
- Halloween stickers (ghosts, bats, or skulls)
- Frame (wood or plastic)
How to Make It
- Drip red paint along the top edge of the frame. Let it run down naturally to look like blood.
- Stick Halloween stickers around the frame. Place them unevenly for a haunted effect.
- Prop the mirror in the center of your table. Angle it to catch the light.
Time and Cost
- Time: 25 minutes
- Cost: $20 (mirrors and paint are affordable at craft stores)
Variations
Add LED backlighting behind the mirror for a glowing effect. Etch spooky phrases like “Beware” onto the glass with a craft knife. Use glow-in-the-dark stickers for nighttime impact.
Tips
Clean the mirror after the party for reuse. Keep it away from edges where it could get knocked over. This one’s great for adult parties with a gothic vibe.
Edible and Fun Creations
These centerpieces are interactive and delicious, perfect for kid-friendly parties or as decor that doubles as a snack.
10. Candy Corn Tower
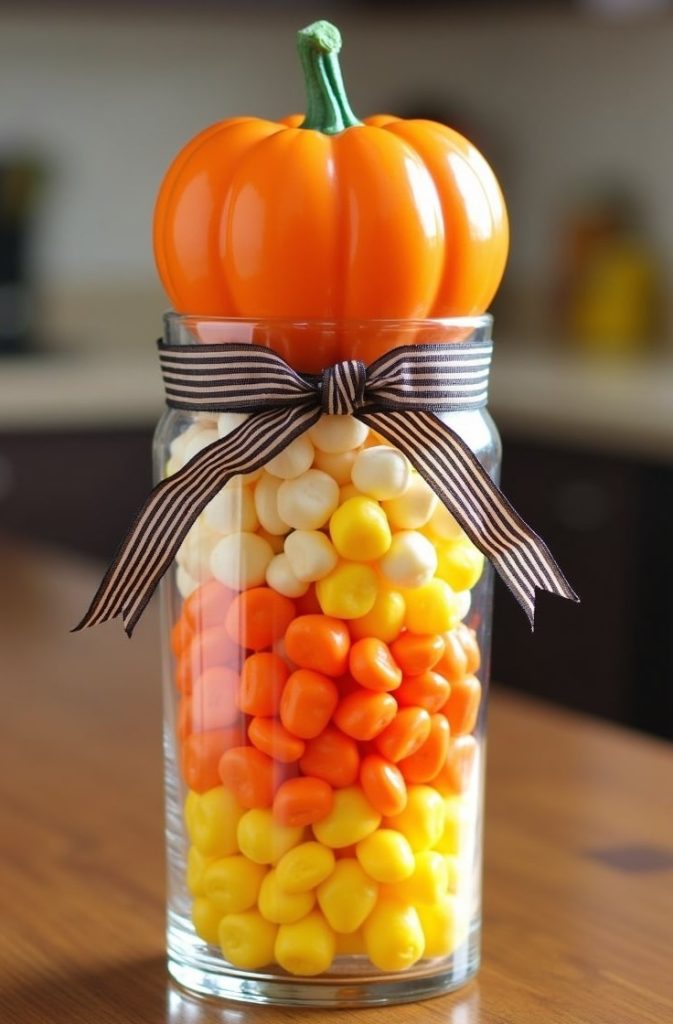
Nothing says Halloween like candy corn! This centerpiece stacks layers of candy corn in a clear vase, topped with a mini pumpkin for a sweet, colorful display.
Materials You’ll Need
- Clear vase (6-8 inches tall)
- Bags of candy corn (2-3 pounds)
- Mini pumpkin (real or faux)
- Ribbon (optional)
How to Make It
- Pour candy corn into the vase, layering by color (yellow, orange, white) for a neat look.
- Place the mini pumpkin on top of the candy. Press it gently to secure it.
- Tie a ribbon around the vase for a festive touch.
Time and Cost
- Time: 10 minutes
- Cost: $15 (candy corn is cheap in bulk)
Variations
Mix in chocolates or gummy candies for variety. Use a Halloween-themed vase with skull or bat designs. Add a small sign that says “Take One” to invite guests to dig in.
Tips
Seal the vase with a lid or plastic wrap to keep the candy fresh. Place it where kids can’t tip it over. This one’s a crowd-pleaser and super easy to assemble.
11. Monster Eyeball Fruit Bowl
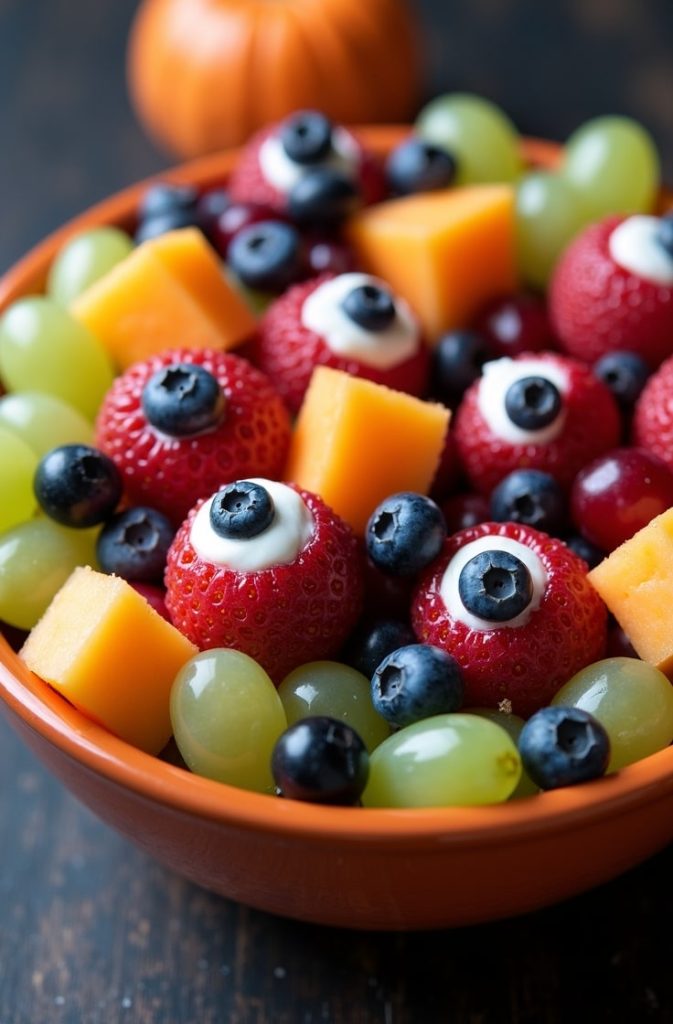
This healthy centerpiece is spooky and fun. A bowl of fruit with “eyeballs” made from lychee and blueberries will delight kids and adults alike.
Materials You’ll Need
- Fresh fruit (grapes, melon, berries)
- Lychee (canned or fresh, about 10-12)
- Blueberries (1 pint)
- Black olives (for pupils)
How to Make It
- Stuff a blueberry into each lychee to create an eyeball effect.
- Cut small pieces of black olive and place them in the center of each blueberry for pupils.
- Arrange the eyeballs in a bowl with other fruits. Scatter them for a creepy look.
Time and Cost
- Time: 15 minutes
- Cost: $20 (lychee can be pricier, but fruit is affordable)
Variations
Make the eyeballs with gelatin for a jiggly texture. Add candy eyes for a sweeter version. Mix in kiwi or mango for extra color.
Tips
Keep the bowl refrigerated until serving to stay fresh. Use a shallow bowl so the eyeballs stand out. This one’s great for healthy Halloween parties.
12. Witch’s Brew Punch Bowl
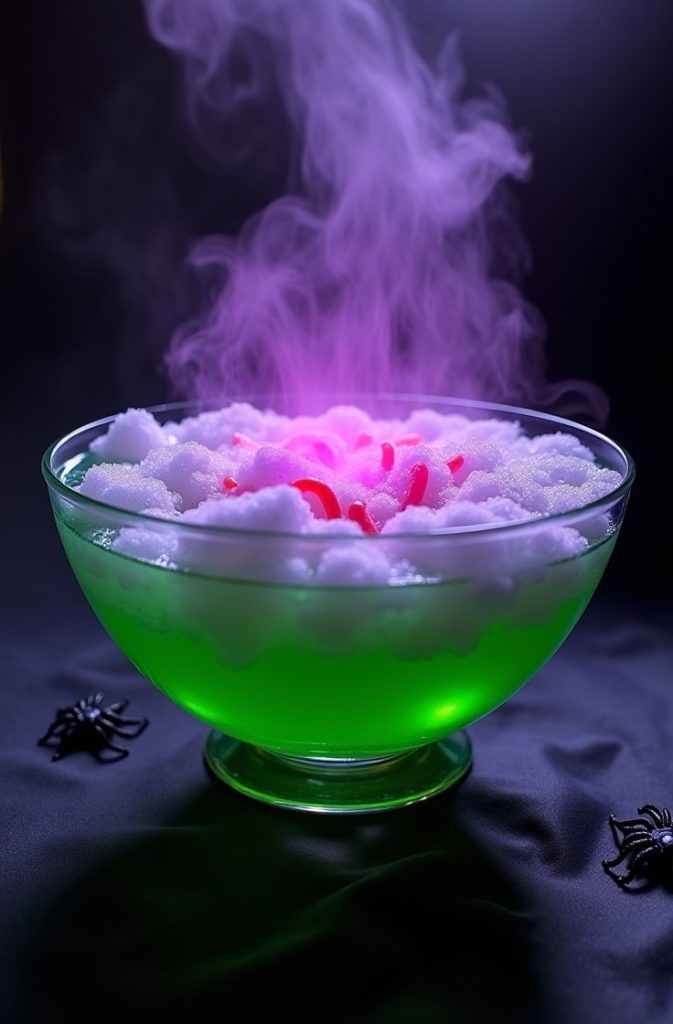
This centerpiece is a showstopper. A punch bowl with dry ice fog and floating gummy worms looks like a witch’s potion and doubles as a drink station.
Materials You’ll Need
- Large bowl (10-12 inches wide)
- Punch ingredients (juice, soda, etc.)
- Dry ice (1-2 pounds)
- Gummy worms or candies
How to Make It
- Mix your punch in the bowl. Use a bright color like green or purple.
- Toss in gummy worms or candies to float on top.
- Use tongs to add small pieces of dry ice just before serving. It’ll create a foggy effect.
Time and Cost
- Time: 20 minutes
- Cost: $25 (dry ice is the main expense)
Variations
Make a non-alcoholic version for kids. Add food coloring for a neon glow. Use gummy spiders or eyeballs for different “potions.”
Tips
Handle dry ice with tongs and gloves to avoid burns. Keep it away from kids. Serve the punch quickly to enjoy the fog effect. This one’s perfect for dramatic entrances.
13. Pumpkin Pie Stand

This centerpiece is a delicious dessert display. A tiered stand with mini pumpkin pies or cookies, decorated with chocolate spiders, is both festive and tasty.
Materials You’ll Need
- Tiered tray (2-3 levels)
- Mini pumpkin pies or cookies (12-15 pieces)
- Chocolate (melted, for piping spiders)
How to Make It
- Bake or buy mini pumpkin pies or cookies. Arrange them on the tiered tray.
- Melt chocolate in a piping bag. Pipe spider shapes (body and legs) on each pie or cookie.
- Let the chocolate set for 10 minutes before placing the tray on the table.
Time and Cost
- Time: 30 minutes (plus baking time)
- Cost: $30 (baking supplies add up, but store-bought works too)
Variations
Use vegan pie recipes for dietary needs. Drizzle caramel over the pies for extra sweetness. Swap spiders for candy pumpkins or ghosts.
Tips
Provide napkins for easy cleanup. Place the tray on a stable surface to avoid tipping. This centerpiece is a hit for dessert lovers and looks stunning.
Wrapping It Up
There you have it—13 Halloween table centerpiece ideas to make your party unforgettable! From rustic pumpkin patches to ghostly candles and edible treats, there’s something here for every style and budget.
Mix and match these ideas to create a table that’s uniquely yours. A few extra tips: consider your table size and guest count when choosing centerpieces. Shop at dollar stores or thrift shops to save money.
For eco-friendly options, use reusable materials like glass vases or real plants. If kids are involved, stick to non-toxic supplies and avoid small parts.
I hope these ideas spark your creativity and make your Halloween celebration a hit. Have fun crafting, and let me know which one you try first!

Emily Harper is a kitchen decor expert and interior designer with a passion for creating stylish, functional spaces. As a busy mom, she understands the importance of a kitchen that works for both family life and design. With 6 years of experience, Emily specializes in transforming kitchens into inviting, practical spaces. She’s known for her ability to blend trends with everyday needs, helping families create kitchens that feel like the heart of the home.