11 Halloween Wreath Ideas for a Perfect Spooky Welcome
I’ve always loved how a Halloween wreath can instantly set the tone for the season. It’s one of the easiest ways to make your front door or entryway feel festive.
So I’ve rounded up 11 Halloween wreath ideas that I think you’ll really enjoy—some are spooky, some are cute, and all of them are easy to pull off.

No matter your budget or crafting experience, you’ll find a style that works for your space. Let’s jump in and start making your Halloween decor stand out.
The 11 Halloween Wreath Ideas
I’ve crafted this list to suit every taste and skill level. Each wreath idea includes a description, materials, difficulty, cost, and styling tips. Let’s make something amazing together!
1. Classic Pumpkin Wreath

Nothing says Halloween like pumpkins! This classic pumpkin wreath is warm, inviting, and perfect for a family-friendly vibe. It’s packed with mini pumpkins and autumn leaves, giving your door that quintessential fall feel.
Materials: You’ll need a foam wreath form, mini pumpkins (real or faux), hot glue, burlap ribbon, and some faux fall foliage like maple leaves. Grab these at a craft store or online.
Difficulty: Beginner. If you can handle a hot glue gun, you’re golden.
Cost: About $15–$30, depending on whether you use real or faux pumpkins.
Styling Tips: Wrap the foam form in burlap for a rustic base. Glue on the pumpkins and leaves in a balanced pattern. Want to make it glow? Add LED string lights for a cozy, magical touch. This wreath looks amazing on a white or wooden door, welcoming trick-or-treaters with warmth.
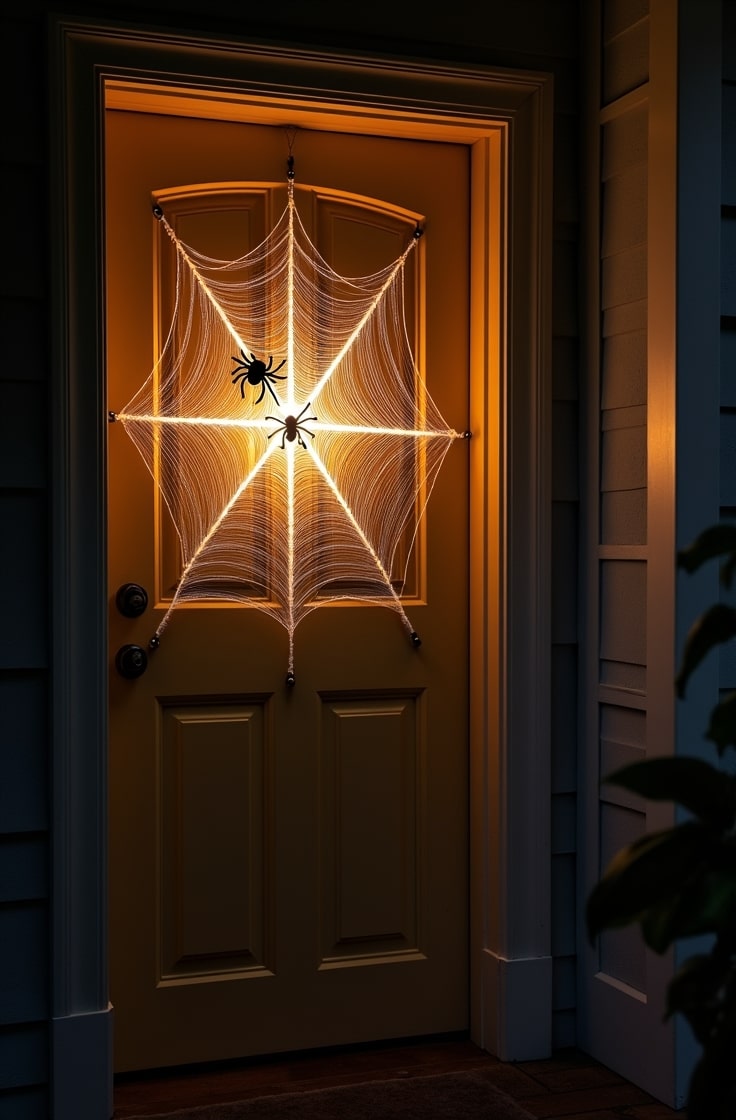
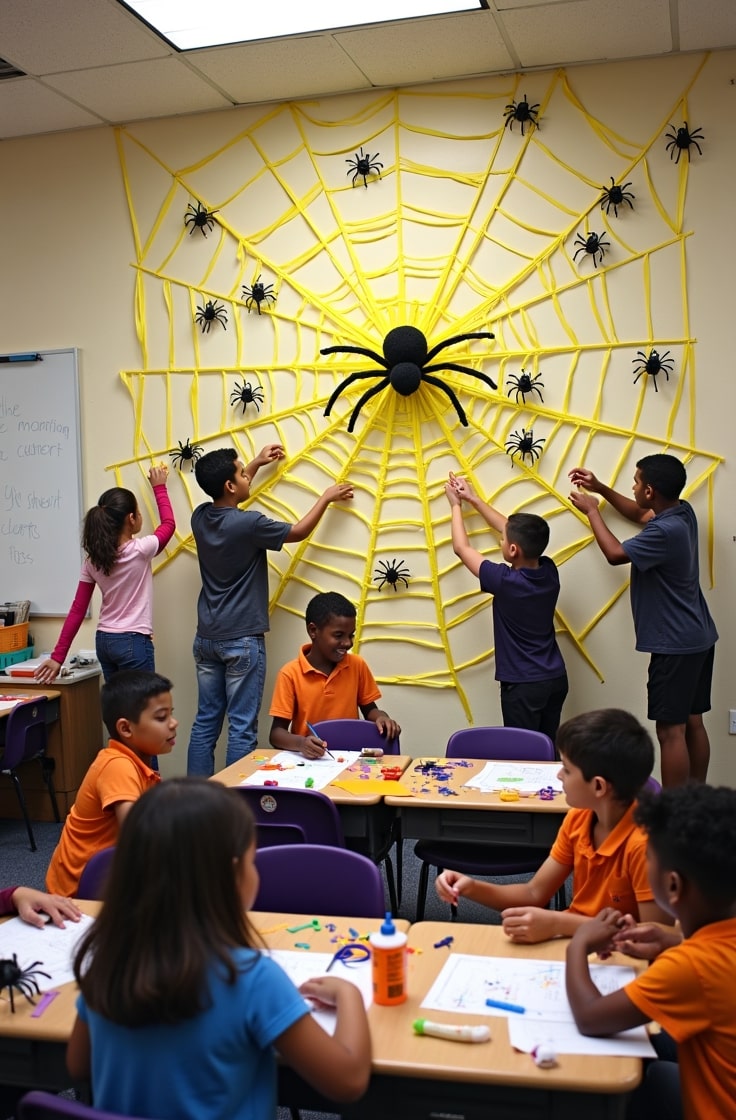
2. Spooky Spider Web Wreath

Ready to give everyone the creeps? This spider web wreath is simple but oh-so-spooky. It’s built around a faux web with plastic spiders crawling all over it. Perfect for a haunted house vibe!
Materials: Grab an embroidery hoop, white yarn, plastic spiders, black spray paint, and a ribbon for hanging. Most of these are at dollar stores or craft shops.
Difficulty: Beginner. You’re mostly wrapping yarn and gluing spiders.
Cost: $10–$20. Super budget-friendly!
Styling Tips: Paint the hoop black for a sleek base. Wrap yarn in a web pattern, then glue on spiders of different sizes. Hang this in a window with a large spider centerpiece for maximum impact. Add a red ribbon for a pop of color. It’s creepy yet approachable, perfect for all ages.
3. Gothic Black Feather Wreath

Want something elegant yet eerie? This gothic black feather wreath is all about moody sophistication. It’s perfect for those who love a chic Halloween aesthetic.
Materials: You’ll need a foam wreath, black feathers, silver skull decorations, and black satin ribbon. Check craft stores or online for feathers and skulls.
Difficulty: Intermediate. Arranging feathers takes a bit of patience.
Cost: $20–$40, as feathers can get pricey.
Styling Tips: Cover the wreath in feathers for a lush, full look. Add silver skulls for a touch of drama. A black satin ribbon adds elegance. For extra flair, glue on purple gemstones. This wreath shines on a black or dark-colored door. It’s perfect for a gothic-themed Halloween party.
4. Candy Corn Wreath

Who doesn’t love candy corn? This playful wreath brings the iconic Halloween treat to life with bright, cheerful colors. It’s a hit with kids and adults alike.
Materials: Get a foam wreath, ribbons in yellow, orange, and white, hot glue, and small candy props (optional). Ribbons are easy to find at craft stores.
Difficulty: Beginner. It’s all about wrapping and gluing ribbon.
Cost: $15–$25. Ribbons are affordable, and you can reuse leftovers.
Styling Tips: Wrap the wreath in layers to mimic candy corn’s colors: yellow at the bottom, orange in the middle, white at the top. Add mini candy props for fun. A “Trick or Treat” sign in the center makes it extra festive. This wreath is perfect for a kid-friendly porch or classroom.
5. Skeleton Hands Wreath

This one’s for the thrill-seekers! The skeleton hands wreath features plastic hands reaching out, creating a chilling graveyard vibe. It’s spooky but not too scary.
Materials: You’ll need a grapevine wreath, plastic skeleton hands, black spray paint, moss, and twine. Check Halloween sections at craft stores.
Difficulty: Intermediate. Positioning the hands takes some finesse.
Cost: $20–$35. Skeleton hands can vary in price.
Styling Tips: Spray-paint the wreath black for a dark base. Glue on skeleton hands in a circular pattern, like they’re emerging from the grave. Add moss for texture and a faux crow for extra spookiness. This wreath looks amazing on a rustic wooden door.
6. Witch Hat Wreath

Double, double, toil and trouble! This witch hat wreath is whimsical and magical, perfect for a witchy Halloween theme. Mini witch hats steal the show.
Materials: Grab a straw wreath, mini witch hats, purple and green tulle, and star-shaped sequins. Look for hats online or at party stores.
Difficulty: Beginner. It’s mostly layering and gluing.
Cost: $15–$30. Tulle and sequins keep costs low.
Styling Tips: Wrap the straw wreath in tulle for a fluffy base. Glue on mini witch hats in a playful arrangement. Sprinkle star sequins for sparkle. Hang this with a broomstick prop on your porch for a full witchy effect. It’s fun and enchanting!
7. Ghostly Tulle Wreath

This ghostly tulle wreath is soft, ethereal, and just a little spooky. It’s perfect for a friendly Halloween vibe that kids will love.
Materials: You’ll need a foam wreath, white tulle, felt ghost cutouts, googly eyes, and a ribbon. Tulle is super affordable at craft stores.
Difficulty: Beginner. Tying tulle is easy and forgiving.
Cost: $10–$20. This one’s a budget star!
Styling Tips: Wrap the wreath in white tulle for a cloudy effect. Glue on felt ghosts with googly eyes for a cute touch. Add battery-powered fairy lights to make it glow at night. This wreath is perfect for indoor spaces like a kid’s room or entryway.
8. Bat Swarm Wreath

Bats are a Halloween classic, and this bat swarm wreath is dramatic and bold. It’s like a flock of bats circling your door!
Materials: Get a grapevine wreath, black foam bats, red rhinestone eyes, and black paint. Foam bats are easy to cut out or buy pre-made.
Difficulty: Intermediate. Positioning bats takes some planning.
Cost: $20–$35. Foam and rhinestones are affordable.
Styling Tips: Paint the wreath black for a seamless look. Glue bats in a swirling pattern, like they’re flying. Add red rhinestone eyes for a creepy glow. This wreath is perfect for a vampire-themed Halloween party. Hang it indoors for a bold statement.
9. Rustic Twig and Skull Wreath

Love a natural, earthy vibe? This rustic twig and skull wreath combines twigs and small skulls for a haunting, forest-inspired look.
Materials: Gather twigs, a foam wreath, plastic skulls, hot glue, and burlap ribbon. Twigs can be collected from your yard!
Difficulty: Intermediate. Arranging twigs takes time.
Cost: $15–$30. Free twigs keep costs down.
Styling Tips: Glue twigs onto the foam wreath for a natural base. Add small skulls for a spooky touch. Wrap burlap ribbon for texture. Dried leaves or moss enhance the forest feel. This wreath is perfect for an outdoor porch or rustic home.
10. Glittery Eyeball Wreath

This quirky eyeball wreath is creepy and fun! Covered in glittery ping-pong ball eyeballs, it’s sure to turn heads.
Materials: You’ll need a foam wreath, ping-pong balls, paint, glitter, googly eyes, and hot glue. Ping-pong balls are cheap at sporting goods stores.
Difficulty: Intermediate. Painting and glittering takes patience.
Cost: $15–$25. Most items are budget-friendly.
Styling Tips: Paint ping-pong balls in neon colors, then add glitter and googly eyes. Glue them tightly onto the wreath for a full effect. This wreath pops on a porch with other quirky decorations. It’s a conversation starter!
11. Elegant Crow Wreath

For a mysterious, sophisticated look, this crow wreath is perfect. Black crows and dark florals create a hauntingly beautiful vibe.
Materials: Grab a grapevine wreath, faux crows, black roses, purple ribbon, and hot glue. Look for crows at craft or Halloween stores.
Difficulty: Intermediate. Arranging florals and crows takes care.
Cost: $25–$45. Crows and roses can be pricier.
Styling Tips: Glue black roses onto the grapevine wreath for a lush base. Add crows in dynamic poses. A purple velvet ribbon adds elegance. This wreath is ideal for gothic or Victorian-themed decor. Hang it on a dark door for maximum impact.
Getting Started with Your Halloween Wreath
Where to Find Materials
Start by gathering your supplies. Craft stores like Michaels and Hobby Lobby carry foam wreath bases, ribbons, and seasonal props. Dollar stores are great for budget-friendly items like plastic spiders, googly eyes, or faux webs. For convenience, check Amazon for extras like mini pumpkins or witch hats. Want to keep things eco-friendly? Thrift stores often have ribbons, and you can even use twigs or branches from your yard.
Tools You’ll Need
- Hot glue gun
- Scissors
- Spray paint (optional)
Make sure to work in a well-ventilated area if you’re painting, and keep a damp cloth nearby for any glue mishaps.
Step-by-Step: How to Make a Halloween Wreath
Step 1: Choose Your Base
Foam wreath forms are easiest to work with, but you can also use grapevine wreaths or wire frames, depending on your look.
Step 2: Prep the Base
If you want a colored background, spray paint your wreath form and let it dry completely. This adds depth to the final design.
Step 3: Wrap the Wreath
Wrap the entire base with fabric, ribbon, or mesh. Secure the ends with hot glue or pins.
Step 4: Arrange Your Decorations
Lay out your decorations before gluing. Play with placement—group similar items (like pumpkins or spiders) in clusters or space them out evenly.
Step 5: Glue Everything in Place
Once you’re happy with the layout, start attaching pieces using hot glue. Press firmly and hold each piece for a few seconds to secure it.
Step 6: Add Final Details
This is where you can layer on extras—think faux cobwebs, glitter, feathers, or LED lights. A bold ribbon or bow also makes a great focal point.
Step 7: Hang It Up
Use a hook, command strip, or ribbon loop to hang your wreath. Test that it’s secure before stepping back to admire your work.
Creative Tips
Feel free to mix and match ideas. Add spiders to a pumpkin wreath or sprinkle glitter on a skeleton-themed one for extra flair. Combining elements is a great way to make your wreath feel unique.
How to Store After Halloween
To keep your wreaths in good shape for next year:
- Wrap them in tissue paper or bubble wrap
- Store in a cool, dry place to avoid fading or damage
- Use a sturdy box for added protection
A little care goes a long way—your wreath will be ready to hang again next Halloween.
Styling and Display Ideas
Outdoor Display
- Front Door: A classic spot that makes an immediate statement.
- Weatherproofing Tips:
- Use faux materials instead of real pumpkins or leaves.
- Spray with a clear sealant to protect against rain and humidity.
- Use a sturdy wreath hanger or heavy-duty command hooks to keep it in place, even on windy days.
- Use faux materials instead of real pumpkins or leaves.
Indoor Display
- Above the Fireplace: Adds a festive touch to your living room.
- Entryways & Hallways: Great for greeting guests.
- Kids’ Rooms: A ghost-themed tulle wreath adds a fun, not-too-scary vibe.
- Dining Rooms: Gothic feather wreaths bring drama and style to more formal spaces.
Pairing with Decor
- Witch Hat Wreath: Looks great next to a broomstick, cauldron, or spellbook display.
- Bat Swarm Wreath: Pairs well with vampire candles, dark flowers, or red wine glasses for party setups.
Lighting Tips
- Add Glow: Use LED candles or battery-powered fairy lights to create a spooky shimmer.
- Highlight Outdoors: A small spotlight can make your front-door wreath pop after dark.
- Safety First: Stick with battery-powered lights for easy setup and peace of mind.
Conclusion
There you have it—11 Halloween wreath ideas to bring your spooky vision to life!
From the classic pumpkin wreath to the elegant crow wreath, there’s something for every style, budget, and skill level. I hope you’re feeling inspired to grab some supplies and start crafting. These wreaths are more than decor—they’re a way to express your Halloween spirit.
So, what’s next? Pick your favorite wreath and get started! Share your creations on Pinterest or Instagram—I’d love to see what you come up with.
FAQs
Got questions? I’ve got answers! Here are some common ones:
How do I make a wreath weatherproof? Use faux materials like plastic pumpkins or foam bats. Spray your wreath with a clear sealant to protect against rain. Store it indoors during storms to extend its life.
What’s the easiest wreath for beginners? The ghostly tulle or candy corn wreaths are perfect. They involve simple tying and gluing, with no fancy skills needed.
Why isn’t my glue sticking? Make sure surfaces are clean and dry before gluing. Hot glue works best on porous materials like foam or burlap. For slick surfaces like plastic, try a stronger adhesive.
Can I reuse my wreath next year? Absolutely! Store it carefully in a dry, cool place. Wrap delicate elements in tissue paper to prevent damage.
I hope these tips help you create a Halloween wreath that’s the talk of the neighborhood. Happy crafting, and have a spook-tacular Halloween!

Emily Harper is a kitchen decor expert and interior designer with a passion for creating stylish, functional spaces. As a busy mom, she understands the importance of a kitchen that works for both family life and design. With 6 years of experience, Emily specializes in transforming kitchens into inviting, practical spaces. She’s known for her ability to blend trends with everyday needs, helping families create kitchens that feel like the heart of the home.