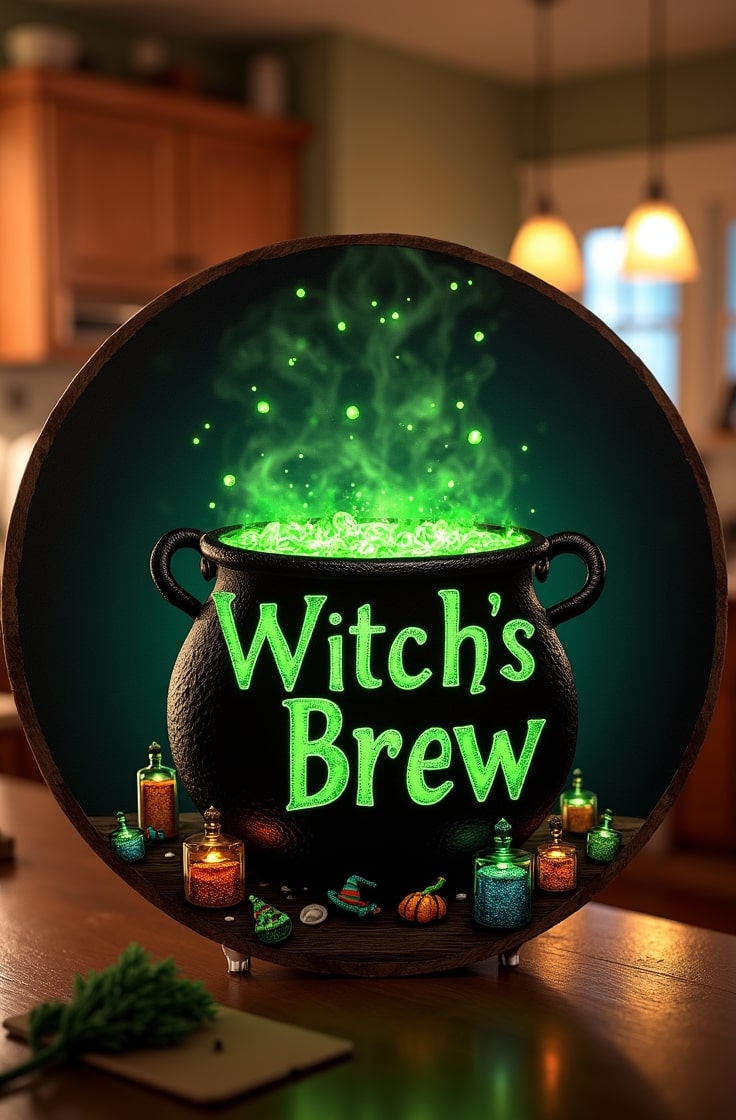
15 Halloween Garland Ideas to Elevate Your Spooky Decor
Halloween garland ideas are a quick way to add charm and character to your seasonal decor.
I’ve rounded up 15 creative styles that can bring your mantel, doorway, or party setup to life—no over-the-top skills required.

From creepy to cute, each idea adds just the right touch of Halloween spirit. I’ve used many of these in my own home over the years, and they always make the space feel festive.
If you’re looking for easy ways to decorate that still feel fun and unique, these garland ideas are a great place to start.
Let’s jump into the details and get your space Halloween-ready.
Table of Contents
- Why Halloween Garlands Are a Must-Have
- 15 Halloween Garland Ideas to Try
- 1. Paper Bat Swarm Garland
- 2. Pumpkin Pom-Pom Garland
- 3. Ghostly Felt Garland
- 4. Spider Web Crochet Garland
- 5. Skull and Bones Garland
- 6. Witch Hat Silhouette Garland
- 7. Autumn Leaves and Pumpkin Garland
- 8. Eyeball Ping-Pong Ball Garland
- 9. Boo-tiful Banner Garland
- 10. Black Cat Silhouette Garland
- 11. Vintage Book Page Garland
- 12. LED-Enhanced Spider Garland
- 13. Dollar Tree Halloween Ornament Garland
- 14. Spooky Balloon Garland
- 15. Tinsel Witch’s Broom Garland
- Step-by-Step Guide to Making Halloween Garland
- Customization and Styling Tips for Halloween Garland Ideas
- Conclusion
- FAQs
Why Halloween Garlands Are a Must-Have
Halloween garlands are simple decorations made from materials like paper, fabric, yarn, or tinsel.
You can hang them across mantels, doorways, stairs, or porches to add a quick festive touch. They’re affordable, easy to customize, and fit any Halloween theme—from playful to spooky.
Most ideas use basic supplies, many of which you may already have at home or can find at budget stores. Each garland in this list includes clear instructions, a materials list, and a difficulty level to help you choose the right project.
Let’s break down the styles and get started with these 15 Halloween garland ideas.
15 Halloween Garland Ideas to Try
I’ve curated 15 garland ideas that cater to every taste, from spooky to sweet. Each one comes with a description, materials list, estimated time, difficulty level, and styling tips to help you nail the look. Let’s get started!
1. Paper Bat Swarm Garland

Picture a flock of black bats fluttering across your window. This paper bat swarm garland is spooky yet simple, perfect for beginners. It creates a dynamic, “flying” effect that screams Halloween.
Materials: Black cardstock, string, scissors, bat template, tape or glue.
Time: 30–45 minutes.
Difficulty: Beginner.
How to Make It: Grab a bat template online (a quick Google search will do). Cut out 20–30 bats from black cardstock. I like to vary the sizes for a more natural look. Punch a small hole at the top of each bat and thread them onto a long piece of string. Space them evenly, securing with a dab of glue or tape to keep them in place.
Styling Tips: Hang this garland across windows or ceilings to mimic bats in flight. For an extra eerie touch, paint the bats with glow-in-the-dark paint. When the lights go out, they’ll glow like they’re soaring through the night!
2. Pumpkin Pom-Pom Garland

If you’re after a cozy, cute vibe, this pumpkin pom-pom garland is for you. These fluffy orange and black pom-poms look like mini pumpkins, perfect for a warm Halloween feel.
Materials: Orange, black, and green yarn, pom-pom maker (or fork for DIY), twine, scissors.
Time: 1–2 hours.
Difficulty: Beginner.
How to Make It: Use a pom-pom maker to create 15–20 pom-poms in orange and black. No pom-pom maker? Wrap yarn around a fork, tie it off, and trim into a ball. Add a few green pom-poms as “stems.” Thread the pom-poms onto twine, spacing them about 2 inches apart. Secure each with a knot or glue.
Styling Tips: Drape this over a fireplace or buffet table for a cozy look. Intersperse green yarn “vines” by twisting them around the twine for extra texture. It’s like a pumpkin patch in garland form!
3. Ghostly Felt Garland

Want something kid-friendly and adorable? This ghostly felt garland features cute white ghosts with black eyes that kids will love.
Materials: White felt, black beads or buttons, needle, thread, string.
Time: 1 hour.
Difficulty: Beginner.
How to Make It: Cut out ghost shapes from white felt—about 10–15, depending on length. I use a simple oval with wavy edges. Sew or glue black beads for eyes. Thread a needle with string and run it through the top of each ghost, spacing them evenly. Knot the string to keep them in place.
Styling Tips: Hang this in a child’s room or party area. For a magical touch, weave in battery-powered LED lights. The ghosts will glow softly, creating a friendly, spooky vibe.
4. Spider Web Crochet Garland

For an elegant, gothic look, try this spider web crochet garland. It’s a bit more advanced, but the delicate webs are worth the effort.
Materials: White or black crochet thread, crochet hook (size 2mm), small plastic spiders.
Time: 3–4 hours.
Difficulty: Intermediate.
How to Make It: Crochet 8–10 small spider webs using a simple pattern (check YouTube for tutorials). Each web should be about 3–4 inches wide. String them onto black or white thread, spacing them evenly. Glue tiny plastic spiders onto the webs for a creepy touch.
Styling Tips: Drape this along stair railings or chandeliers for a sophisticated spooky vibe. The spiders add just the right amount of creepiness. It’s like something out of a haunted mansion!
5. Skull and Bones Garland

Channel Day of the Dead vibes with this macabre skull and bones garland. It’s bold, festive, and super easy to make.
Materials: Plastic skulls and bones, black ribbon, hot glue, optional paint.
Time: 1–1.5 hours.
Difficulty: Beginner.
How to Make It: Pick up small plastic skulls and bones from a craft store. Thread black ribbon through 10–15 pieces, alternating skulls and bones. Secure each with a dot of hot glue. Want a twist? Paint the skulls in neon colors like pink or green.
Styling Tips: Hang this above a Halloween bar setup for a festive touch. The neon paint makes it pop, especially under black lights at a party.
6. Witch Hat Silhouette Garland

This witch hat silhouette garland is whimsical and perfect for a witchy Halloween theme. It’s quick and beginner-friendly.
Materials: Black cardstock, string, scissors, witch hat template.
Time: 30–45 minutes.
Difficulty: Beginner.
How to Make It: Find a witch hat template online. Cut out 15–20 hats from black cardstock. Punch a hole at the top of each hat and thread them onto string, spacing them evenly. Secure with tape or glue.
Styling Tips: Hang this over a dessert table or entryway. Pair it with purple and green decorations for a classic witchy color scheme. It’s simple but oh-so-charming!
7. Autumn Leaves and Pumpkin Garland

Love a rustic Halloween vibe? This autumn leaves and pumpkin garland blends harvest charm with spooky flair.
Materials: Faux leaves, mini foam pumpkins, twine, hot glue.
Time: 1 hour.
Difficulty: Beginner.
How to Make It: Grab faux fall leaves and mini foam pumpkins from a craft store. Thread twine through 10–15 leaves and pumpkins, alternating them. Use hot glue to secure each piece in place. Add a few burlap scraps for texture if you like.
Styling Tips: This is perfect for outdoor porches or rustic-themed parties. Drape it over a railing or table for a cozy, autumnal feel.
8. Eyeball Ping-Pong Ball Garland

For a dose of horror, this eyeball ping-pong ball garland is deliciously creepy. It’s a bit more involved but totally worth it.
Materials: Ping-pong balls, paint (white, red, black), string, needle.
Time: 1.5–2 hours.
Difficulty: Intermediate.
How to Make It: Paint 10–15 ping-pong balls to look like eyeballs—white base, black pupil, colored iris, and red veins for a bloody effect. Let them dry completely. Use a needle to thread string through each ball, spacing them evenly. Knot the string to secure.
Styling Tips: Hang this in dark corners or doorways for maximum creepiness. The red veins make it look like the eyes are watching you—perfect for a horror-themed party!
9. Boo-tiful Banner Garland

This “BOO” banner garland is a fun, festive way to spell out Halloween spirit. It’s quick and customizable.
Materials: Cardstock, markers or paint, string, Halloween stickers.
Time: 45 minutes.
Difficulty: Beginner.
How to Make It: Cut out large letters spelling “BOO” from cardstock. Decorate with markers, paint, or Halloween stickers (think bats or pumpkins). Punch holes in the top corners of each letter and thread them onto string. Add extra cardstock shapes like ghosts for flair.
Styling Tips: Hang this on a front door or above a party table. Use glitter or glow-in-the-dark paint for a fun twist. It’s a bold statement piece!
10. Black Cat Silhouette Garland

Nothing says Halloween like black cats! This silhouette garland is a classic that’s easy to whip up.
Materials: Black cardstock, string, scissors, cat template.
Time: 30–45 minutes.
Difficulty: Beginner.
How to Make It: Find a black cat template online (arched backs are best). Cut out 15–20 cats from black cardstock. Punch a hole at the top of each and thread onto string. Add yellow paper eyes with glue for a spooky effect.
Styling Tips: Hang this across mirrors or bookshelves. The yellow eyes add a mysterious glow, especially in dim lighting.
11. Vintage Book Page Garland

For a gothic, literary vibe, this vintage book page garland uses old pages to create Halloween icons. It’s hauntingly beautiful.
Materials: Old book pages, scissors, string, templates, optional tea-staining.
Time: 1–1.5 hours.
Difficulty: Intermediate.
How to Make It: Cut out shapes like ghosts, pumpkins, or bats from old book pages. For an aged look, tea-stain the pages first (dip in tea and let dry). Thread 10–15 shapes onto string, securing with glue or tape.
Styling Tips: Hang this in a library or study for a vintage feel. The tea-stained pages give it an antique, haunted-book vibe.
12. LED-Enhanced Spider Garland

This LED-enhanced spider garland is a showstopper. The glowing lights and creepy spiders create a dramatic effect.
Materials: Plastic spiders, black string, battery-powered LED string lights, hot glue.
Time: 1–1.5 hours.
Difficulty: Intermediate.
How to Make It: Wrap black string around battery-powered LED lights. Glue 10–15 plastic spiders along the string, spacing them evenly. Test the lights first to ensure they work. Secure the battery pack discreetly at one end.
Styling Tips: Wrap this around outdoor railings or indoor banisters. The glowing lights make it perfect for a nighttime Halloween display.
13. Dollar Tree Halloween Ornament Garland

On a budget? This Dollar Tree ornament garland uses affordable mini decorations for a quick, festive look.
Materials: Dollar Tree mini ornaments (skulls, pumpkins, bats), twine or ribbon, hot glue, optional spray paint.
Time: 45 minutes–1 hour.
Difficulty: Beginner.
How to Make It: Pick up mini Halloween ornaments at Dollar Tree. Thread 10–15 onto twine or ribbon, securing with hot glue. For a chic twist, spray paint the ornaments in metallic colors like gold or silver.
Styling Tips: Hang this over a party table or doorway. The metallic paint adds a touch of elegance to these budget finds.
14. Spooky Balloon Garland

This spooky balloon garland is vibrant and playful, with balloons featuring drawn-on Halloween faces. It’s a party favorite!
Materials: Small balloons (orange, black, white, purple), permanent markers, balloon string or fishing line, helium (optional).
Time: 1–1.5 hours.
Difficulty: Beginner.
How to Make It: Inflate 10–15 small balloons (helium for floating, or leave deflated for a quirky look). Use permanent markers to draw spooky faces—ghosts, pumpkins, or monsters. Thread them onto balloon string or fishing line, securing with knots.
Styling Tips: Hang this above a party backdrop. Use helium for a floating effect or string deflated balloons for a unique, budget-friendly look.
15. Tinsel Witch’s Broom Garland

For a magical, glittering vibe, this tinsel witch’s broom garland is pure Halloween fun. It sparkles like nobody’s business!
Materials: Black and purple tinsel, small sticks or straw, twine, hot glue, optional mini witch hat charms.
Time: 1–1.5 hours.
Difficulty: Intermediate.
How to Make It: Cut tinsel into 6-inch strips. Bundle 5–6 strips around a small stick or straw to form a mini broom. Secure with hot glue. Make 10–15 brooms and thread them onto twine. Add mini witch hat charms for extra flair.
Styling Tips: Hang this along a staircase or window. The tinsel catches the light, and the witch hats add a whimsical touch.
Step-by-Step Guide to Making Halloween Garland
Step 1: Gather Your Materials
Start by collecting everything you’ll need for your chosen garland design. Common items include:
- Scissors
- Glue or tape
- String, yarn, or twine
- Paper, felt, tinsel, or balloons
- Templates (like bats, ghosts, or pumpkins)
Lay everything out before you begin to keep your process smooth and organized.
Step 2: Prepare Your Workspace
Choose a flat, clutter-free surface with enough space to spread out your materials and completed pieces. This helps you stay organized and avoids losing small parts.
Step 3: Measure Your Garland Length
Decide where you’ll hang the garland—mantel, doorway, staircase, or porch—and measure your string accordingly:
- Mantel: About 6 feet
- Doorway: Around 8 feet
- Stair railing: Varies based on steps
Add a little extra length at each end for tying or taping in place.
Step 4: Create Your Garland Elements
Cut or assemble your decorative pieces like paper bats, felt ghosts, or tinsel shapes. You can use stencils for cleaner shapes or freehand if you prefer a handmade look. For balloon-based garlands, inflate and tie balloons before assembling.
Step 5: Attach the Elements to the String
Space the pieces evenly along your measured string. Use hot glue, craft glue, tape, or knots to secure each element.
- For fabric or felt pieces: Sewing or hot glue works well.
- For paper shapes: Tape or glue dots are easiest.
- For balloons: Double-knot securely to prevent deflation or slipping.
Step 6: Safety Check
- Use non-toxic glue and materials for kid-friendly projects.
- Keep flammable items like paper and tinsel away from candles or heat sources.
- For outdoor garlands, make sure materials and any lights (like LEDs) are weather-resistant.
Step 7: Hang and Test
Before finalizing, do a test hang to make sure your garland looks balanced and secure. Adjust spacing if needed. Check that everything is firmly attached—no drooping, sliding, or falling parts.
Customization and Styling Tips for Halloween Garland Ideas
Choose Your Vibe
Garlands can match any Halloween theme with a few simple tweaks:
- Gothic Look: Try spider web crochet or garlands made from vintage book pages. Stick to black, white, or dark tones.
- Kid-Friendly: Go with felt ghosts, balloon garlands, or cartoon-style cutouts in soft or bright colors.
- Playful + Whimsical: Use pom-poms, pastel shades, or smiling pumpkins for a lighter touch.
Stick to a Color Scheme
Keep your look cohesive with classic Halloween colors:
- Orange + Black – Timeless and bold
- Purple + Green – Fun and a bit spooky
- White + Black – Clean and gothic
- Add Metallics – Gold, silver, or copper for a polished touch
Smart Placement Ideas
Garlands can go almost anywhere. Try these spots:
- Over mantels
- Along stair railings
- Framing doorways
- Wrapped around trees for outdoor decor
Style Like a Pro
- Layer different textures (e.g. tinsel with fabric) for depth
- Pair garland types—like balloons with felt pieces—for contrast
- Use reusable hooks or clear tape for easy hanging
Budget-Friendly Options
- Shop Dollar Tree or craft stores for supplies like tinsel and mini ornaments
- Repurpose old book pages, scrap fabric, or leftover wrapping paper
- Use printable templates to save time and money
Conclusion
Halloween garlands are the perfect way to add festive flair to your home or party.
From creepy eyeball garlands to sparkly tinsel brooms, these 15 ideas offer something for everyone. They’re affordable, fun to make, and totally customizable.
I hope you’re inspired to grab some supplies and create a spooky masterpiece. Try at least one of these ideas, and watch your space transform into a Halloween haven.
For more guidance, check out printable templates or video tutorials online. Happy crafting, and have a spooktacular Halloween!
FAQs
What are the best materials for outdoor garlands?
Use weather-resistant materials like plastic, laminated paper, tinsel, or treated fabric to withstand the elements.
How can I make garlands kid-safe?
Avoid small parts for young kids. Stick to soft materials like felt, yarn, or deflated balloons for safety.
Can I reuse garlands next year?
Absolutely! Store them in a dry, cool place. Durable materials like tinsel, plastic, or felt hold up best.
Where can I find free templates or budget materials?
Look for free printable templates online for bats, cats, or witch hats. Hit up Dollar Tree for affordable ornaments or tinsel to keep costs low.

Emily Harper is a kitchen decor expert and interior designer with a passion for creating stylish, functional spaces. As a busy mom, she understands the importance of a kitchen that works for both family life and design. With 6 years of experience, Emily specializes in transforming kitchens into inviting, practical spaces. She’s known for her ability to blend trends with everyday needs, helping families create kitchens that feel like the heart of the home.