15 Creative Halloween Door Hanger Ideas to Spook Up Your Entryway
Every Halloween, your front door is the very first thing guests—and trick-or-treaters—see, making it the perfect canvas for creativity.
As someone who has crafted and styled countless Halloween door hangers over the years, I can tell you this: the right piece sets the tone before anyone even steps inside.
From rustic farmhouse wood cutouts to eerie, gothic silhouettes that sway in the breeze, each design can tell its own spooky story.
Whether you’re aiming for charmingly whimsical or bone-chillingly dramatic, a well-chosen door hanger can instantly boost curb appeal and seasonal spirit.
In this guide, I’ll share Halloween door hanger ideas that are not just eye-catching, but thoughtfully designed to make your entryway unforgettable.
Table of Contents
- 15 Halloween Door Hanger Ideas
- 1. Classic Jack-o’-Lantern Hanger
- 2. Spooky Spider Web Hanger
- 3. Haunted House Silhouette
- 4. Friendly Ghost Hanger
- 5. Witch’s Hat Door Hanger
- 6. Candy Corn Wreath Hanger
- 7. Skeleton Hand Knock Hanger
- 8. Bat Swarm Hanger
- 9. Pumpkin Patch Welcome Sign
- 10. Creepy Eyeball Hanger
- 11. Black Cat Silhouette
- 12. Frankenstein’s Monster Face
- 13. Boo-tiful Floral Hanger
- 14. Mummy Wrapped Hanger
- 15. Vampire Fang Door Hanger
- Step-by-Step Crafting Guide
- Customization and Personalization
- Displaying Your Door Hanger
- Conclusion
Without further ado, let’s discover them.
15 Halloween Door Hanger Ideas
Ready to get crafting? Here are 15 Halloween door hanger ideas that will make your home the talk of the neighborhood. I’ve included the materials, skill level, and why each one stands out. Let’s make something amazing!
1. Classic Jack-o’-Lantern Hanger
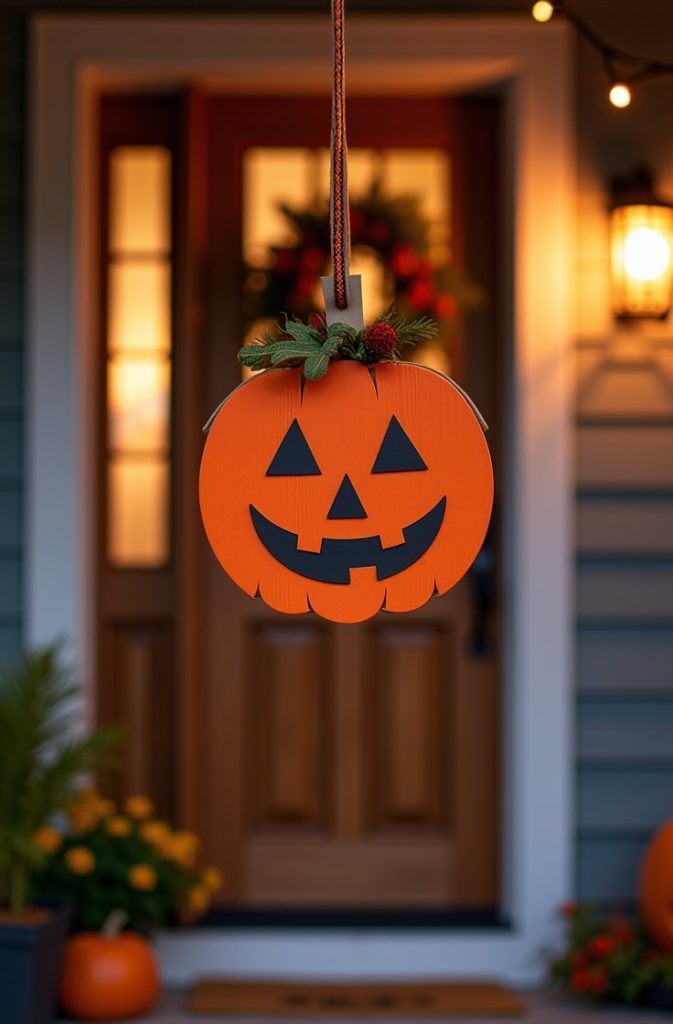
Nothing says Halloween like a grinning jack-o’-lantern. This door hanger is a bold, bright pumpkin face in classic orange and black. It’s perfect for beginners and instantly screams “Halloween is here!”
- Materials: Wood or foam board, orange and black paint, a paintbrush, and a ribbon for hanging.
- Skill Level: Beginner.
- How to Make It: Grab a round piece of wood or foam board. Paint it orange for the pumpkin base. Once dry, use black paint to add triangle eyes, a nose, and a toothy grin. Attach a ribbon loop at the top with hot glue. Hang it on your door, and you’re done!
- Why It’s Great: This design is iconic and kid-friendly. It’s a quick project that brings instant Halloween spirit.
2. Spooky Spider Web Hanger
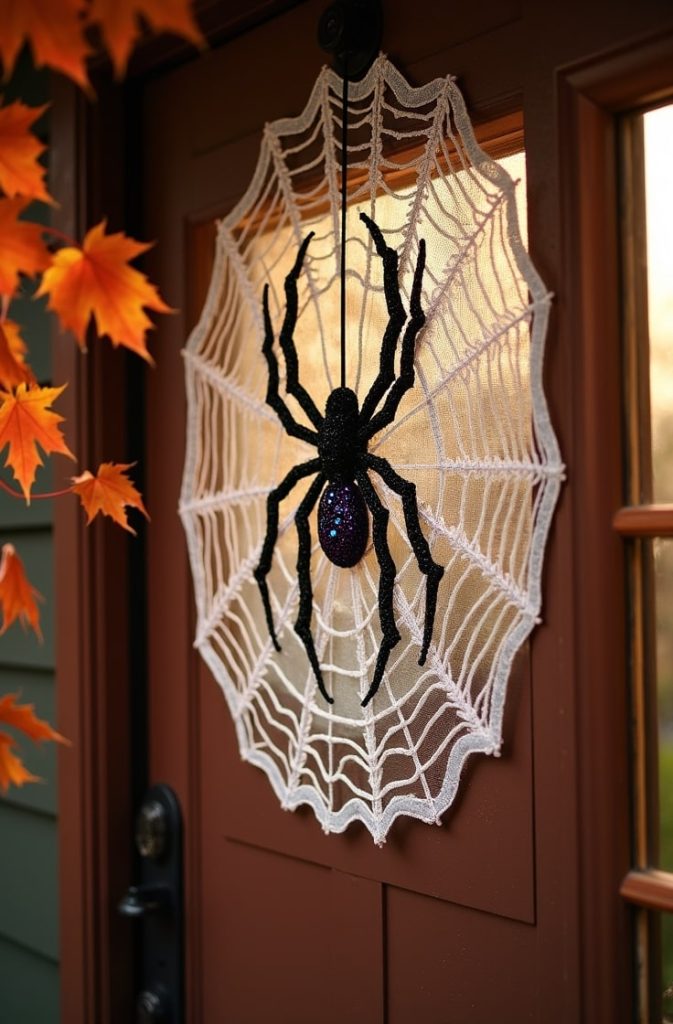
If you want something creepy yet classy, try a spider web hanger. It’s a circular design with a glittery web and a dangling spider that sways in the breeze.
- Materials: An embroidery hoop, white or silver yarn, a plastic spider, and glitter spray paint.
- Skill Level: Beginner to intermediate.
- How to Make It: Take an embroidery hoop and wrap yarn across it to create a web pattern. Spray it with glitter paint for some sparkle. Glue a plastic spider to the center, letting it hang from a thread. Add a ribbon to hang it.
- Why It’s Great: It’s eerie but elegant, and the glitter catches the light beautifully. Kids and adults will love it.
3. Haunted House Silhouette
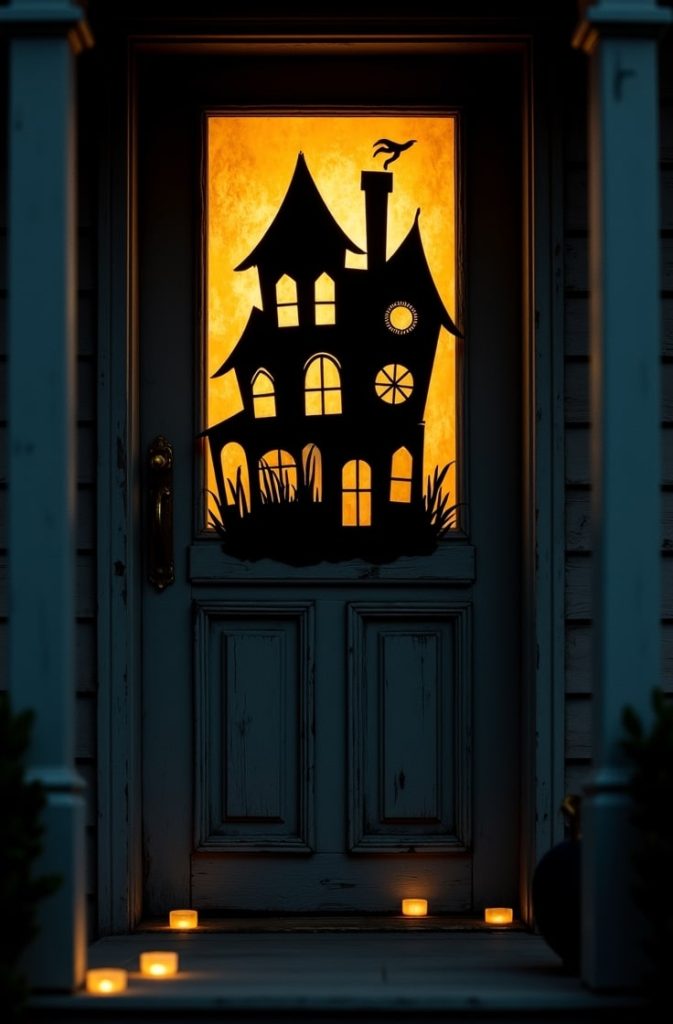
This hanger features a spooky haunted house silhouette with glowing window accents. It’s perfect for setting a creepy mood.
- Materials: Black cardstock, yellow tissue paper, LED tea lights, and glue.
- Skill Level: Intermediate.
- How to Make It: Cut a haunted house shape from black cardstock—think jagged roofs and a crooked chimney. Cut out small windows and glue yellow tissue paper behind them. Place an LED tea light behind the paper for a glowing effect. Attach a loop of string to hang it.
- Why It’s Great: The glowing windows create a haunting atmosphere. It’s a showstopper for your front door.
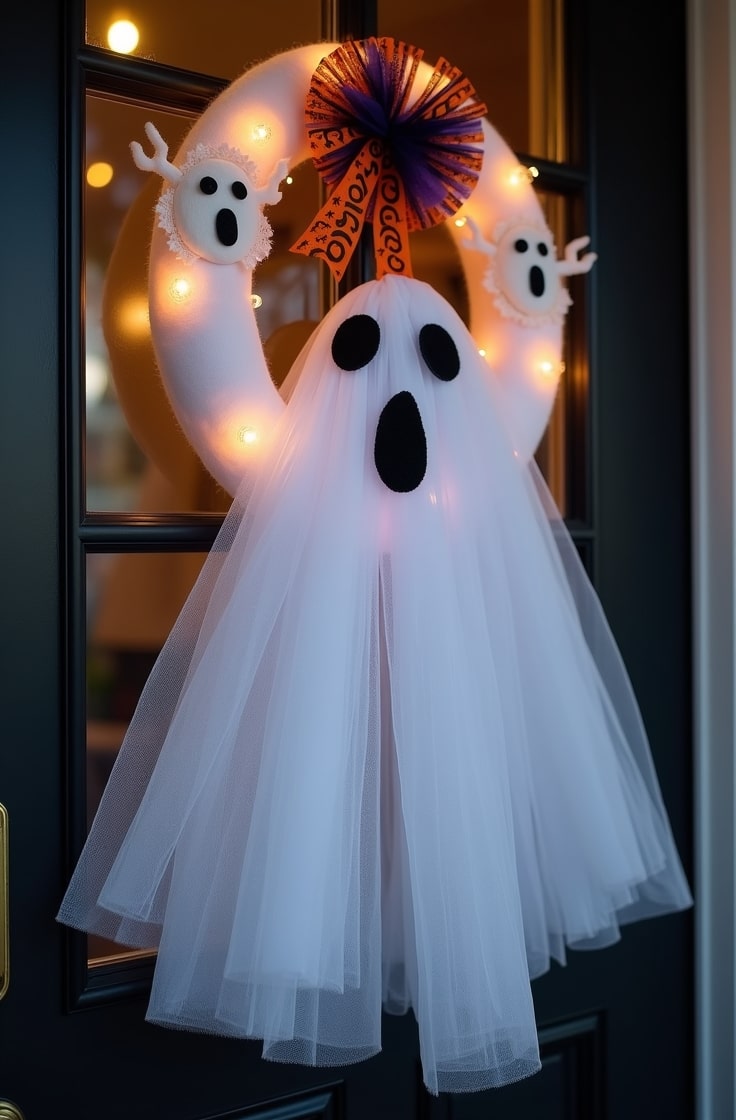
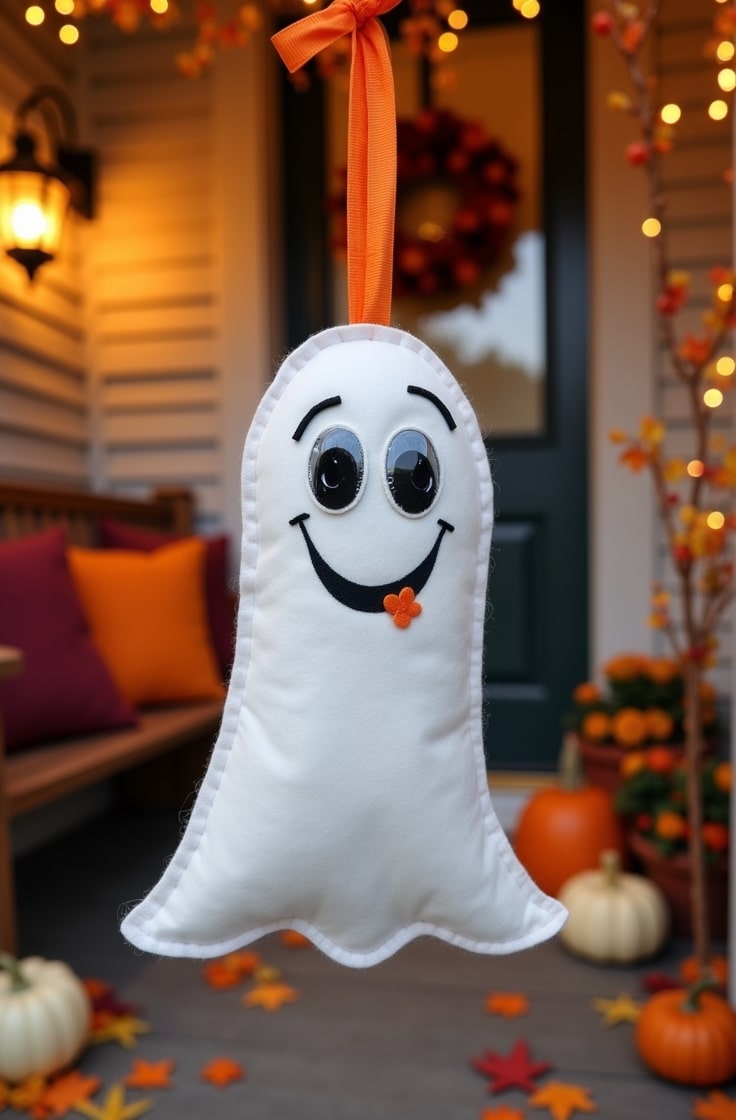
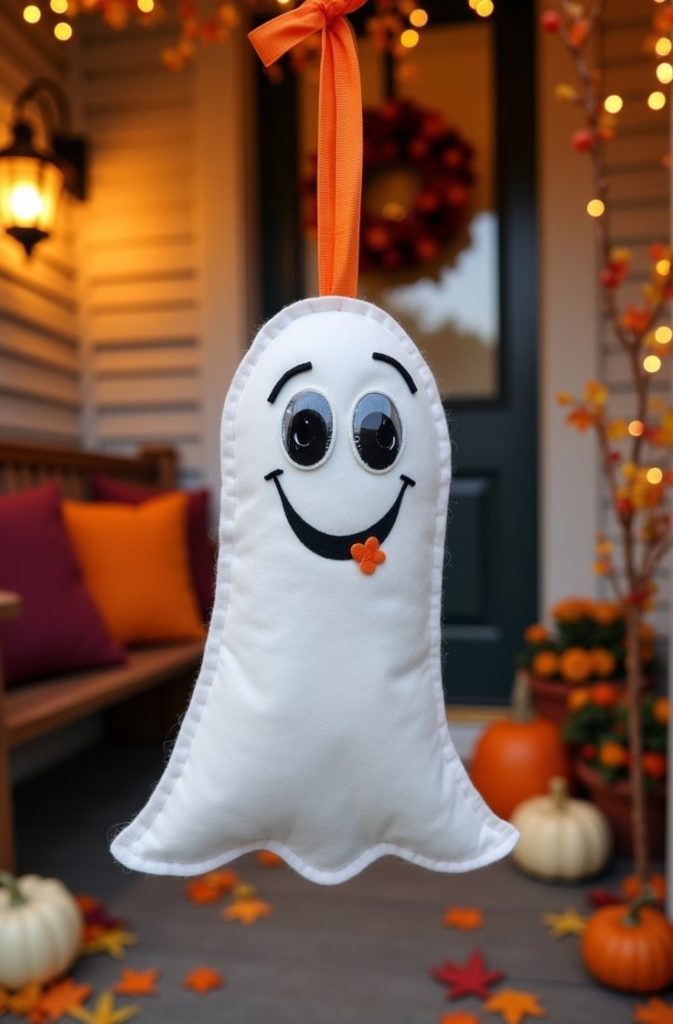
4. Friendly Ghost Hanger
Who says ghosts have to be scary? This friendly ghost hanger is soft, cuddly, and perfect for younger kids.
- Materials: White felt, googly eyes, black marker, and a ribbon.
- Skill Level: Beginner.
- How to Make It: Cut a ghost shape from white felt—think a wavy, cloud-like form. Glue on googly eyes and draw a smiling mouth with a marker. Add a ribbon loop at the top. You can stuff it with a bit of cotton for a 3D effect.
- Why It’s Great: It’s cute and welcoming, making it ideal for families with little ones.
5. Witch’s Hat Door Hanger
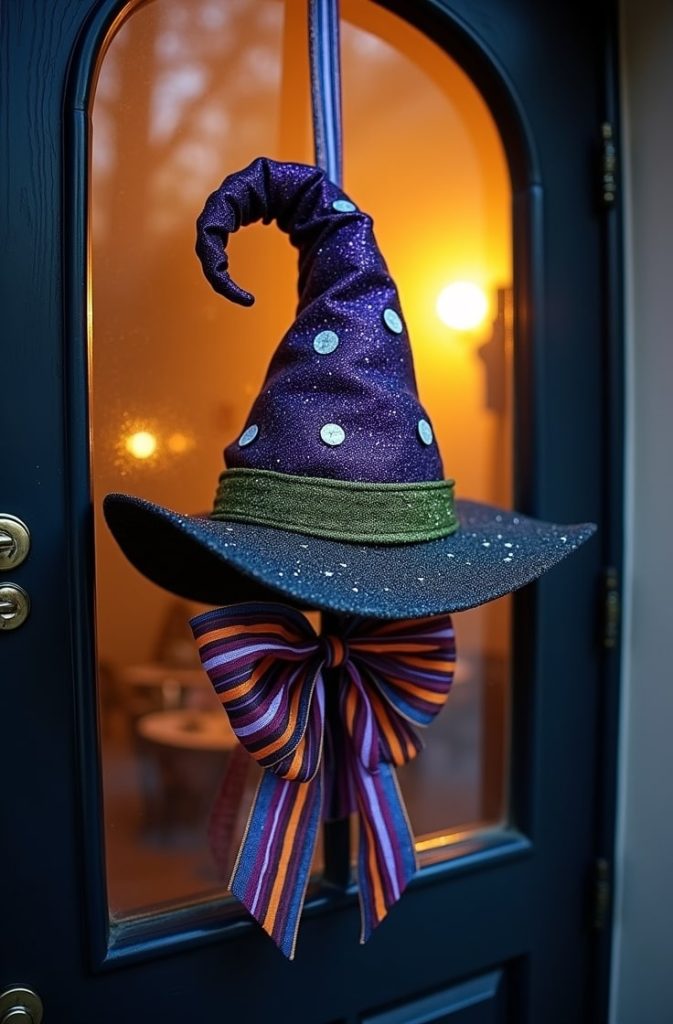
This whimsical witch’s hat hanger is all about magic. With a striped ribbon and star accents, it’s a playful addition to your decor.
- Materials: Black foam, purple or green fabric, glitter paint, and a striped ribbon.
- Skill Level: Intermediate.
- How to Make It: Cut a witch’s hat shape from foam. Cover it with fabric, gluing it down tightly. Paint on some glittery stars. Tie a striped ribbon around the base of the hat and add a loop for hanging.
- Why It’s Great: It’s fun and magical, perfect for anyone who loves a witchy vibe.
6. Candy Corn Wreath Hanger
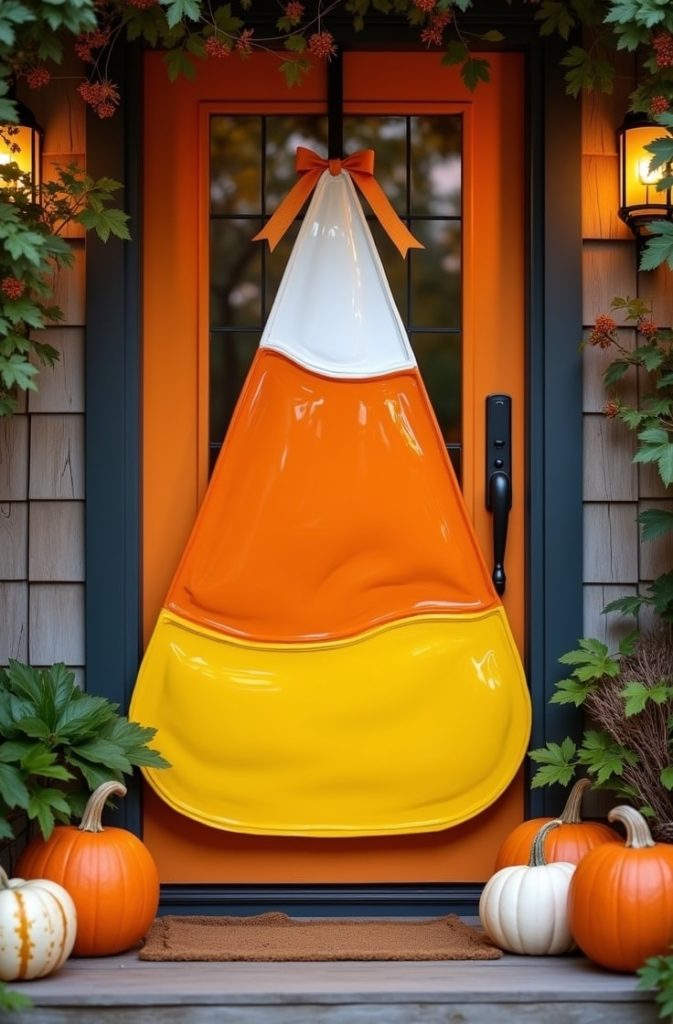
Candy corn is a Halloween classic, and this triangular hanger brings its cheerful colors to your door.
- Materials: Wood or foam board, yellow, orange, and white paint, and varnish.
- Skill Level: Beginner.
- How to Make It: Cut a triangle from wood or foam. Paint the bottom third yellow, the middle third orange, and the top third white to mimic candy corn. Seal with varnish for a glossy finish. Add a ribbon loop to hang it.
- Why It’s Great: It’s sweet and festive, with a nod to everyone’s favorite Halloween candy.
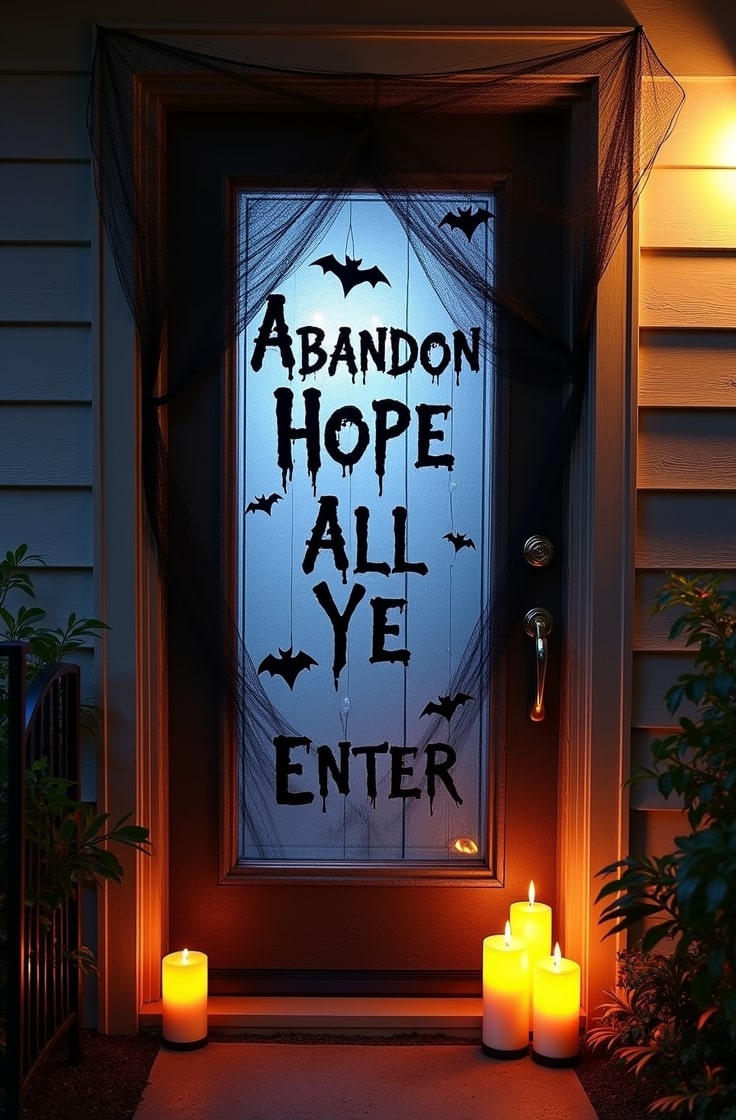
7. Skeleton Hand Knock Hanger
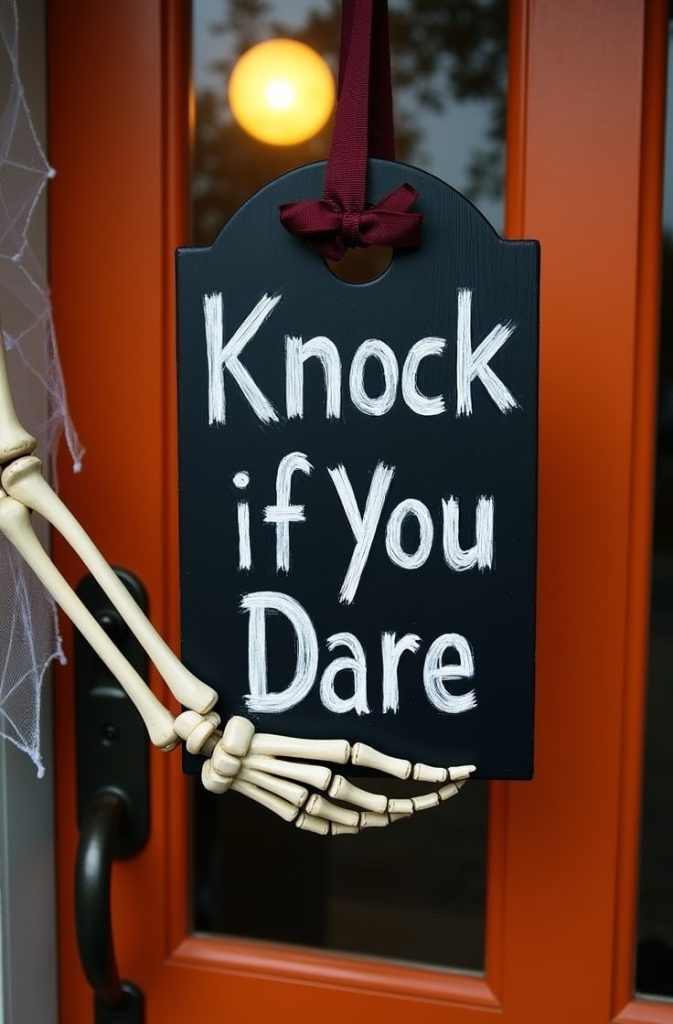
This skeleton hand hanger is bold and spooky, holding a sign that says, “Knock If You Dare.” It’s a fun way to greet brave trick-or-treaters.
- Materials: A plastic skeleton hand, a small wooden plaque, black paint, and white chalk marker.
- Skill Level: Intermediate.
- How to Make It: Paint the wooden plaque black. Write “Knock If You Dare” in white chalk marker. Glue the skeleton hand to the plaque so it looks like it’s gripping the sign. Add a loop of twine to hang it.
- Why It’s Great: It’s creepy and playful, perfect for thrill-seekers knocking on your door.
8. Bat Swarm Hanger
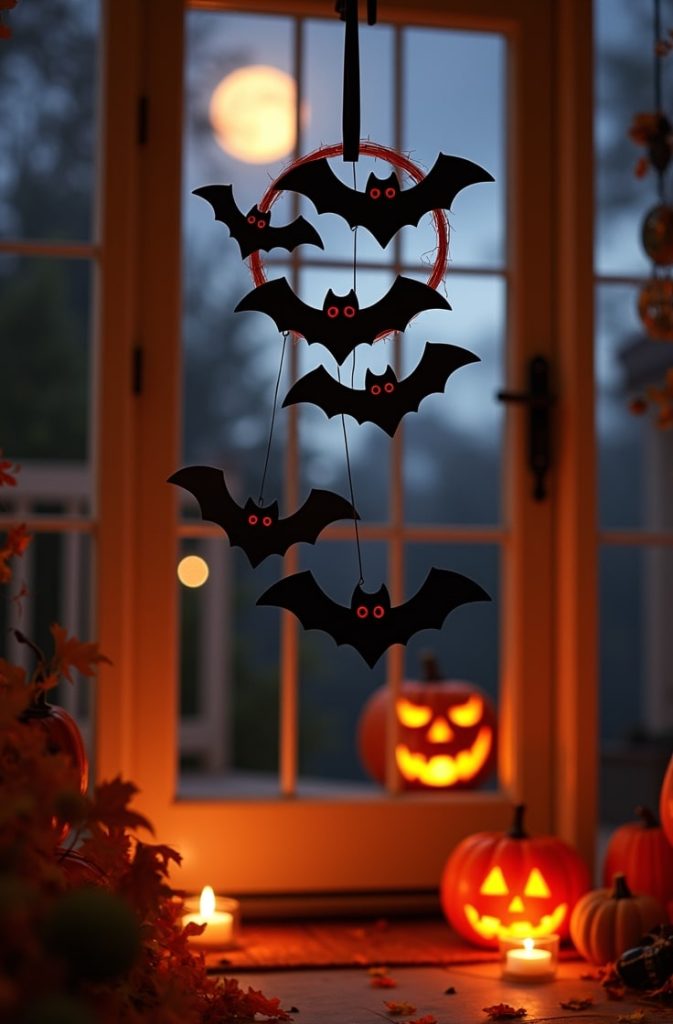
This hanger features a flock of bats in mid-flight, complete with glowing red eyes. It’s dynamic and just spooky enough.
- Materials: Black foam, red beads, wire, and black paint.
- Skill Level: Intermediate.
- How to Make It: Cut bat shapes from black foam. Glue red beads for eyes. Attach the bats to a wire frame in a circular pattern to look like they’re flying. Paint the wire black and add a loop for hanging.
- Why It’s Great: The 3D effect and glowing eyes make this a standout piece for bat fans.
9. Pumpkin Patch Welcome Sign
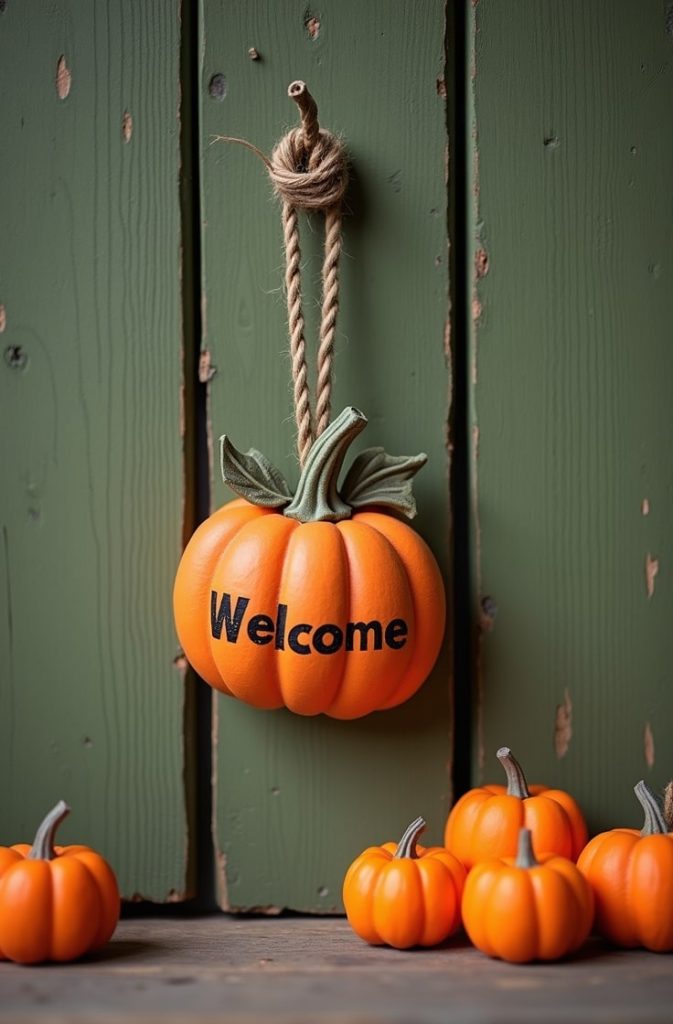
This rustic hanger features mini pumpkins and a “Welcome” message, giving off cozy farmhouse vibes.
- Materials: A wooden board, mini foam pumpkins, green paint, and twine.
- Skill Level: Beginner to intermediate.
- How to Make It: Paint the wooden board green to mimic a pumpkin patch. Glue on mini foam pumpkins in a cluster. Write “Welcome” in black paint or use wooden letters. Tie twine around the top for hanging.
- Why It’s Great: It’s warm and inviting, perfect for a cozy Halloween aesthetic.
10. Creepy Eyeball Hanger
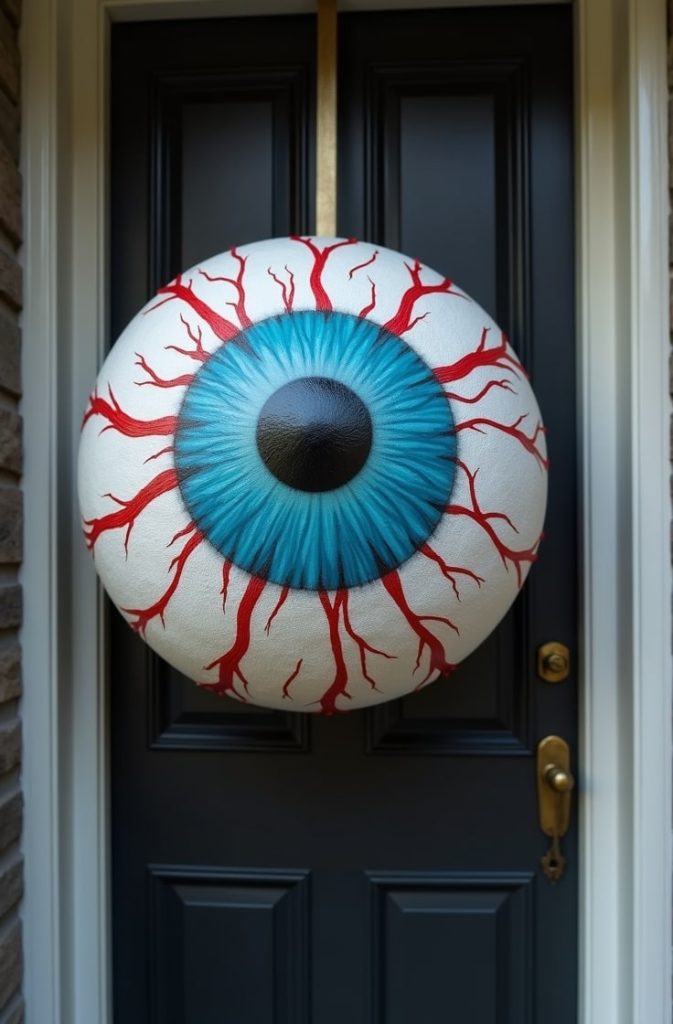
Want something unsettling? This round hanger features a giant, realistic eyeball that stares right at your guests.
- Materials: A Styrofoam ball, acrylic paint, and varnish.
- Skill Level: Intermediate.
- How to Make It: Cut a Styrofoam ball in half to create a flat circle. Paint a realistic eyeball—white base, colored iris, black pupil, and red veins. Seal with varnish for shine. Add a ribbon loop to hang it.
- Why It’s Great: It’s creepy and unique, perfect for horror fans who want to make a statement.
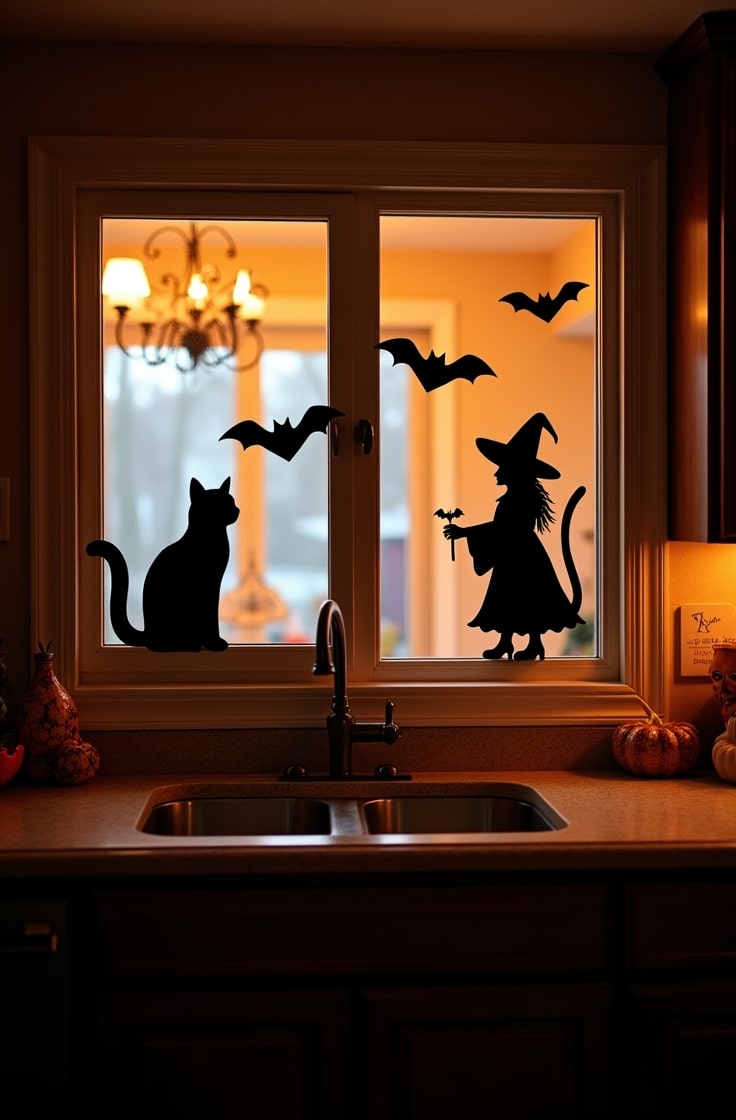
11. Black Cat Silhouette
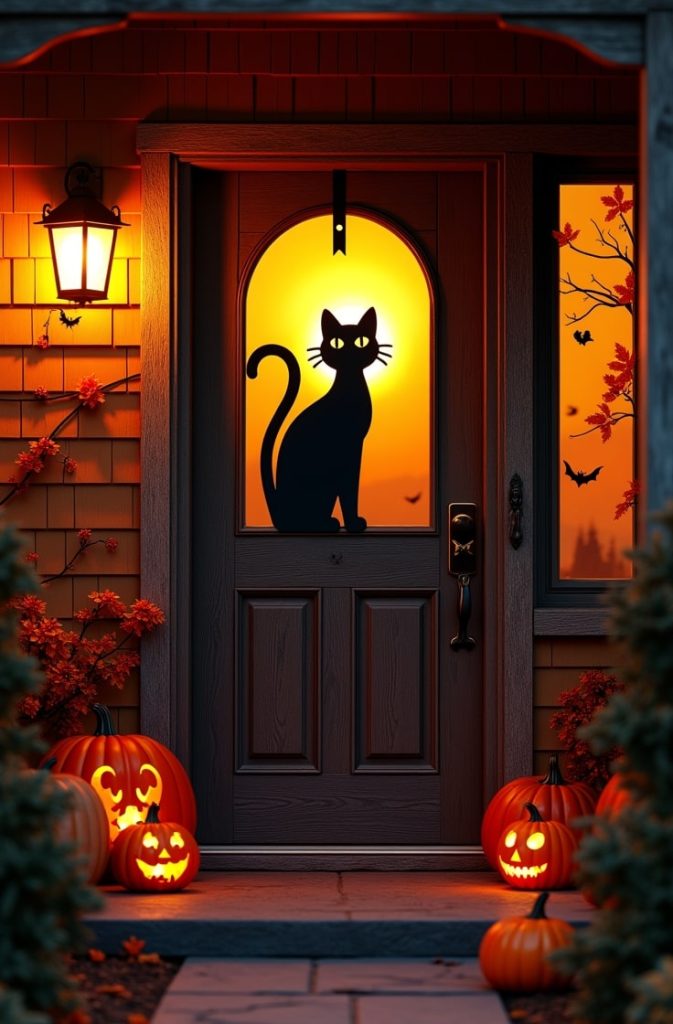
This sleek black cat hanger, with its arched back and glowing eyes, is a Halloween classic.
- Materials: Black cardstock, glow-in-the-dark paint, and scissors.
- Skill Level: Beginner.
- How to Make It: Cut a cat silhouette from black cardstock—think arched back and raised tail. Paint the eyes with glow-in-the-dark paint. Attach a string loop for hanging.
- Why It’s Great: It’s simple, mysterious, and captures that classic Halloween cat vibe.
12. Frankenstein’s Monster Face
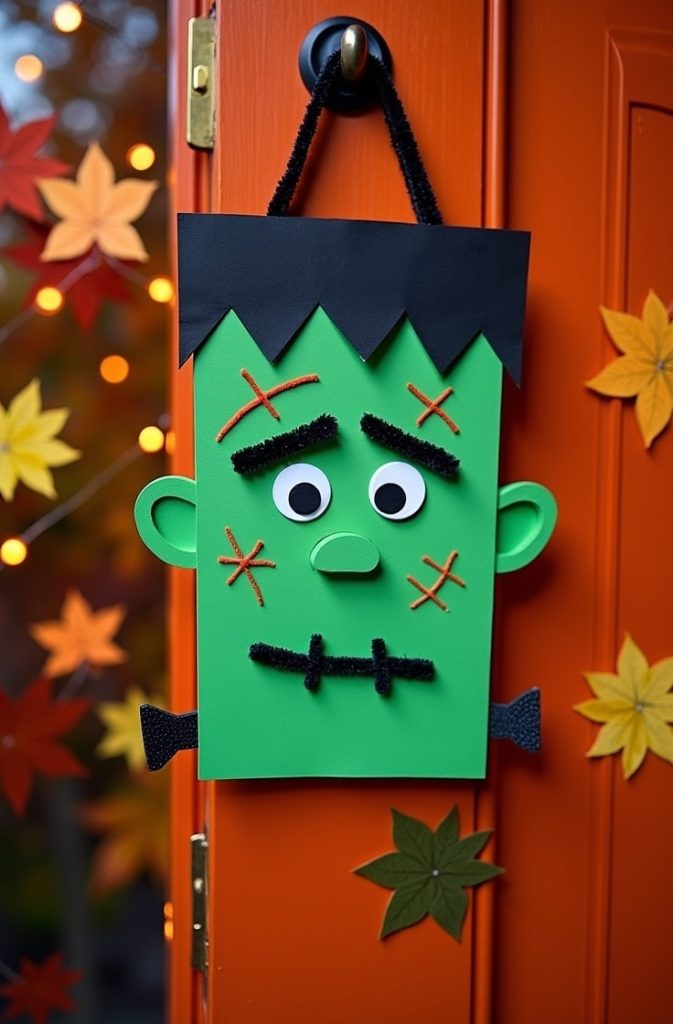
This green monster face, complete with bolts and stitched scars, is a fun nod to a Halloween icon.
- Materials: Foam board, green and black paint, pipe cleaners, and bolts.
- Skill Level: Intermediate.
- How to Make It: Cut a square from foam board. Paint it green and add black hair and stitched scars. Glue on pipe cleaner eyebrows and small bolts on the sides. Add a ribbon for hanging.
- Why It’s Great: It’s quirky and iconic, perfect for monster lovers.
13. Boo-tiful Floral Hanger
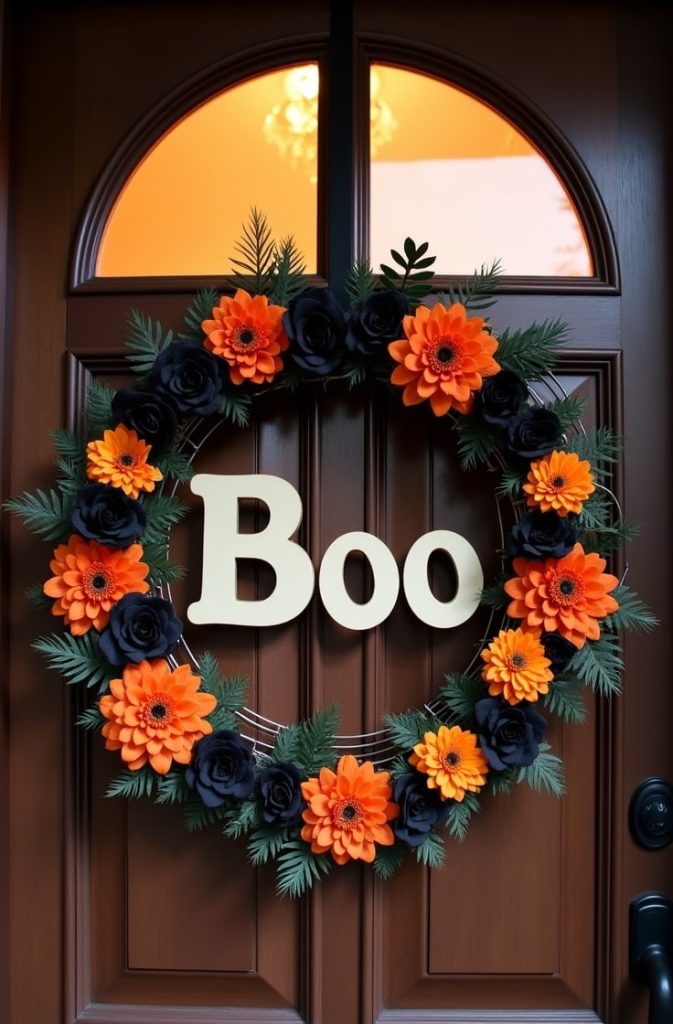
This floral hanger combines a “Boo” sign with Halloween-colored flowers for a chic, festive look.
- Materials: Artificial orange and black flowers, a wire wreath frame, and wooden letters.
- Skill Level: Intermediate.
- How to Make It: Wrap the wire frame with flowers, securing them with hot glue. Paint wooden letters to spell “Boo” and glue them to the center. Add a ribbon loop for hanging.
- Why It’s Great: It blends spooky with elegant, making it a stylish choice for any door.
14. Mummy Wrapped Hanger
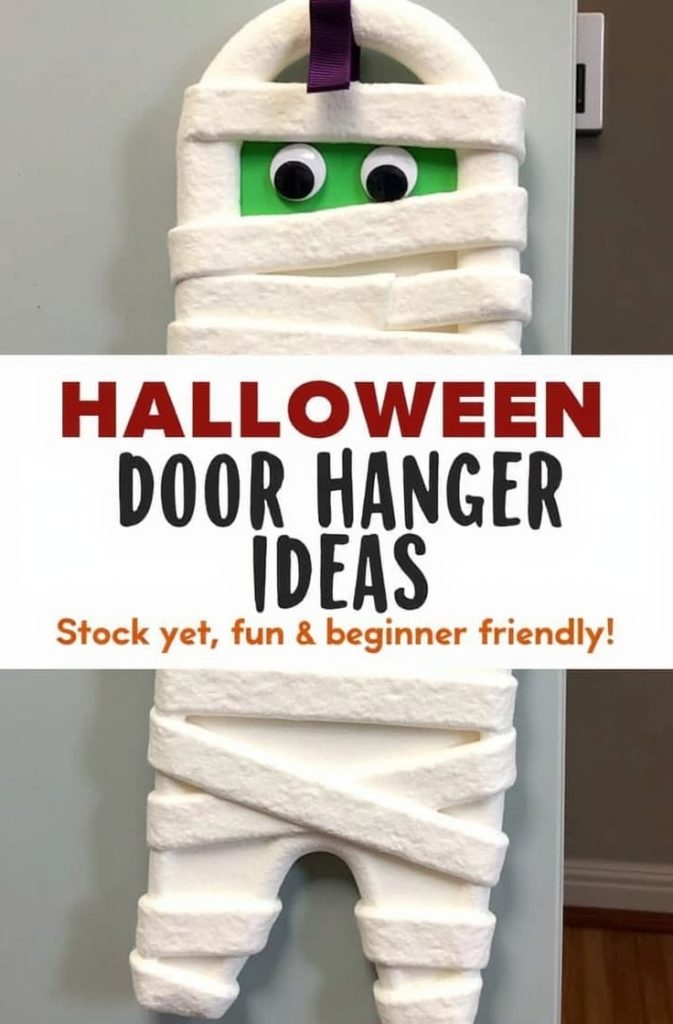
This mummy hanger, wrapped in gauze with googly eyes peeking out, is quirky and easy to make.
- Materials: Gauze, foam board, googly eyes, and glue.
- Skill Level: Beginner.
- How to Make It: Cut a circle or rectangle from foam board. Wrap it in gauze, leaving gaps for texture. Glue on googly eyes in a gap. Add a ribbon loop to hang it.
- Why It’s Great: It’s spooky yet fun, and super simple for beginners.
15. Vampire Fang Door Hanger

This blood-red hanger with dripping fangs and a “Bite Me” message is perfect for gothic vibes.
- Materials: Wood, red paint, white foam, and a black marker.
- Skill Level: Intermediate.
- How to Make It: Paint a wooden board red. Cut fang shapes from white foam and glue them on, adding red paint for a dripping effect. Write “Bite Me” in black marker. Add a twine loop for hanging.
- Why It’s Great: It’s bold and vampire-themed, ideal for fans of gothic Halloween style.
Step-by-Step Crafting Guide
Now that you’ve got some inspiration, let’s talk about how to make these door hangers. Here’s a simple process that works for most designs:
- Sketch Your Design: Draw your shape on paper first. This helps you plan the size and details.
- Cut Your Base: Use scissors or a craft knife to cut your material (wood, foam, or cardstock) into the desired shape.
- Paint or Decorate: Add color with paint, markers, or glitter. Let each layer dry before adding more.
- Assemble Details: Glue on extras like googly eyes, ribbons, or beads.
- Add a Hanger: Attach a ribbon, twine, or wire loop with hot glue for easy hanging.
- Seal It: Use varnish or clear spray paint to protect your design, especially for outdoor use.
Tips for Success:
- Use templates for clean, consistent shapes. You can find free ones online.
- Seal painted hangers with varnish to protect them from rain or sun.
- Make sure your ribbon or twine is sturdy enough to hold the hanger’s weight.
Safety Notes: If you’re crafting with kids, supervise them when using hot glue guns or craft knives. Stick to non-toxic paints and glues for safety.
Customization and Personalization
Want to make your door hanger extra special? Here are some ideas to customize it:
- Themes: Pick a Halloween theme that speaks to you. Go gothic with dark colors and skulls, or keep it cute with smiling pumpkins and ghosts. You can even tie it to a favorite movie, like a Nightmare Before Christmas-inspired design.
- Color Schemes: Stick to classic Halloween colors—orange, black, purple, and green—or mix it up with metallics like gold or silver for a modern twist.
- Personal Touches: Add your family’s name, a funny message, or even a photo. For example, write “The Smiths’ Spooky House” on your haunted house hanger.
- Budget-Friendly Options: Use recycled materials like cardboard from old boxes or fabric scraps. Dollar stores are great for cheap foam, ribbon, and paint.
Displaying Your Door Hanger
Your door hanger is ready—now where should it go? Here are some tips for showing it off:
- Placement: Hang it on your front door to greet trick-or-treaters. It also looks great on interior doors, like a kid’s bedroom or a party room. For parties, use multiple hangers as wall decor.
- Weatherproofing: If it’s going outside, seal it with waterproof varnish. For paper hangers, laminate them or keep them under a porch to avoid rain damage.
- Lighting Effects: Add LED tea lights or glow-in-the-dark paint for a nighttime glow. This makes your hanger pop when the sun goes down.
Conclusion
After exploring these 15 Halloween door hanger ideas, you can see how a single piece can completely transform your entryway.
The best designs do more than decorate—they spark curiosity, set the mood, and make every visitor feel the magic (or mischief) of the season before they even knock.
Whether you go for handcrafted charm, bold statement pieces, or layered textures and colors, your front door becomes a story in itself.
Choose the style that fits your home’s personality, add those little finishing touches, and you’ll have a Halloween welcome that neighbors will remember—and maybe even try to copy next year.

Emily Harper is a kitchen decor expert and interior designer with a passion for creating stylish, functional spaces. As a busy mom, she understands the importance of a kitchen that works for both family life and design. With 6 years of experience, Emily specializes in transforming kitchens into inviting, practical spaces. She’s known for her ability to blend trends with everyday needs, helping families create kitchens that feel like the heart of the home.