Rustic Kitchen Shelving: How To Get The Reclaimed-Wood Look Without Reclaimed-Wood Prices
I once paid too much for a single piece of “real” barn wood. It arrived warped. It smelled faintly like a barn, too. I learned that day that authentic doesn’t always mean better, and expensive doesn’t always mean rustic.
Since then, I’ve built rustic shelves both ways. Real reclaimed wood. Budget lumber, faked to look old. Guests can’t always tell the difference.
You don’t need a barn to get that look. You need the right technique.
This guide walks you through both paths. Real sourcing when it’s worth it. Clever faking when it’s not. Either way, you’ll end up with shelves that look earned, not manufactured.
Top 5 Rustic Shelving Products on Amazon
- Rockin’ Wood Weathered Reclaimed Wood Planks – genuine barn wood boards for anyone who wants the real material without sourcing it themselves.
- Varathane Weathered Gray Wood Stain – a fast-drying stain that turns plain pine into a convincing weathered gray finish.
- Urban Legacy Reclaimed Barnwood Floating Shelves – pre-built shelves made from real barn planks, ready to mount with included brackets.
- YCCO Industrial Pipe Shelf Brackets – black iron pipe hardware that adds an authentic rustic edge to any wood shelf.
- Renovators Supply Black Wrought Iron H-Hinges – decorative hardware that instantly signals “old farmhouse” on cabinets or shelf doors.
Tell The Difference Between Real Rustic And Cheap-Looking Rustic
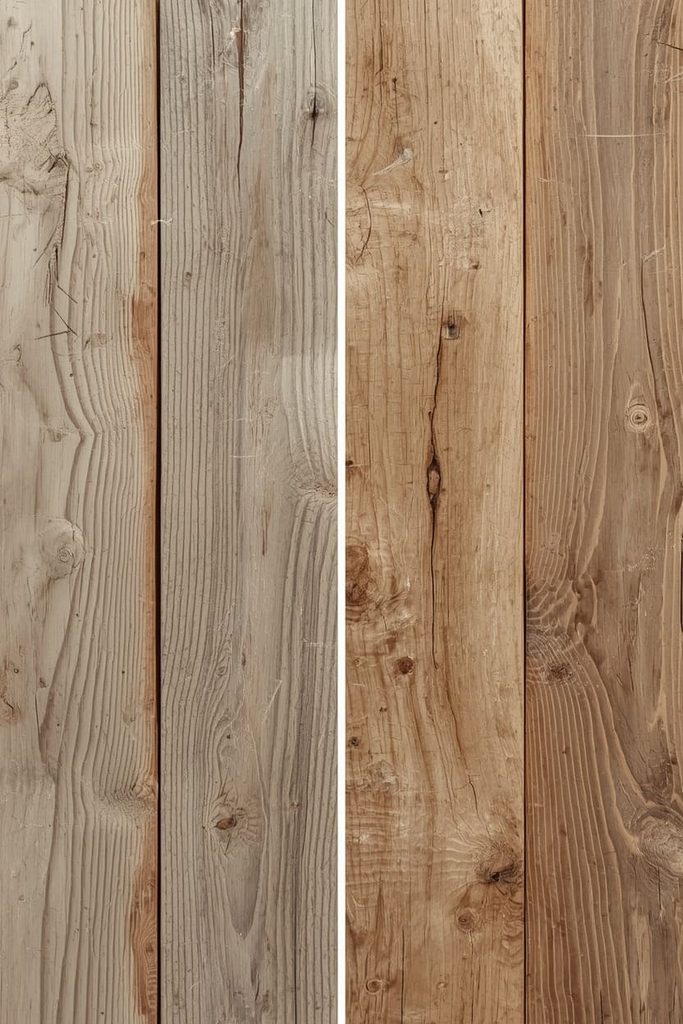
Real rustic wood has uneven color, visible grain, and small imperfections that follow a natural pattern. Cheap-looking rustic wood has repeated, uniform distress marks that look stamped on.
This matters before you buy anything. A lot of mass-produced “rustic” shelves use the exact same fake wormhole or the exact same scratch pattern repeated every few inches. Your eye notices this, even if you can’t explain why something feels off.
Real weathering happens randomly. Some boards fade more on one side. Knots show up in odd places. Nail holes don’t line up in a neat row. When you’re shopping or building, look for pieces where the imperfections feel scattered, not stamped.
If you’re distressing wood yourself, this is your biggest advantage. Machines repeat patterns. Your hands don’t.
Take a step back after every round of distressing and look at the piece from a few feet away. Up close, every mark looks intentional. From a distance, repeated patterns suddenly stand out. This simple habit catches mistakes before they become permanent.
Mix your techniques instead of relying on just one tool. A wire brush alone tends to create a consistent texture across the whole board. Combine it with random hammer dents, a few scrapes from a screwdriver, and light sanding in uneven spots. The variety is what convinces the eye.
Shop The Look:
- Rockin’ Wood Weathered Reclaimed Wood Planks – each board is naturally unique, so no two match exactly, which is what real barn wood looks like.
- Bright Creations Shelf Wood Boards (6-Pack) – raw, unfinished boards that let you control the distressing yourself instead of buying a pre-faked pattern.
- 80-Grit Sandpaper (Multi-Pack) – gives you a range of textures so your distressing doesn’t look uniform.
Source Real Reclaimed Wood Without Overpaying
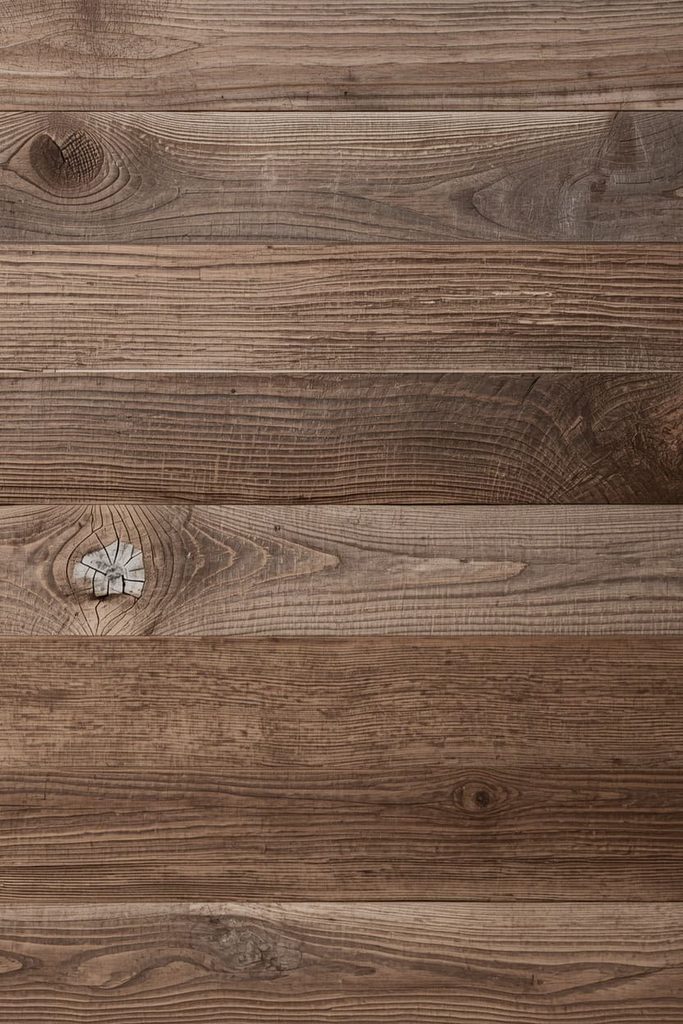
Buy small reclaimed wood packs online instead of full barn wood slabs, and check local salvage yards before shopping big-box retailers.
If you want the real thing, you don’t need to buy an entire wall’s worth at once. Small packs of pre-cut reclaimed planks cost far less than full-size barn wood boards, and they’re often already sized close to standard shelf widths.
Check local salvage yards, architectural reclaim shops, or even old fence removal listings before buying online. People often give away or deeply discount reclaimed wood just to have it hauled off their property. This is where you’ll find the best price on truly authentic material.
Inspect any reclaimed wood for nails, staples, or soft rot before bringing it home. A metal detector or a slow visual pass saves you from a painful surprise mid-cut.
Ask sellers about the wood’s original use before buying. Wood from an old barn roof weathers differently than wood from an interior wall or a fence line. Knowing the source helps you predict how the board will look once it’s cleaned up and mounted in your kitchen.
Buy a little more than you think you need. Reclaimed wood often has unusable sections, whether that’s rot, heavy warping, or leftover hardware buried too deep to remove safely. An extra board or two gives you room to choose the best pieces instead of settling for whatever’s left.
Shop The Look:
- Rockin’ Wood Weathered Reclaimed Wood Planks (20-Pack) – a budget-friendly way to buy real reclaimed material in smaller, shelf-ready pieces.
- Handheld Metal Detector Wand – catches hidden nails or staples before you cut into salvaged wood.
- Urban Legacy Reclaimed Barnwood Planks (Pre-Cut Shelf Size) – already sized and finished if you’d rather skip the cutting step entirely.
Fake The Weathered Look With Budget Pine Boards
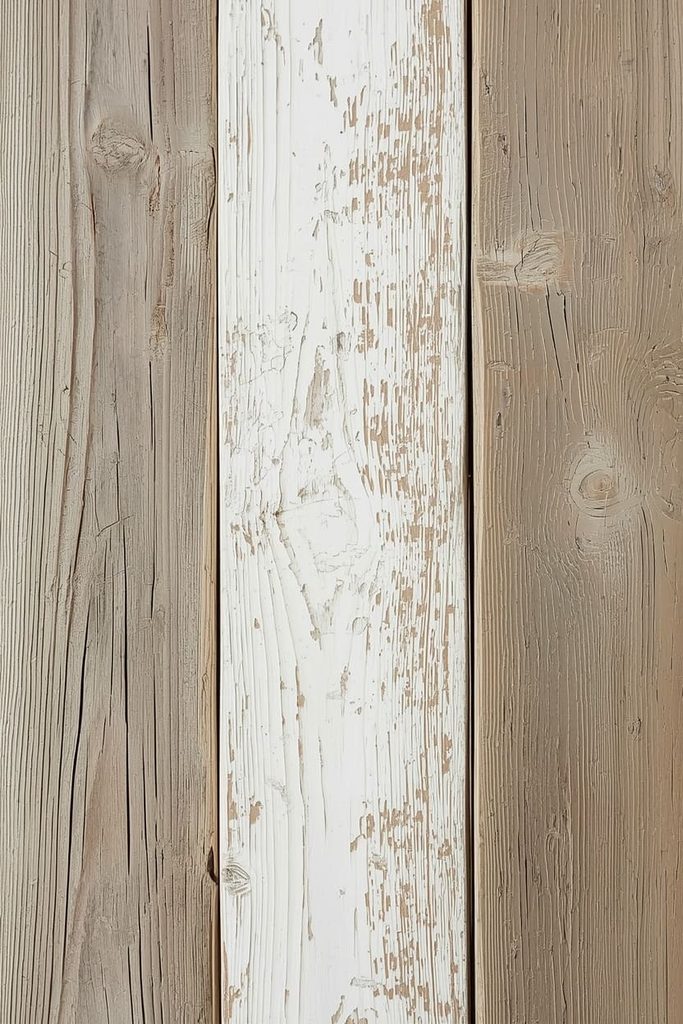
Plain pine boards can pass for weathered barn wood once you sand, distress, and stain them the right way.
This is the project that saves the most money. Start with basic pine from any hardware store. Rough up the surface first with a wire brush, dragging it along the grain in random, uneven strokes. This raises the softer wood fibers and mimics decades of weather exposure.
Add small dents with a hammer, a chain, or even a handful of screws in a bag. Tap these into the wood randomly, focusing more on edges and corners where real wear naturally happens.
Finish with a weathered gray or driftwood stain instead of a traditional wood tone. This single step does more to sell the rustic look than any other part of the process.
Apply your stain unevenly on purpose. Real weathered wood doesn’t absorb color at the same rate across its whole surface. Dab on extra stain near edges and corners, then wipe some away from the center before it fully sets. This creates the subtle color variation that makes budget pine convincing.
Let each layer dry completely before adding another pass. Rushing this step leads to a muddy, overly dark finish that reads as painted rather than naturally aged. Patience here makes a noticeable difference in the final result.
Shop The Look:
- Varathane Weathered Gray Wood Stain – a one-coat, fast-drying option that mimics sun-bleached barn wood on fresh pine.
- Wire Brush Set (3-Piece) – used to rough up the grain before staining for a more convincing texture.
- Pre-Sanded Pine Project Board – an affordable base board that takes distressing and staining well.
Build A Rustic Bracket Shelf With Real Farmhouse Character
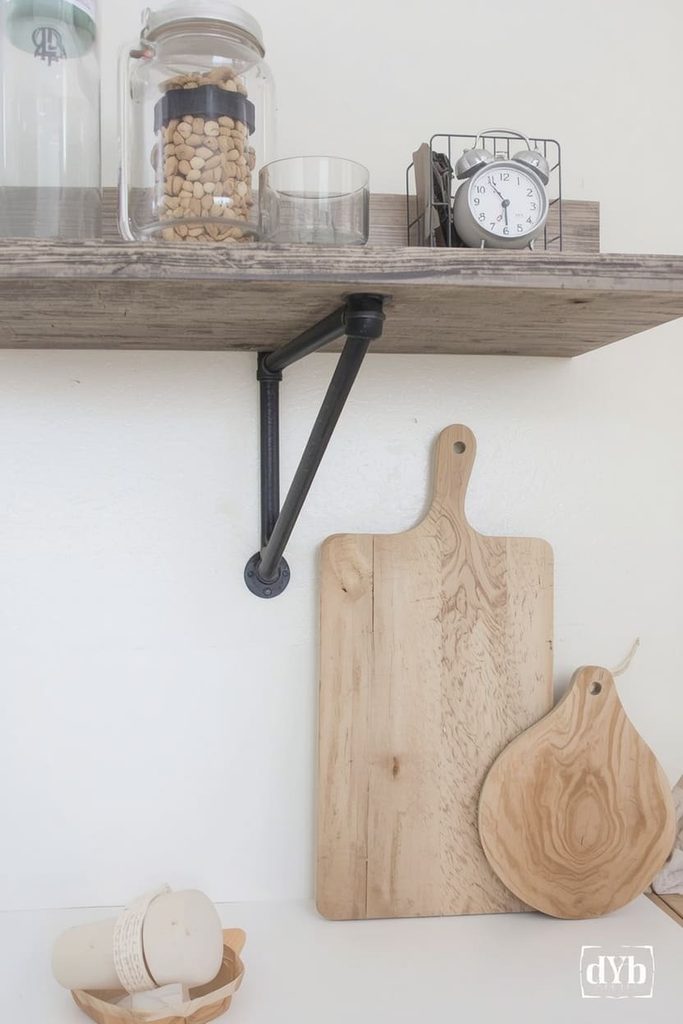
Pair a distressed wood board with exposed black iron pipe brackets for a shelf that looks handmade instead of store-bought.
Floating brackets hide your hardware. Rustic style often does the opposite. Exposed iron pipe brackets add visual weight and history to a shelf, especially in kitchens with black fixtures or dark cabinet hardware already in place.
Mount the pipe flanges directly into studs for the strongest hold, since pipe brackets carry weight differently than blind floating brackets. Rest your finished wood board on top, then secure it from underneath with short screws so the top surface stays clean.
This combination, distressed wood plus black iron, is one of the fastest ways to signal “rustic” without needing an entire farmhouse renovation.
Space your pipe brackets slightly wider than you would with a hidden bracket system. Since the hardware is visible, uneven spacing stands out far more than it would on a floating shelf. Measure twice and mark both mounting points with a level before drilling anything.
Consider running a second, shorter pipe brace diagonally beneath longer shelves for extra support and even more visual character. This detail, borrowed from real vintage shelving, adds both strength and an authentic industrial-farmhouse touch that a single straight bracket can’t match on its own.
Shop The Look:
- YCCO Industrial Pipe Shelf Brackets (4-Pack) – authentic-looking black iron hardware built for real shelf weight.
- Rockin’ Wood Weathered Reclaimed Wood Planks – pairs naturally with the pipe’s industrial-farmhouse look.
- Black Oxide Wood Screws – blend into the iron hardware instead of standing out as shiny metal.
Add Corbels And Trim For A Built-In, Old-House Feel
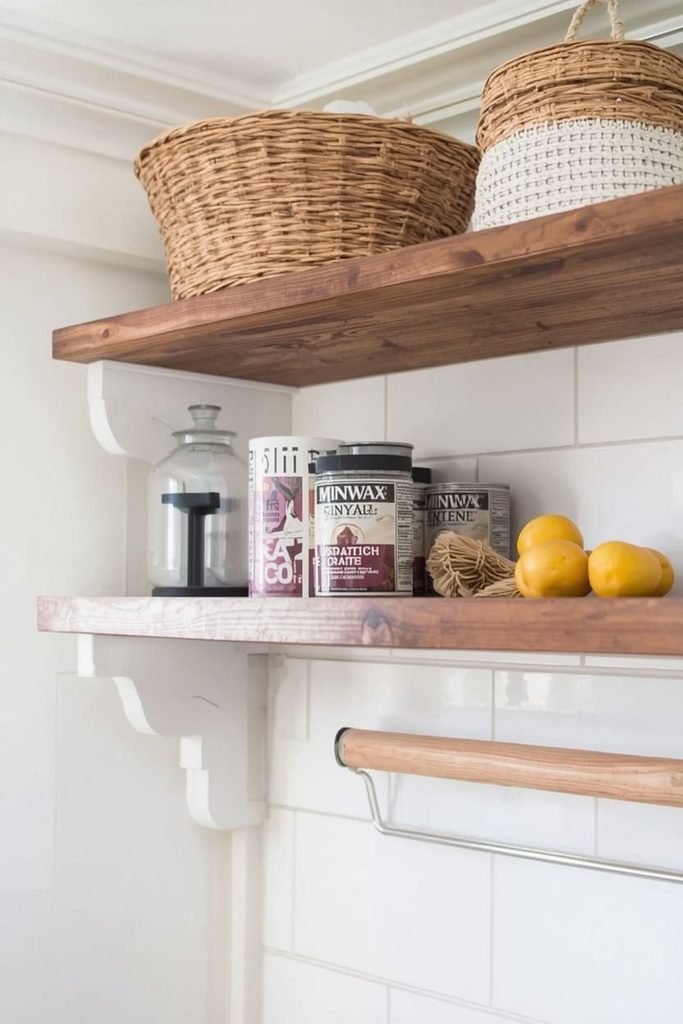
Decorative wood corbels under a shelf make it look like part of the original house, not an addition.
Rustic style often leans on the idea that a piece has always belonged in the space. Corbels help sell that story. Unlike a floating bracket, a corbel is visible, and its shape references older architectural details you’d find in farmhouses or cottages.
Choose a simple, slightly worn corbel style over anything too ornate. Rustic design favors function-first shapes, not fussy carved details. Stain or paint your corbels to match your shelf board so the whole unit reads as one piece, not two separate purchases.
This detail works especially well if your kitchen already has trim, wainscoting, or beams you want the new shelf to visually connect with.
Test the corbel placement with painter’s tape before drilling any permanent holes. Step back and view it from different spots in the kitchen, since corbels sit lower and more visibly than most bracket types. A slight adjustment before drilling saves you from patching unwanted holes later.
If your kitchen leans more cottage than farmhouse, consider a lighter whitewashed corbel instead of a dark stain. The softer tone still reads as rustic but feels a touch more delicate, which often suits cottagecore-inspired spaces better than heavy, dark wood tones.
Shop The Look:
- All Chic Wood Corbels (Set of 2) – simple, farmhouse-style supports with a slightly worn finish.
- Minwax Wood Finish Stain (Provincial or Early American) – common tones for matching corbels to existing trim.
- Small Foam Brush Set – useful for evenly staining detailed corbel edges without drips.
Use Wire And Rope Baskets Instead Of Plastic Storage
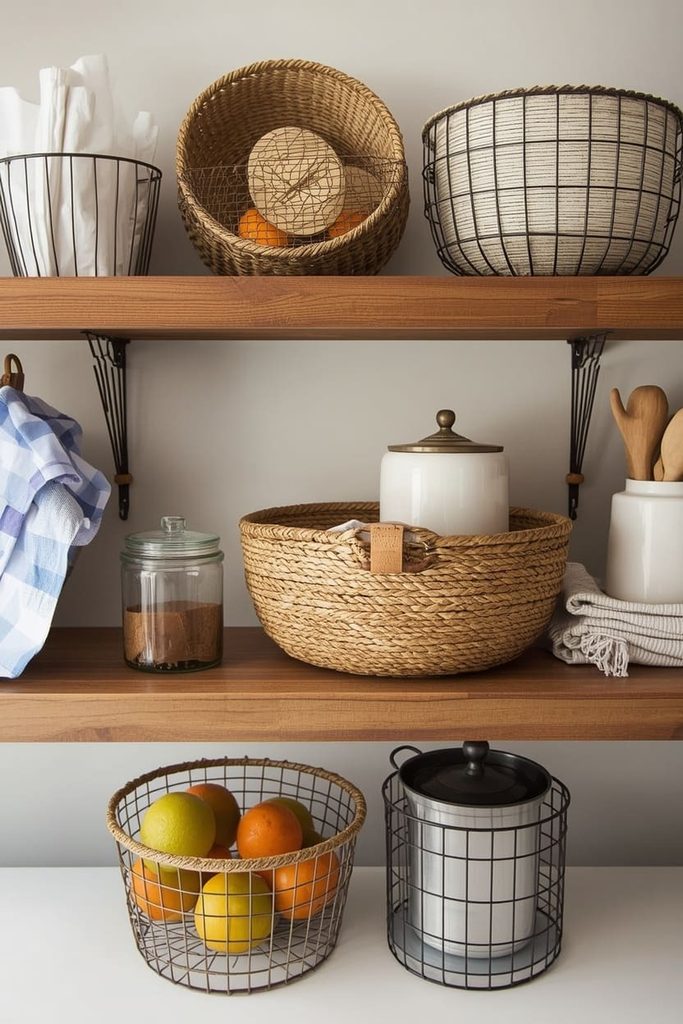
Swap plastic bins for wire or rope-woven baskets on your shelves. This one change makes the whole display feel more authentic.
Rustic style depends on texture as much as wood tone. A plastic storage bin breaks that illusion instantly, no matter how good your shelf looks. Wire baskets and rope-woven baskets both add natural texture that plays well with distressed wood.
Use wire baskets for produce or bread, since airflow keeps things fresher longer. Save woven rope baskets for dry goods, napkins, or towels where moisture isn’t a concern.
Mixing both textures on the same shelf, wire and rope side by side, actually reads as more intentional than matching every basket exactly.
Pay attention to basket size relative to your shelf depth. A basket that hangs slightly over the shelf edge can look unfinished or even become a bump hazard in a busy kitchen. Measure your shelf depth before ordering, and leave at least an inch of clearance on all sides.
Rotate what’s stored in open baskets seasonally. Root vegetables in fall, citrus in winter, stone fruit in summer. This keeps your rustic display looking lived-in and functional instead of like a static prop that never changes.
Shop The Look:
- StorageWorks Round Paper Rope Woven Baskets (2-Pack) – neutral tone that pairs well with any stain color.
- Wire Mesh Produce Basket – adds farmhouse texture while keeping fruit and bread ventilated.
- Vintage-Style Metal Wire Bin – a slightly oversized option for napkins, towels, or bread storage.
Style Shelves With Vintage-Inspired Hardware Details
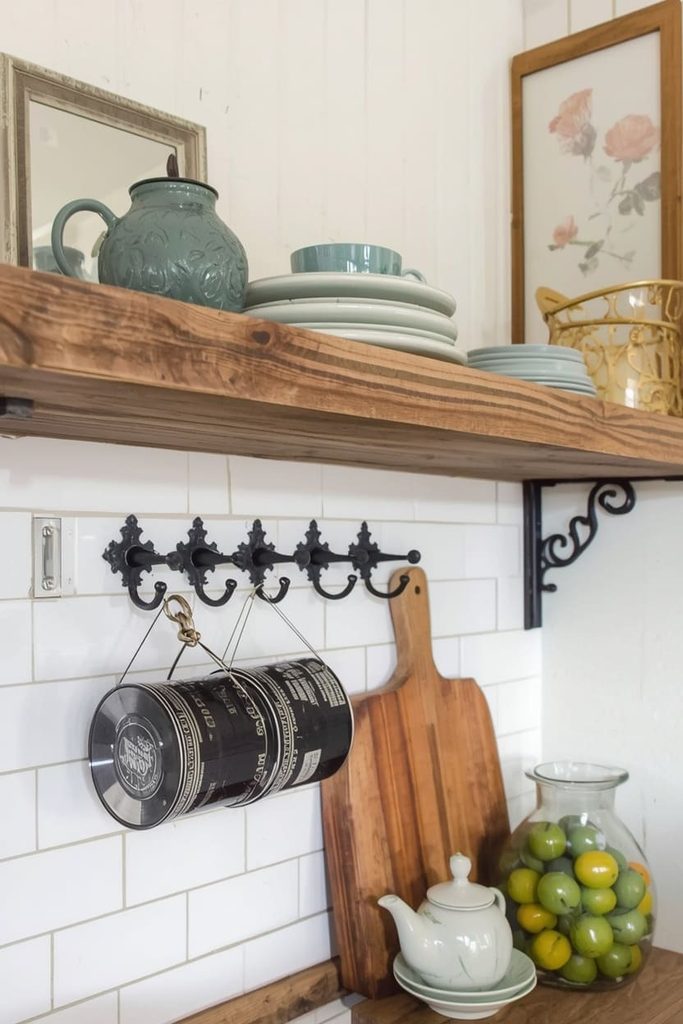
Small hardware choices, like black iron hooks or antique-style hinges, tie your whole shelf system together and finish the rustic look.
This is the step people skip most often, and it’s the one that separates a good rustic shelf from a great one. Hardware is a small detail, but it’s also the closest thing your eye lands on when scanning a shelf.
Add a row of black iron hooks under your shelf for mugs or utensils. Choose ones with a slightly hammered or uneven texture instead of a smooth, factory finish. If your shelf sits above open cabinetry, swap plain hinges for wrought iron ones with a worn black finish.
These small swaps cost very little compared to the wood and labor, but they carry a surprising amount of visual weight in the final result.
Keep your metal finishes consistent across the kitchen, not just on the shelf itself. If your shelf hardware is black iron, matching cabinet pulls, faucet finish, or light fixtures nearby ties the whole room together. Mismatched metals, even subtle ones, tend to undercut an otherwise well-built rustic shelf.
Buy a few extra hooks or pulls beyond what you need for the shelf itself. Small hardware pieces are easy to misplace during installation, and matching a single missing piece later, once a product listing changes or sells out, can be more of a hassle than buying one or two spares upfront.
Shop The Look:
- Black Iron Cup Hooks (Set of 10) – adds function and rustic texture underneath any shelf.
- Renovators Supply Black Wrought Iron H-Hinges – classic farmhouse-style hardware for nearby cabinet doors.
- Antique-Finish Cabinet Pulls (4-Pack) – small hardware upgrades that echo the same worn, iron look as your shelf brackets.
FAQs About Rustic Kitchen Shelving
Is reclaimed wood more expensive than regular lumber?
Yes, usually. Real reclaimed wood costs more due to sourcing and labor, even though the material itself is repurposed. Distressed pine or fir can achieve a similar look for a fraction of the price.
How do I make new wood look old without it looking fake?
Focus on randomness. Uneven staining, scattered dents, and varied sanding depths look far more convincing than a repeated, uniform pattern. Take your time and step back often while distressing.
What wood works best for a DIY rustic shelf?
Pine and fir are both affordable and take distressing well. Reclaimed oak or barn wood offers more built-in character if you’re willing to pay a bit more or source it locally.
Do rustic kitchen shelves need to be sealed?
Yes, especially in a kitchen where grease and moisture are common. A matte or satin sealer protects the wood without adding unwanted shine that can look out of place with a rustic finish.
Can I combine rustic shelving with a modern kitchen?
Yes, this pairing is popular right now. One or two rustic wood shelves against clean, modern cabinetry creates contrast that highlights both styles instead of clashing.
How much weight can a rustic wood shelf hold?
This depends on your brackets, not just the wood. Iron pipe brackets and steel blind brackets typically support 50 to 150 pounds per pair when mounted into studs. Always check your specific bracket’s rating before loading dishes.

Sohel Rana is the founder of FixTheDisposal.Com. He is a plumbing expert with 7+ years of hands-on repairing garbage disposals, water heaters, space heaters, and other appliances used in a home. Before the launch of Fix The Disposal, he wrote and provided advice on water heaters, sump pumps, and space heater repairing & troubleshooting tips for LilDutchUncle.Com.