9 Cheap Christmas Decorations for a Festive Home on a Budget
Christmas is my favorite time of year, and I bet it’s one of yours too. The twinkling lights, the cozy vibes, the joy of decorating—it’s all so magical.

But let’s be real: holiday decorations can get pricey fast. That’s why I’m so excited to share nine affordable Christmas decoration ideas with you.
These projects are budget-friendly, easy to make, and will fill your home with festive cheer without emptying your wallet.
Whether you’re a crafting pro or just starting out, you’ll find something here that sparks joy. Let’s dive in and make your holiday season shine!
Table of Contents
- Why Choose Cheap Christmas Decorations?
- Materials and Tools Needed
- 9 Cheap Christmas Decoration Ideas
- Tips for Maximizing Savings
- Styling and Displaying Your Decorations
- Reader Engagement and FAQs
- Conclusion
Why Choose Cheap Christmas Decorations?
You don’t need to spend a fortune to make your home feel like a winter wonderland. With holiday costs piling up—gifts, food, travel—decorating on a budget is a smart move.
I’ve been there, staring at my bank account, wondering how to make the season special without breaking it. The good news? You can create beautiful decorations for next to nothing.
Cheap decorations aren’t just about saving money. They’re sustainable, letting you reuse household items or natural materials. They’re also a chance to get creative and add a personal touch to your holiday setup.
Worried about quality? Don’t be. These ideas look stunning and hold up well, even if you’re spending just a few dollars. Plus, you can shop smart at thrift stores, dollar stores, or even your own backyard to keep costs low.
Ready to make your home festive for less? Let’s talk about what you’ll need.
Materials and Tools Needed
Before we jump into the projects, let’s gather some supplies. Most of these items are already in your home or easy to find at low cost. Here’s what you’ll need for all nine decorations:
- Paper: Printer paper, construction paper, or even old wrapping paper works.
- Pinecones: Free from your yard or a nearby park.
- Mason jars: Check your kitchen or thrift stores.
- Ribbons and twine: Grab these at dollar stores or craft sales.
- Felt and yarn: Look for remnants or discount bins.
- Cardboard: Save those delivery boxes.
- Paint and glitter: Small bottles from dollar stores do the trick.
- Flour, salt, and water: For salt dough, straight from your pantry.
- LED tea lights or fairy lights: Affordable and safe for cozy vibes.
You’ll also need basic tools: scissors, a hot glue gun, a paintbrush, and a needle and thread. If you don’t own a glue gun, dollar stores sell them for about $5. For materials, check thrift stores, dollar stores, or your recycling bin. Nature is a great resource too—pinecones and branches are free! Total cost for all nine projects? Around $20–$30, depending on what you already have. Let’s get to the fun part: the decorations!
9 Cheap Christmas Decoration Ideas
Here are nine ideas to make your home festive on a budget. Each one includes what you need, how to make it, and tips to make it pop. Let’s get crafting!
1. Paper Snowflakes

Nothing says winter like delicate snowflakes hanging in your windows or on your tree. These are a classic, and they’re so easy to make.
Materials: White printer paper or construction paper, scissors, string or thread.
Cost: About $1 if you need to buy paper.
Instructions:
- Fold a square piece of paper in half to form a triangle.
- Fold it in half again, then fold it into thirds to make a smaller triangle.
- Cut small shapes—triangles, circles, or curves—along the edges.
- Unfold carefully to reveal your snowflake.
- Tie a string loop to hang it.
Styling Tip: Add a touch of sparkle with glitter or a quick swipe of metallic paint. Hang snowflakes in clusters at different heights in a window or on your tree for a whimsical effect.
I love how these transform a room in minutes. They’re perfect for kids to try too—just supervise the scissors!
2. Mason Jar Snow Globes

These little snow globes are so charming on a tabletop or shelf. They’re simple to make and look like something from a boutique.
Materials: Mason jar (or any glass jar), small figurine (like a tiny tree or reindeer), glycerin, glitter, water, hot glue.
Cost: About $3–$5 (jars from thrift stores, figurines from dollar stores).
Instructions:
- Glue the figurine to the inside of the jar lid with hot glue. Let it dry.
- Fill the jar with water, leaving a little space at the top.
- Add a pinch of glitter and a drop of glycerin (it helps the glitter fall slowly).
- Screw the lid on tightly and flip the jar upside down. Shake gently.
Styling Tip: Place your snow globes on a tray with fairy lights or pine sprigs for a cozy, glowing display.
I made a few of these last year, and they were a hit at my holiday party. Everyone thought I spent way more than I did!
3. Pinecone Ornaments

Pinecones are nature’s gift to budget decorators. Turn them into rustic ornaments for your tree or garland.
Materials: Pinecones, acrylic paint, ribbon, hot glue.
Cost: About $2 (pinecones are free; ribbon and paint are cheap).
Instructions:
- Collect pinecones from your yard or a park. Clean off dirt.
- Paint the tips with white, gold, or silver for a frosty look. Let dry.
- Cut a 6-inch piece of ribbon and glue it into a loop.
- Glue the loop to the top of the pinecone for hanging.
Styling Tip: Dust with glitter for a frosted effect. Mix these with store-bought ornaments for a balanced, natural look.
Foraging for pinecones is half the fun. I take a walk every year to gather them—it’s like a treasure hunt!
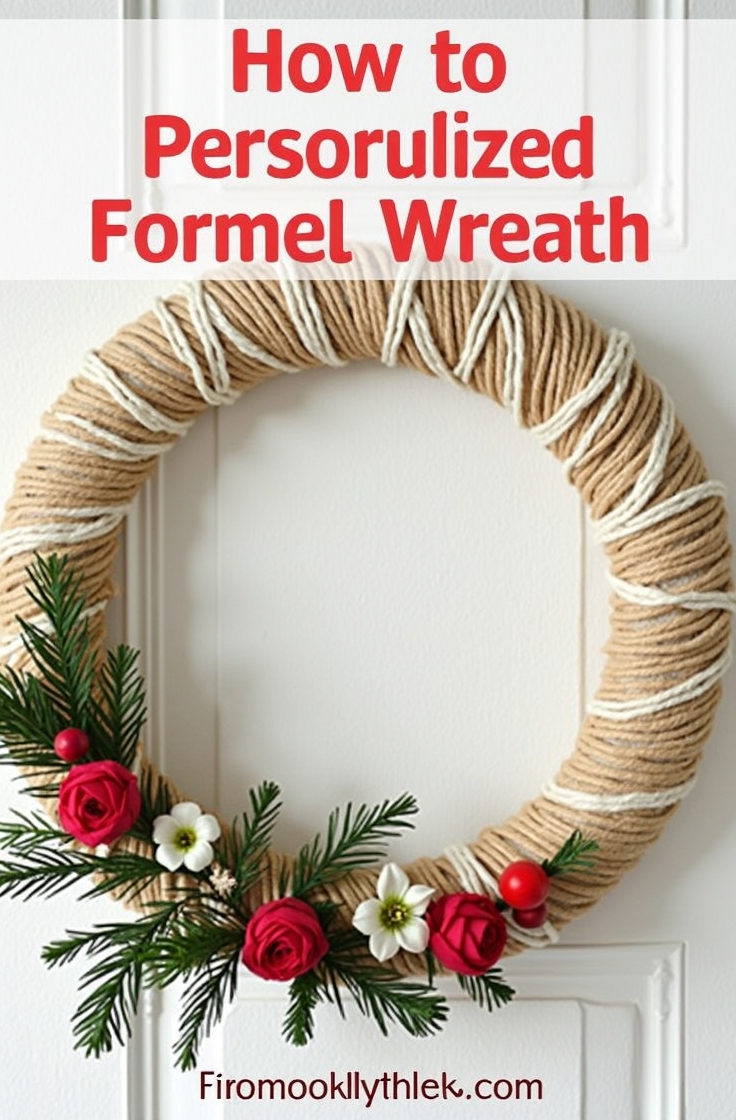
4. Yarn-Wrapped Wreath

A colorful wreath adds warmth to your door or wall. This one is so cozy and costs almost nothing.
Materials: Foam or straw wreath base, yarn, felt, hot glue, scissors.
Cost: About $5 (base and yarn from dollar stores).
Instructions:
- Tie the end of the yarn to the wreath base.
- Wrap the yarn tightly around the base, covering it completely.
- Cut felt into shapes like stars or holly leaves.
- Glue the shapes onto the wreath for a festive touch.
Styling Tip: Hang with a bold ribbon in a contrasting color, like red on a green wreath, for extra pop.
I made one of these for my front door, and my neighbors keep asking where I bought it. Shh, it’s our little secret!
5. DIY Christmas Village Silhouettes

These cardboard cutouts create a glowing village scene that’s perfect for your mantel or windowsill.
Materials: Cardboard, black paint, X-acto knife, LED tea lights.
Cost: About $3 (cardboard is free; tea lights are cheap).
Instructions:
- Draw simple house shapes on cardboard. Include windows and doors.
- Cut out the shapes with an X-acto knife (be careful!).
- Paint the cutouts black and let them dry.
- Place them over LED tea lights to create a glowing effect.
Styling Tip: Arrange your village on a mantel with cotton balls as faux snow for a wintery vibe.
I love how these look at night. The soft glow makes my living room feel like a cozy hamlet.
6. Ribbon Garland

This garland is so versatile—you can drape it on your tree, mantel, or staircase. It’s colorful and festive.
Materials: Ribbons in various colors, twine, scissors.
Cost: About $4 (ribbons from discount bins).
Instructions:
- Cut ribbons into 6–8 inch strips.
- Tie each strip onto a long piece of twine, alternating colors or patterns.
- Keep tying until the garland is the length you want.
- Trim any uneven ends for a polished look.
Styling Tip: Mix textures like satin and burlap for a rich, layered effect. Drape loosely for a relaxed feel.
I used this garland on my staircase last Christmas, and it added such a cheerful touch.
7. Salt Dough Ornaments

These handmade ornaments have a sweet, homemade charm. They’re great for gifting too.
Materials: Flour, salt, water, cookie cutters, acrylic paint, string.
Cost: About $2 (pantry staples and paint).
Instructions:
- Mix 1 cup flour, 1/2 cup water, and 1/2 cup salt to form dough.
- Roll it out to 1/4-inch thickness.
- Use cookie cutters to cut shapes like stars or trees.
- Poke a hole for hanging. Bake at 250°F for 2 hours.
- Paint and seal with clear varnish or glue. Thread string through the hole.
Styling Tip: Personalize with names or dates using a fine paintbrush. Hang on your tree or give as gifts.
My kids love making these. We make a new batch every year to mark special moments.
8. Twine-Wrapped Candle Holders

These rustic holders create a warm, inviting glow. They’re perfect for a holiday centerpiece.
Materials: Glass jars, twine, hot glue, LED candles.
Cost: About $4 (jars from recycling, twine from dollar stores).
Instructions:
- Clean and dry a glass jar.
- Glue the end of the twine to the bottom of the jar.
- Wrap the twine tightly around the jar, gluing as you go.
- Place an LED candle inside for a safe glow.
Styling Tip: Group three holders together with pine sprigs or berries for a stunning centerpiece.
These look so elegant on my dining table. They’re simple but make a big impact.
9. Felt Christmas Stockings

These mini stockings are perfect for small gifts, decor, or even gift tags. They’re so cute!
Materials: Felt, needle, thread, scissors, optional beads or buttons.
Cost: About $3 (felt from craft store sales).
Instructions:
- Cut two stocking shapes from felt.
- Sew or glue the edges together, leaving the top open.
- Decorate with beads, buttons, or felt cutouts like snowflakes.
- Add a small loop of felt or ribbon for hanging.
Styling Tip: Hang them on a garland or use them as gift tags for a personal touch.
I made a set of these for my family, and everyone loved their tiny, custom stockings.
Tips for Maximizing Savings
Want to keep costs even lower? Here are my go-to tips:
- Shop smart: Hit up dollar stores, thrift shops, or online marketplaces for deals on ribbons, felt, or jars.
- Repurpose: Use old jars, cardboard boxes, or fabric scraps from around the house.
- Go natural: Collect pinecones, branches, or leaves for free decor elements.
- Plan ahead: Start early to avoid last-minute purchases, which can get pricey.
- Batch craft: Make multiple decorations at once to save time and materials.
Last year, I found a bag of ribbon scraps at a thrift store for $1. It was enough for two projects! Look around—you’ll be surprised what you find.
Styling and Displaying Your Decorations
Now that you’ve made these gorgeous decorations, let’s make them shine in your home. Stick to a color theme, like red and white or gold and green, for a cohesive look. Here’s how to display them:
- Windows: Hang paper snowflakes or ribbon garland for a festive view from outside.
- Mantel: Arrange your Christmas village silhouettes or mason jar snow globes with fairy lights.
- Tree: Mix pinecone and salt dough ornaments with store-bought ones for a balanced look.
- Table: Group twine-wrapped candle holders with pine sprigs for a cozy centerpiece.
For extra flair, add affordable touches like fairy lights (dollar stores have them!) or faux snow made from cotton balls. Safety first: use LED candles to avoid fire risks, and secure heavy decorations so they don’t fall. Your home will feel like a holiday haven in no time.
Reader Engagement and FAQs
I know you might have questions, so let’s tackle some common ones:
How do I store these decorations for next year?
Keep them in a dry, cool place. Use plastic bins for fragile items like mason jar snow globes. Wrap ornaments in tissue paper to prevent scratches.
Can kids help with these projects?
Absolutely! Paper snowflakes and salt dough ornaments are kid-friendly with supervision. Avoid hot glue or sharp tools for younger kids.
Where can I find free materials?
Check your recycling bin for cardboard and jars. Forage for pinecones or branches in your yard or a park. Ask friends for yarn or fabric scraps.
How do I make these decorations last?
Seal salt dough ornaments with varnish. Use sturdy glue for pinecone or wreath projects. Store carefully to reuse them next year.
I’d love to see your creations! Share photos of your decorations on social media or in the comments below. If you’re short on time, try the paper snowflakes or ribbon garland—they’re quick but still stunning. For advanced crafters, the Christmas village silhouettes are a fun challenge.
Conclusion
There you have it—nine cheap Christmas decorations that prove you don’t need a big budget to make your home festive. From paper snowflakes to felt stockings, these projects are easy, affordable, and full of holiday charm.
I’ve loved sharing these ideas with you, and I hope you’re inspired to grab some supplies and start crafting. Make them your own—add your favorite colors, tweak the designs, and have fun. Your home will glow with holiday spirit, and your wallet will thank you. Happy decorating, and here’s to a joyful Christmas season!

Emily Harper is a kitchen decor expert and interior designer with a passion for creating stylish, functional spaces. As a busy mom, she understands the importance of a kitchen that works for both family life and design. With 6 years of experience, Emily specializes in transforming kitchens into inviting, practical spaces. She’s known for her ability to blend trends with everyday needs, helping families create kitchens that feel like the heart of the home.